
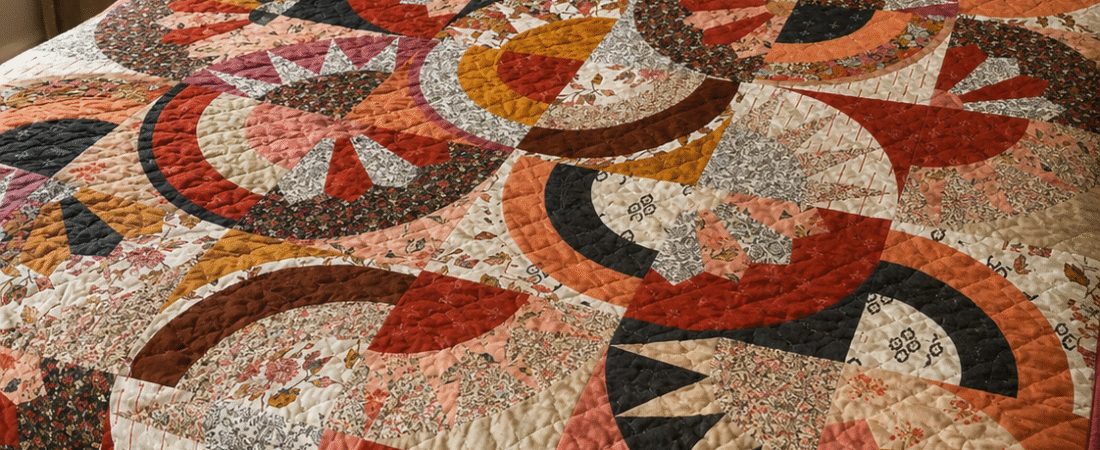
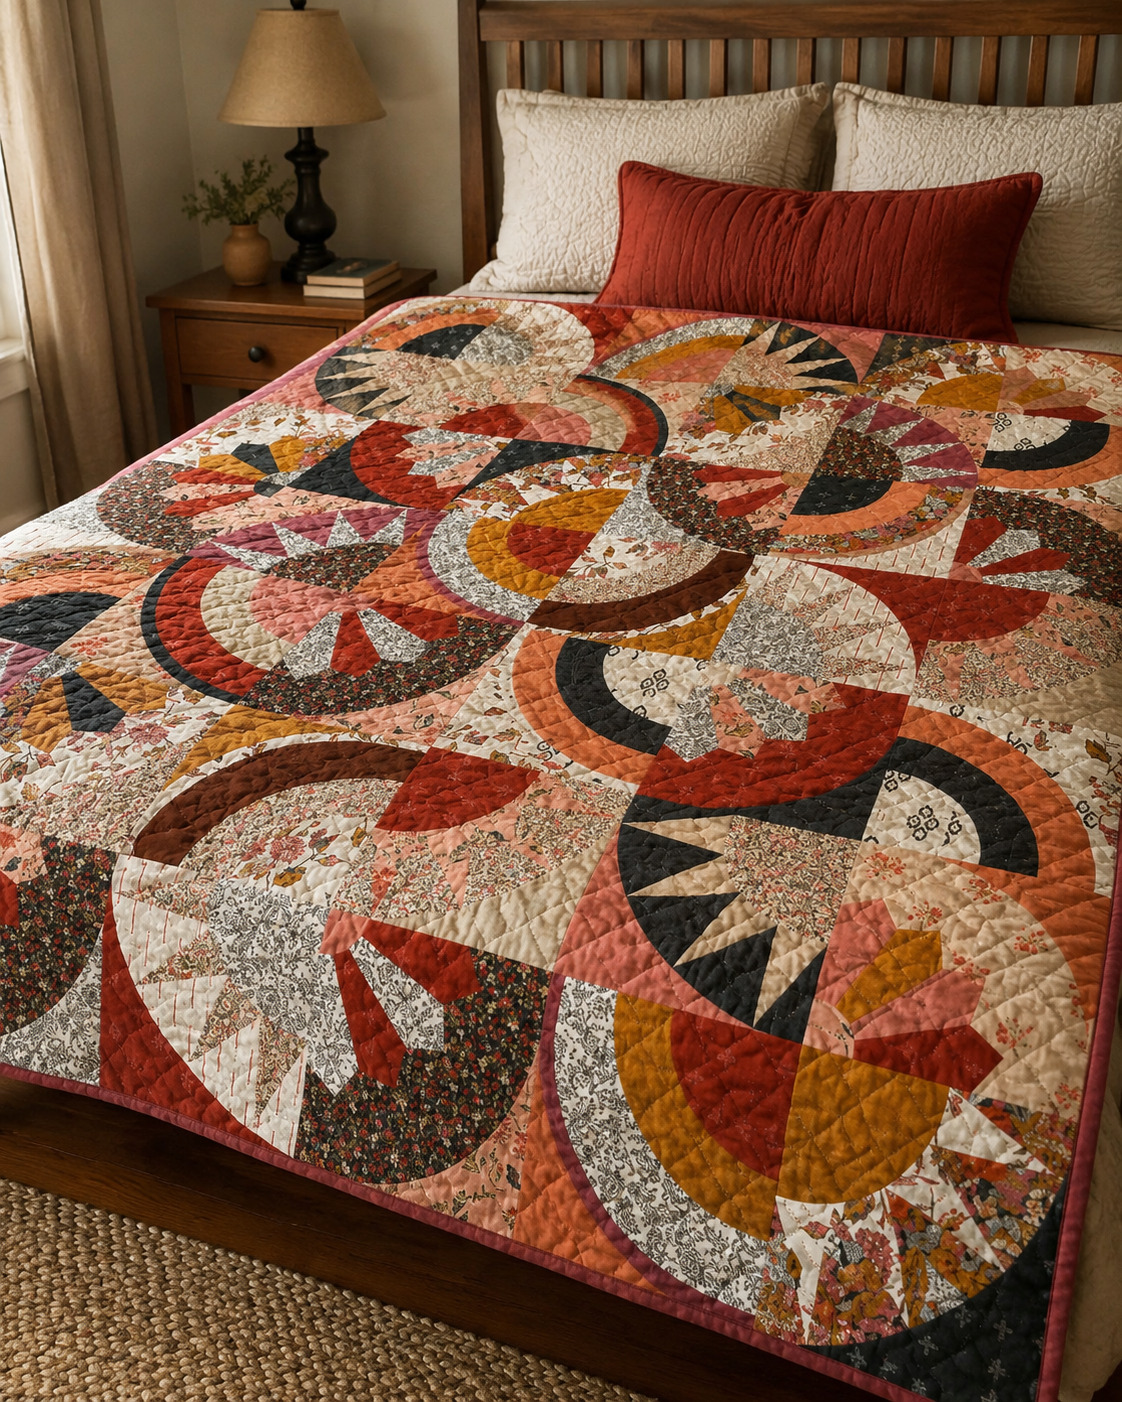
The Time Wheel quilt pattern is a 60 x 70-inch patchwork design built from forty-two large blocks. Concentric curves, quarter Dresden fans, and foundation-paper-pieced rays move across a six-column by seven-row grid, creating circles that appear to continue from one block into the next.
AGF Studio designed the quilt to feature the Kismet collection by Sharon Holland for Art Gallery Fabrics. The original version uses nineteen fabrics identified as A through S: thirteen Kismet prints and six coordinating Pure Solids.
This is not a conventional beginner quilt. It combines curved piecing, Dresden appliqué, foundation paper piecing, tiled templates, and forty-two blocks. This companion helps you plan the stages, check the math, print accurately, and recognize three quantity conflicts before bulk cutting. Use this guide beside the official PDF. It does not reproduce the publisher’s complete cutting list, templates, or row-by-row layout.
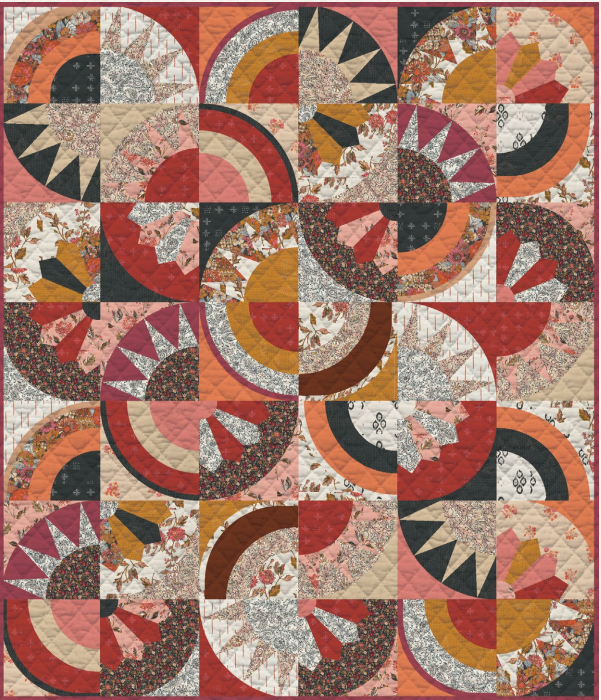
Time Wheel quilt at a glance
| Detail | Pattern information |
|---|---|
| Pattern name | Time Wheel |
| Quilt design | AGF Studio |
| Featured collection | Kismet by Sharon Holland |
| Publisher | Art Gallery Fabrics |
| Finished size | 60 x 70 inches |
| Grid | 6 columns x 7 rows |
| Total blocks | 42 |
| Block A | 14 curved-ring blocks in five color versions |
| Block B | 13 curved blocks with four-blade Dresden appliqué |
| Block C | 15 curved blocks with foundation-paper-pieced rays |
| Block size | 10 1/2 inches unfinished; 10 inches finished |
| Fabrics | 19 fabrics labeled A-S |
| Seam allowance | 1/4 inch, included in the templates |
| Backing | 4 1/2 yards suggested in the PDF |
| Binding | Fabric C, cut 1 1/2 inches wide to make 270 inches |
| PDF length | 49 pages, including tiled full-size templates |
The PDF does not assign an official skill level. Because several precision techniques appear in the same project, Time Wheel is better suited to an experienced intermediate quilter or an adventurous maker who has practiced curves, appliqué, and foundation paper piecing separately.
Official pattern page and free PDF
Art Gallery Fabrics lists Time Wheel by AGF Studio in its official free quilting patterns gallery. The direct PDF contains fabric references, construction diagrams, the complete 42-block layout, finishing directions, and full-size templates.
Read the construction pages before printing. The cover and general instructions can remain digital; print the template section accurately when using the published shapes.
The 42-block structure
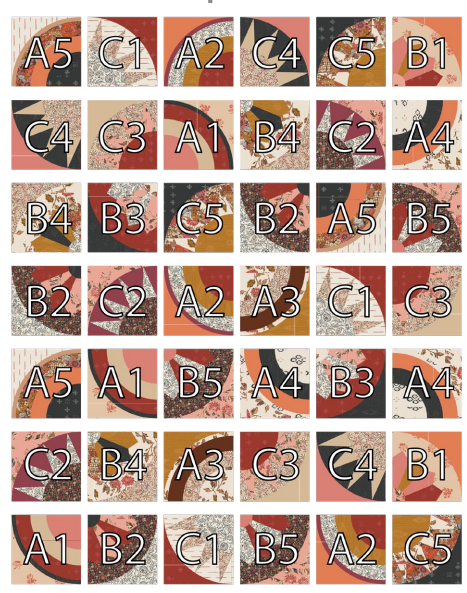
Time Wheel is assembled from three block families. Each family has five color recipes, numbered A1-A5, B1-B5, and C1-C5.
The A family contains fourteen blocks: three A1, three A2, two A3, three A4, and three A5. These are entirely curved-pieced units made from a quarter-circle center, three progressively larger curved bands, and the shared outer corner piece.
The B family contains thirteen blocks: two B1, three B2, two B3, three B4, and three B5. Its base uses a broad curved piece and an outer corner. Four pointed Dresden blades are joined into a quarter fan and appliquéd over the corner, followed by a small curved center appliqué.
The C family contains fifteen blocks, with three each of C1 through C5. A curved inner piece joins a foundation-paper-pieced ray section, then the shared outer corner completes the block.
The totals provide a useful check:
- 14 A blocks;
- 13 B blocks;
- 15 C blocks;
- 14 + 13 + 15 = 42 blocks.
Six blocks across and seven down also equal forty-two. Since each unit finishes at ten inches, the grid finishes at 60 x 70 inches without separate borders.
Fabric requirements in the featured Kismet version
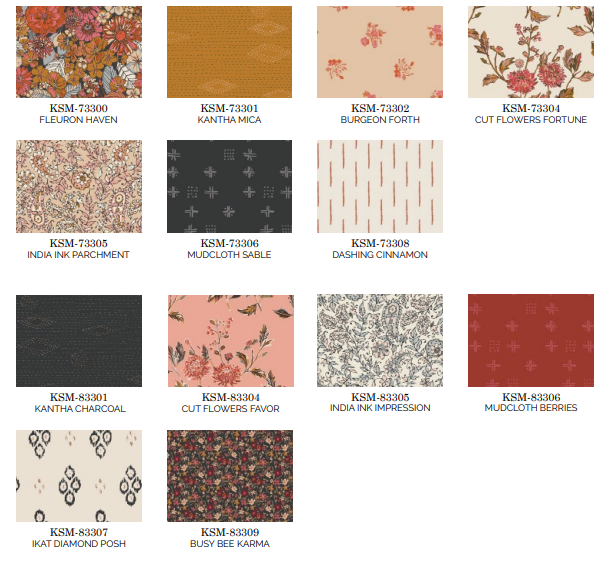
The original palette uses warm coral, brick, cream, brown, charcoal, mustard, and small-scale floral prints. Preserve the A-S labels throughout cutting; names alone become difficult to track when nineteen fabrics are on the table.
| Label | Fabric and code | Amount |
|---|---|---|
| A | Mudcloth Berries, KSM-83306 | 7/8 yard |
| B | Vanilla Custard, PE-486 | 1/2 yard |
| C | Weathered Brick, PE-492 | 1/2 yard, including binding |
| D | Fleuron Haven, KSM-73300 | 1/2 yard |
| E | Dried Carrot, PE-457 | 3/4 yard |
| F | Chocolate, PE-422 | 1/4 yard |
| G | Cut Flowers Fortune, KSM-73304 | 1 yard |
| H | India Ink Impression, KSM-83305 | 3/4 yard |
| I | India Ink Parchment, KSM-73305 | 5/8 yard |
| J | Ikat Diamond Posh, KSM-83307 | 1/4 yard |
| K | Mudcloth Sable, KSM-73306 | 3/8 yard |
| L | Kantha Charcoal, KSM-83301 | 5/8 yard |
| M | Dashing Cinnamon, KSM-73308 | 1/2 yard |
| N | Miami Sunset, PE-489 | 3/8 yard |
| O | Toasty Walnut, PE-458 | 1/4 yard |
| P | Burgeon Forth, KSM-73302 | 3/8 yard |
| Q | Busy Bee Karma, KSM-83309 | 5/8 yard |
| R | Cut Flowers Favor, KSM-83304 | 5/8 yard |
| S | Kantha Mica, KSM-73301 | 5/8 yard |
The suggested backing is 4 1/2 yards of fabric G, Cut Flowers Fortune. Binding is cut from the 1/2-yard Fabric C allowance, so reserve the required length before using C scraps elsewhere.
Three PDF conflicts to resolve before bulk cutting
The cutting list and the later block recipes do not fully agree. These are not cosmetic wording differences; they concern template identities and quantities. The PDF also tells readers to reserve remnants for paper piecing, so a mistaken early cut could affect a later block.
| Area | Cutting list | Later block recipe | Why it needs checking |
|---|---|---|---|
| Fabric K and Block C | Calls for three Block C Piece 3 shapes | C5 calls for Fabric K as Piece 1 and Fabric N as Piece 3; make three C5 | The piece number assigned to K conflicts |
| Fabric N outer pieces | Calls for three Outer Block shapes | C4 and C5 both call for Fabric N as Piece 3, with three of each variant | Those two recipes appear to require six outer pieces |
| Fabric N Dresden blades | Calls for three Dresden Plate shapes | B1 uses two Fabric N blades per block and says to make two B1 blocks | Two blocks would require four blades, not three |
This guide does not declare which side contains the intended assignment. Before cutting fabrics K and N, contact Art Gallery Fabrics or make a paper inventory of the disputed shapes and their block destinations. Never solve a shortage by scaling a template or cutting into reserved binding fabric.
Print the templates at the correct scale
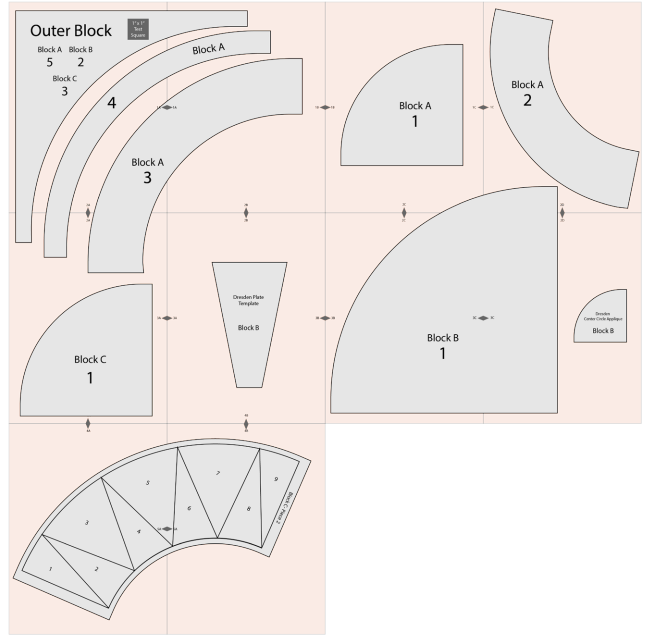
Page 11 of the PDF shows a reduced overview of the template system. It is a placement guide, not a page to trace for fabric cutting. The real-size templates begin on the following page and continue through the end of the file.
Print at Actual Size or 100% with automatic scaling disabled. Measure the 1 x 1-inch test square before assembling anything. If either side is wrong, correct the settings and reprint.
Large curves span multiple sheets. Match the lettered arrows, tape without gaps, and verify that lines flow smoothly across each join. A step in the paper curve becomes a bump in every fabric piece.
The final thirty pages provide repeated foundations for the fifteen C blocks. Keep each paired set together and label it C1-C5. Odd-numbered sections use the assigned background; even sections form the rays.
Do not use the current article’s small screenshot of all templates as a cutting source. It is a reduced composite and cannot preserve the required scale.
Organize nineteen fabrics without losing their roles
Attach a large A-S label to every fabric before cutting. Add the fabric code and color name beneath the letter, since the PDF alternates between letters, stock numbers, and printed swatches.
Separate A-block curves, B-block curves and appliqué, and C-block curves and paper scraps. Within each group, label all five variants. A3 - Piece 2 - make 2 is more useful than Fabric I alone.
Cut one sample before bulk cutting a family. It tests scale, seam allowance, pressing, and the 10 1/2-inch measurement while protecting yardage.
The PDF specifically reserves remnants from fabrics B, C, D, G, H, I, L, M, and R for the C-block foundations. Keep those scraps flat and clearly labeled. A piece that looks too small for a curve may still be exactly what a numbered paper section needs.
Sew Block A: concentric curved rings
Block A is the best family to use for a curved-piecing sample because it repeats the same basic operation several times. The PDF recommends folding each curved piece in half to establish center marks. Match the ends and centers first, then distribute pins or clips between them.
Place the concave curve over the convex curve as directed, with the inner piece beneath. Sew an accurate 1/4-inch seam without pulling either layer.
Press from the wrong side, check for tucks, and avoid sliding the iron across bias edges. Clip only where needed and never through the stitching.
Complete all curved bands and the outer corner before trimming. Every A block must finish at 10 1/2 inches square unfinished. Center the curved design consistently during trimming so adjoining circles meet correctly in the final grid.
Sew Block B: curves plus Dresden appliqué
Block B begins with a curved base assembled in the same manner as Block A and trimmed to 10 1/2 inches. Its Dresden fan is made from four wedge-shaped blades.
To form a point, fold the wide blade end right sides together, sew across it, reduce the corner bulk, turn, and press. Center the seam at the point, then join four blades in their assigned order.
Appliqué the fan without stretching its bias curve. Prepare the quarter-circle center over the paper pressing template and appliqué it across the blades’ raw lower ends.
Make one full B sample and compare its fan angle with the diagram. A fan placed too far inward or outward will interrupt the circular movement when neighboring blocks are joined. The site’s Dresden Plate quilt guide provides additional background on blade points and appliqué, but Time Wheel’s four-blade quarter fans must follow the AGF templates.
Sew Block C: foundation-paper-pieced rays
Each C block contains a nine-section ray band. The pattern calls for fifteen assembled foundation templates, matching the fifteen C blocks. On every foundation, odd numbers use the assigned background fabric and even numbers use the contrasting ray fabric.
Use generous scraps so every section covers its area after flipping, including seam allowance. Check coverage against a light source before trimming, especially near the wider outer curve.
Trim seam allowances in sequence and press after each addition. After all nine sections, trim on the outer template line and keep the paper until the ray band is stable.
Attach the inner curved piece, the paper-pieced middle, and the outer corner in the order shown by AGF. Match centers just as you did for Block A. Press carefully, remove foundation paper without stretching the seams, and trim the completed C block to 10 1/2 inches square.
Square every block before arranging the quilt
All forty-two units must be the same unfinished size. Use a 10 1/2-inch square ruler if available. Check that important curved seams reach the correct edges and that a quarter-inch seam allowance remains beyond points that must meet a neighboring block.
Do not trim a seriously undersized block to match. Diagnose whether the problem came from print scale, seam allowance, curve distortion, or appliqué placement. Replacing one inaccurate block is easier than easing several short rows.
Keep each squared block labeled with its full variant code. A1 and A5 may share a construction shape, but they occupy different positions and use different color sequences. Photograph the labeled layout before joining anything.
Assemble six columns by seven rows
The official layout uses seven horizontal rows with six blocks in each. Follow Diagram 20 for the exact A1-C5 sequence. The distribution is intentionally irregular, so do not rely on alternating A, B, and C families.
Six 10 1/2-inch unfinished blocks joined with five 1/4-inch seams should produce a row measuring 60 1/2 inches long. Check the first completed row before sewing the remaining six.
Press row seams in alternating directions when the block construction allows it, so intersections nest. If bulky Dresden appliqué makes one direction impractical, press for flatness and pin intersections individually. Join the seven rows and support their weight near the machine.
The completed top should measure approximately 60 1/2 x 70 1/2 inches unfinished, corresponding to the published 60 x 70-inch finished size. Measure through the center and along both sides. Correct significant waviness before quilting; dense quilting should not be used to force an inaccurate top flat.
Backing, batting, quilting, and binding
The PDF suggests 4 1/2 yards of fabric G for backing. Confirm usable width and plan the seam before cutting. Follow the overage required by your basting method or longarm quilter.
Batting is not given a specific size. If four inches of overage are required on every side, a useful starting target is at least 68 x 78 inches. Follow the batting manufacturer’s quilting-distance instructions.
Curved echo quilting can reinforce the circles, while a quiet texture suits busy florals. Test needle size and tension before crossing thick appliqué intersections.
Time Wheel uses an unusually narrow binding compared with common 2 1/2-inch double-fold binding. The PDF calls for enough 1 1/2-inch WOF strips from Fabric C to make a 270-inch continuous strip. Its finishing method stitches the binding at 1/4 inch, turns it to the back, folds the raw edge under, and hand-stitches it. Follow that single-fold-style method or recalculate fabric if choosing a different binding construction.
The quilt perimeter is 260 inches, so 270 inches leaves only about ten inches for the finishing overlap after joins. Join accurately, reserve Fabric C early, and confirm the full continuous length before attaching it.
Choosing substitute fabrics
Substituting by value and function is safer than matching nineteen color names. Build a palette with lights, mid-values, darks, warm accents, and small prints that remain readable inside narrow arcs and Dresden blades.
Check a grayscale photo of the palette. Curved bands and paper-pieced rays need visible contrast; oversized motifs may disappear inside small sections.
Assign every substitute to an A-S swatch card. Keep the published yardage unless directional prints, fussy cutting, or narrower fabric requires more, and reserve binding and paper scraps.
Reducing the palette is possible only as a deliberate redesign. If one substitute serves several letters, calculate the combined yardage and verify that repeated colors do not erase the wheel effect.
Final checklist before cutting
- Nineteen fabrics are labeled A-S.
- Fabric C is reserved for 270 inches of 1 1/2-inch binding.
- The cutting-list conflicts involving K and N have been resolved or clarified.
- Reserved foundation-piecing remnants are separated from general scraps.
- Templates were printed at 100%, not Fit to Page.
- The 1 x 1-inch test square measures correctly.
- Tiled curves align smoothly at every lettered join.
- One A, one B, and one C sample reach 10 1/2 inches square.
- Fourteen A, thirteen B, and fifteen C blocks are completed and labeled.
- Each row contains six blocks and measures approximately 60 1/2 inches unfinished.
- The completed top measures approximately 60 1/2 x 70 1/2 inches unfinished.
- Backing and batting include the required quilting overage.
- Only original or properly licensed photographs appear in the article.
Pattern credits
Time Wheel was designed by AGF Studio for Art Gallery Fabrics and features the Kismet fabric collection designed by Sharon Holland. The pattern instructions, diagrams, templates, fabric artwork, and publisher photography remain the work of their respective creators and rights holders.
This article is an independent planning companion written by Easy Quilting Patterns. It is not affiliated with Art Gallery Fabrics, does not claim ownership of the pattern, and does not replace the official PDF.