
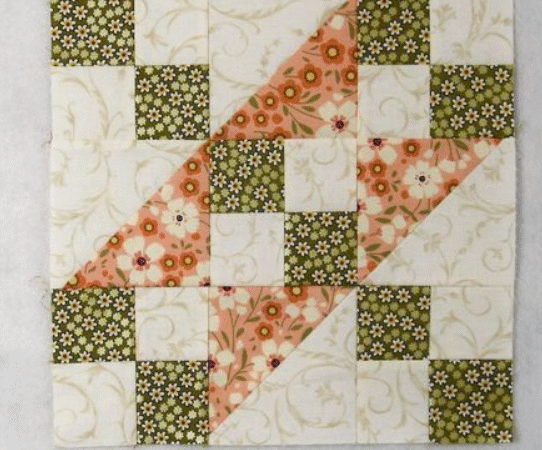
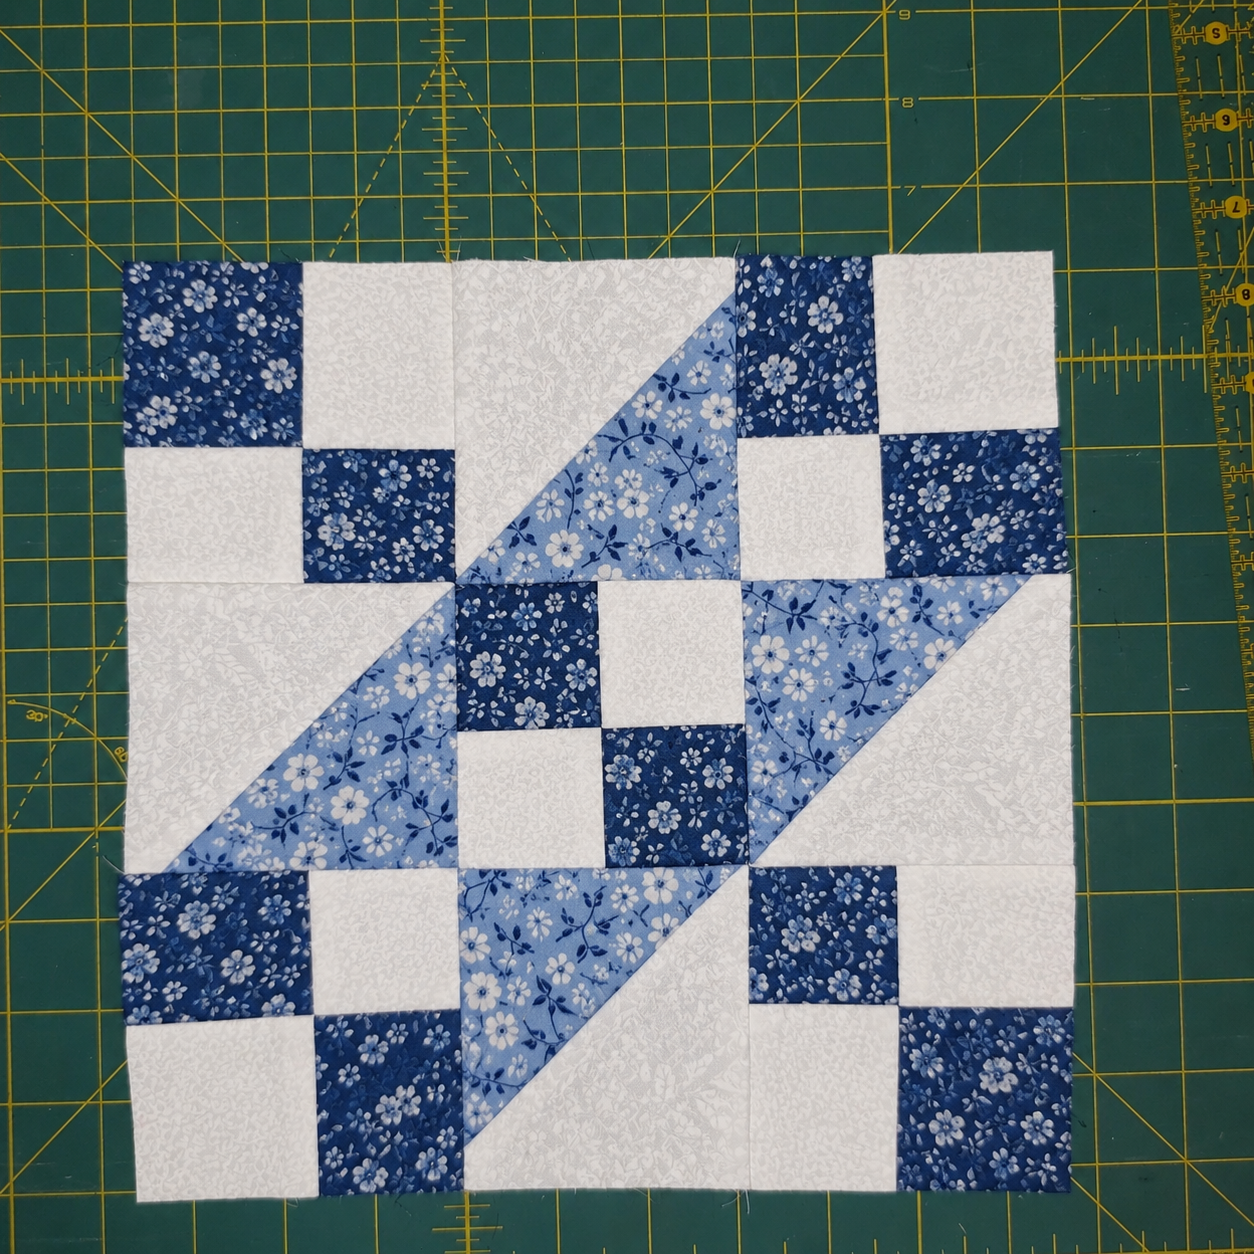
The Jacob’s Ladder Quilt Block is a timeless patchwork design made from two of quilting’s most useful units: four-patch blocks and half-square triangles. When these simple components are arranged together, they create a strong diagonal path that resembles the steps of a ladder moving across the block.
This classic design is an excellent example of how basic quilting techniques can produce an impressive secondary pattern. One block looks balanced and geometric, while several blocks placed together create continuous diagonal lines across an entire quilt.
The free pattern featured in this article comes from the Fat Quarter Shop Classic and Vintage Series. It produces a generously sized 12-inch finished block and is suitable for confident beginners who want to improve their strip piecing, half-square triangles, and seam matching.
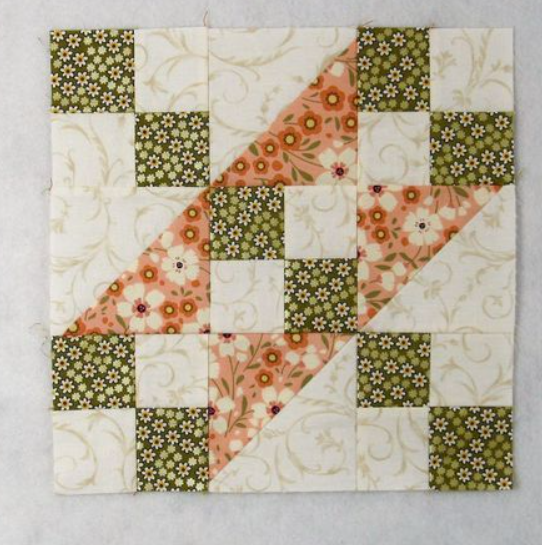
At the end of this article, you can access the free Jacob’s Ladder Quilt Block PDF with the complete cutting measurements and illustrated assembly diagrams.
Jacob’s Ladder Block Information
- Finished block size: 12″ x 12″
- Unfinished block size: 12 1/2″ x 12 1/2″
- Skill level: Confident beginner
- Construction: Machine piecing
- Block structure: Nine-patch grid
- Main units: Five four-patch units and four half-square triangles
- Seam allowance: 1/4″
- Recommended fabric: Quilting cotton
The block is made with one print or dark fabric and one contrasting background fabric. However, the design can easily be adapted for scrappy quilts, seasonal projects, or modern solid-color combinations.
What Makes the Jacob’s Ladder Block Special?
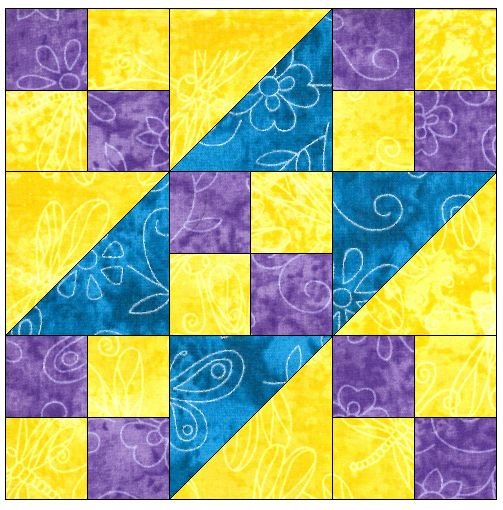
The completed block is arranged as a three-by-three grid. Four-patch units are positioned in the corners and center, while half-square triangles fill the remaining spaces.
When the HSTs are rotated according to the pattern diagram, their diagonal lines connect visually. The alternating squares inside the four-patch units continue this movement, creating the recognizable ladder effect.
The construction is straightforward, but the final design looks much more complicated than it really is. This makes Jacob’s Ladder especially satisfying for newer quilters.
It is also a versatile block. Changing the color placement, rotating individual blocks, or adding sashing can completely transform the finished quilt.
Materials and Supplies
Gather the following materials before you begin:
- One print, medium, or dark quilting cotton
- One contrasting background quilting cotton
- Coordinating sewing thread
- Rotary cutter
- Self-healing cutting mat
- Acrylic quilting ruler
- Fabric-marking pencil
- Sewing machine
- Iron and pressing surface
- Square ruler measuring at least 12 1/2″
- Fine pins or fabric clips
- Optional rotating cutting mat
- Optional spray starch or fabric-sizing spray
Use the downloadable PDF for the exact cutting dimensions and number of pieces required for one block.
Abbreviations
- HST: Half-Square Triangle
- RST: Right Sides Together
- WOF: Width of Fabric
Choosing Fabrics for Jacob’s Ladder
The fabric contrast determines how clearly the ladder design will appear.
Classic Two-Color Combination
Pair navy with cream, red with white, brown with tan, or forest green with a warm neutral. These combinations emphasize the traditional character of the block.
Modern Color Combination
Use a bright solid against white, pale gray, or black. Teal, mustard, coral, purple, and royal blue can give the design a crisp contemporary appearance.
Scrappy Jacob’s Ladder
Make each four-patch and HST from different scraps while repeating one background fabric. The consistent background will keep the design organized even when many prints are used.
Reproduction Fabrics
Small florals, checks, stripes, and traditional reproduction prints work beautifully in Jacob’s Ladder quilts. Choose prints with enough contrast to prevent the diagonal ladder from disappearing.
Seasonal Version
Try red and green for Christmas, orange and black for Halloween, pastels for spring, or red, white, and blue for a patriotic quilt.
Before cutting, place the two fabrics beside each other and take a black-and-white photograph. If they still look different in grayscale, there is usually enough value contrast for the pattern to remain visible.
Preparing the Fabric
Prewashing is optional, but all fabrics used in the same block should be treated consistently. If you wash one fabric, wash the other fabric as well.
Press the fabric before cutting so wrinkles do not affect the measurements. Light starch can make the strips easier to cut and can help prevent the HST edges from stretching.
Label the pieces according to the letters used in the PDF. Keeping the print and background pieces separated will make the assembly process easier.
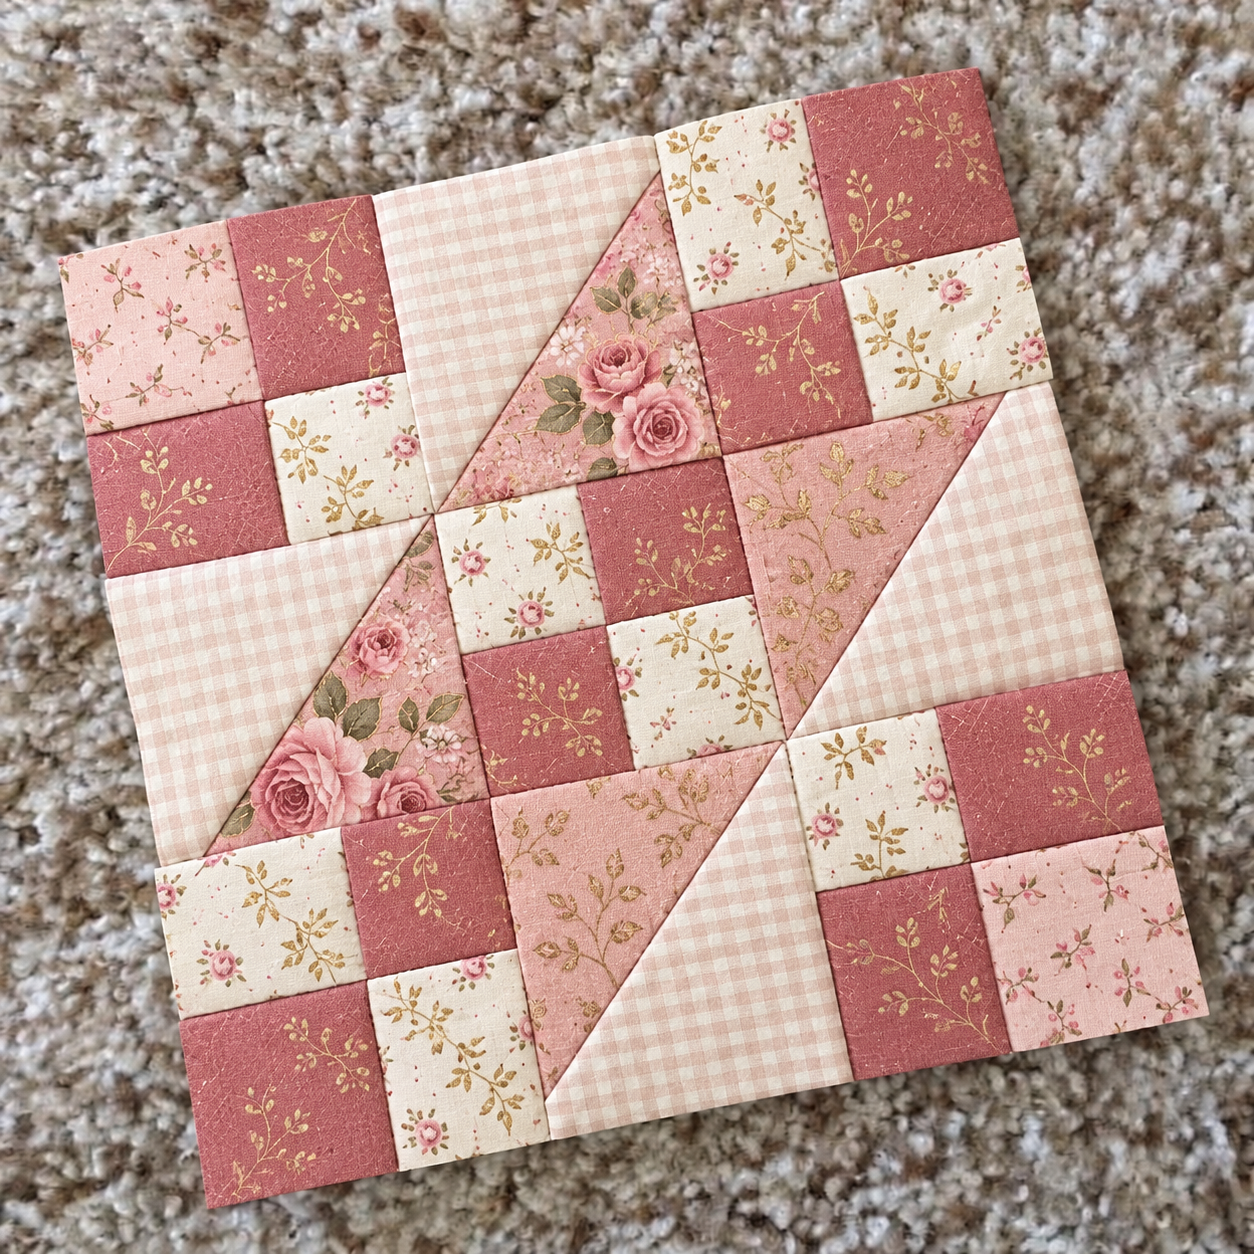
How to Make the Jacob’s Ladder Quilt Block
The following steps provide an original construction overview. Refer to the free PDF for the exact cutting chart, pressing arrows, and complete diagrams.
Step 1: Create the Strip Sets
Place one long print rectangle RST with one long background rectangle. Align the edges carefully and sew along one long side using a consistent 1/4″ seam allowance.
Press the seam in the direction indicated by the pattern. Repeat to make the second strip set.
Before subcutting, check that the strip sets are straight and have the correct width. If the center seam curves, press again without stretching the fabric.
Step 2: Subcut the Strip Sets
Square one end of each strip set before cutting the smaller segments.
Subcut the strip sets according to the measurements in the PDF. You will need ten partial four-patch units for one block.
Place a ruler line along the central seam while cutting. This helps keep every segment square and prevents the four-patch units from leaning to one side.
Step 3: Make Five Four-Patch Units
Arrange two partial units so the print and background squares alternate diagonally.
Place the pieces RST. The center seams should face in opposite directions, allowing them to nest together. Gently slide the seams against each other until you can feel that the intersection is properly aligned.
Sew the units together and press according to the pattern.
Repeat until you have five four-patch units. Each completed unit should measure 4 1/2″ square.
If necessary, trim only a very small amount from the outer edges. The center intersection should remain in the middle of the unit.
Step 4: Prepare the Half-Square Triangles
Draw a diagonal line from corner to corner on the wrong side of each background square.
Place one marked background square RST with one print square. Sew a 1/4″ seam on both sides of the marked line.
Cut along the drawn line to separate the pieces into two HST units. Open the units and press the seams carefully.
Repeat with the remaining squares to make four HSTs.
Trim every HST to 4 1/2″ square. Align the diagonal seam with the 45-degree line on your square ruler before trimming.
Step 5: Arrange the Block
Place the five four-patch units and four HSTs in a three-by-three arrangement.
The four-patch units belong in the four corners and the center. Position the HSTs in the remaining spaces and rotate them as shown in the PDF.
Step back and inspect the design before sewing. The triangles should create a continuous diagonal ladder across the block.
Taking a photograph of the correct arrangement can help you remember the placement if the pieces are moved.
Step 6: Sew the Rows
Join the units to create three horizontal rows.
Use a consistent 1/4″ seam allowance and avoid pulling the fabric as it passes under the presser foot.
Press the seams in the directions shown in the pattern. Strategic pressing allows neighboring seams to nest when the rows are joined.
Check that all three rows measure the same length before continuing.
Step 7: Complete the Block
Arrange the three rows in the correct order and confirm the HST orientation one final time.
Place the first two rows RST, matching and pinning the intersections. Sew them together, then add the final row.
Press the completed block carefully from both sides. Avoid stretching the diagonal seams.
Your unfinished Jacob’s Ladder Quilt Block should measure 12 1/2″ square. Once sewn into a project, it will finish at 12″ square.
Tips for Accurate Results
Check Your Quarter-Inch Seam
A small seam allowance error can multiply across the block. Sew a test seam and measure it before assembling the actual units.
Square the Strip Sets First
Always straighten one end of a strip set before subcutting. Otherwise, every segment may be slightly angled.
Nest the Four-Patch Seams
Pressing the seams in opposite directions allows the center intersections to lock together. This produces sharper points and flatter blocks.
Trim Every HST
Even accurately sewn HSTs can become slightly distorted. Trimming each one to the correct size will make final assembly much easier.
Protect the Bias Edges
The diagonal edges of HSTs can stretch. Handle them gently and press with an up-and-down motion instead of sliding the iron.
Verify the Direction
The block’s design depends on the orientation of its HST units. Compare your layout with the PDF before sewing each row.
Common Problems and Solutions
The Four-Patch Center Does Not Match
Make sure the seam allowances are pressed in opposite directions. Nest the seams and secure the intersection with a pin before sewing.
The HSTs Are Too Small
The original squares may have been cut inaccurately, or the seam allowance may be too wide. Check both measurements before making the remaining units.
The Block Does Not Measure 12 1/2 Inches
Measure each four-patch and HST before assembling the block. Every individual unit should measure 4 1/2″ square.
The Ladder Design Looks Broken
One or more HSTs may be rotated incorrectly. Use the assembly diagram to reposition the units before joining the rows.
The Block Will Not Lie Flat
This can happen when pieces are stretched during pressing or when seam allowances are pressed unevenly. Use gentle pressure and allow the block to cool on a flat surface.
Jacob’s Ladder Quilt Layout Ideas
Blocks Placed Side by Side
Joining the blocks without sashing creates a strong network of diagonal lines. This is the best option for emphasizing the ladder effect.
Blocks with Sashing
Adding narrow sashing gives each block more visual space. This works especially well with busy prints or scrappy color combinations.
Alternating Color Placement
Reverse the print and background fabrics in every other block. The alternating values can produce dramatic secondary patterns.
On-Point Setting
Rotating the blocks into an on-point layout changes the ladder lines into a diamond-like design.
Scrappy Layout
Use a different print in every block while maintaining a consistent light background. This is an excellent way to use fabric leftovers without losing the overall pattern.
Projects You Can Make
One Jacob’s Ladder block can be used for:
- A large quilted pillow
- A mini wall quilt
- A tote bag panel
- A table mat
- The center of a medallion quilt
Several blocks can become:
- A table runner
- A baby quilt
- A lap quilt
- A bed runner
- A twin-size quilt
- A queen-size quilt
Because the block finishes at 12″, it is easy to calculate quilt dimensions and adjust the number of blocks for different projects.
Frequently Asked Questions
Is Jacob’s Ladder suitable for beginners?
Yes. A confident beginner who can sew a consistent 1/4″ seam should be able to complete it. The most important skills are accurate cutting, HST trimming, and matching intersections.
What size is the finished block?
The block measures 12 1/2″ unfinished and finishes at 12″ after being sewn into a quilt.
How many fabrics do I need?
The featured pattern uses one print fabric and one background fabric. However, you can use additional prints for a scrappy version.
How many units are in the block?
One block contains five four-patch units and four HST units arranged in a nine-patch grid.
Can I use directional fabric?
Yes, but directional prints require careful cutting and placement. Lay out all pieces before sewing to make sure the motifs face the desired direction.
Can I make a complete quilt with this free block pattern?
Yes. You can repeat the block and create your own layout. Fat Quarter Shop also offers a separate complete quilt pattern with multiple project sizes.
Download the Free Jacob’s Ladder Quilt Block PDF
The two-page PDF contains the exact cutting chart, illustrated construction steps, pressing guidance, and final block layout.
Pattern credit: Fat Quarter Shop, Classic and Vintage Series.
Important usage note: The PDF states that the pattern is intended for personal use only and may not be reproduced or used commercially without permission from Fat Quarter Shop.
DOWNLOAD THE FREE JACOB’S LADDER QUILT BLOCK PDF
You can also visit the official Jacob’s Ladder free pattern page from Fat Quarter Shop.
The Jacob’s Ladder Quilt Block proves that simple units can create a powerful design. With only four-patches and half-square triangles, the block produces movement, symmetry, and an attractive diagonal path.
Its traditional character makes it ideal for vintage fabrics, while bold solids and modern prints can give it an entirely new personality. It is also an excellent practice block for improving strip piecing, HST trimming, and accurate seam matching.
Start with one block to test your fabric combination. Once you see the ladder design appear, you may be inspired to create an entire quilt.