
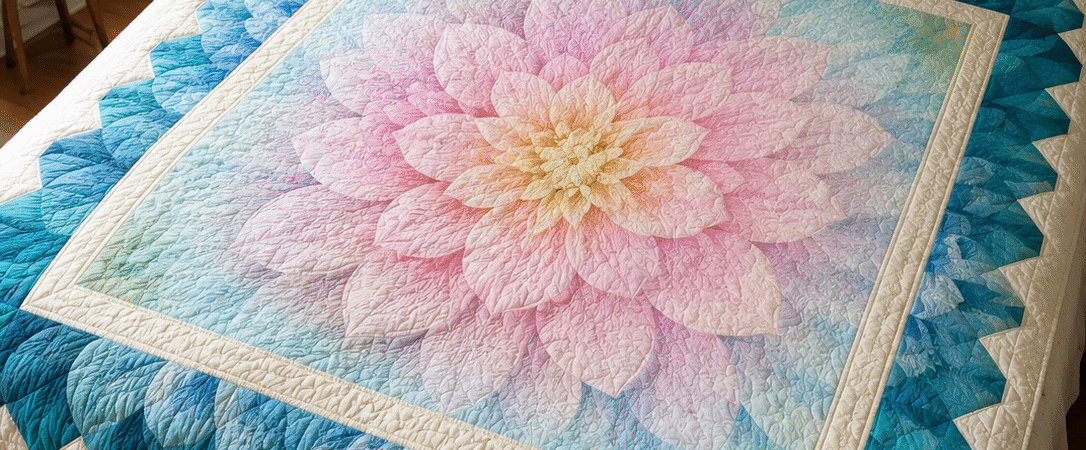
The Dream Big Simple Path quilt pattern turns two oversized floral panels into a 64 x 64-inch square quilt. One panel remains nearly whole at the center. The second is cut into carefully labeled sections, rearranged around that center, and softened with folded-corner units that reveal small wedges of background fabric. Narrow inner and outer borders give the flower room to breathe.
Hoffman California Fabrics publishes the pattern as Simple Path, a beginner project designed by Lyn Brown for the Dream Big digital print collection and Bali Watercolors. Although the sewing is based on straight seams, the project is not simply a matter of adding borders to one panel. Its success depends on preserving the orientation of thirty-six pieces cut from the second panel.
This independently written guide explains what each fabric does, how the border math works, where organization matters most, and which measurements to verify before sewing the next stage. Use it beside the official PDF, since the publisher’s grid tags and layout diagrams are essential to the intended flower arrangement.

Dream Big Simple Path quilt at a glance
| Detail | Pattern information |
|---|---|
| Official pattern name | Simple Path |
| Fabric collection | Dream Big, a Hoffman Spectrum Digital Print |
| Designer | Lyn Brown |
| Publisher | Hoffman California Fabrics |
| Finished size | 64 x 64 inches |
| Skill label in the PDF | Beginner |
| Class label in the PDF | 1 day class |
| Main construction | One center panel, one pieced panel border, and three background borders |
| Center panel | Trimmed to 42 1/2 inches square |
| Second panel | Cut into thirty-six 6 1/4-inch squares |
| Folded corners | Seventy-six 2 1/2-inch background squares |
| Binding | Seven 2 1/2-inch WOF strips in the featured colorways |
“One day class” is the publisher’s class designation, not a promise that every beginner will finish the entire quilt in one day. Cutting and labeling the second panel deserves an unhurried session of its own.
Official pattern page and free PDF
Hoffman’s official Simple Path project page credits Lyn Brown and identifies the featured Dream Big collection. The six-page pattern contains the yardage, grid-tag chart, cutting directions, and exact border layouts needed for construction.
Read all six pages before cutting. This companion adds planning and troubleshooting help, but it deliberately does not reproduce the publisher’s complete grid or diagrams.
How the two-panel design works
The first Dream Big panel becomes the focal center. The pattern trims it to 42 1/2 inches square, then surrounds it with a narrow background border. At that point, the framed center should measure 46 1/2 inches square.
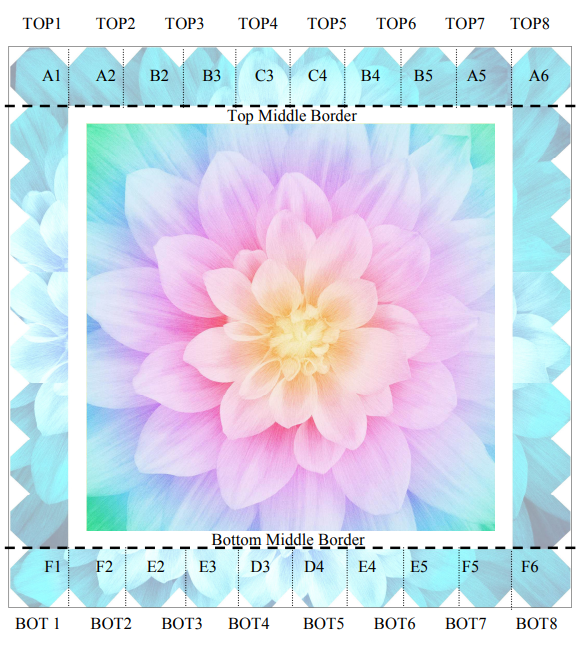
The second panel supplies the flower fragments in the middle border. After two preliminary trimming cuts, the panel is divided into six rows labeled A through F. Each row produces six squares, creating a 6 x 6 grid and thirty-six pieces in total. Those pieces are not sewn back together in their original order. They move to the top, bottom, left, and right sides according to the grid-tag chart.
Background squares are sewn diagonally to the outer edges of the panel pieces. When the corners are trimmed and opened, the background creates the pointed negative-space rhythm around the flower. The second panel still reads as petals, but it becomes a broken, geometric frame instead of another complete flower.
This is why the old description of the quilt as a way to transform “a single panel” is inaccurate. The featured construction requires two complementary Dream Big panels: one for the center and one for the fragmented border.
Fabric requirements for all three colorways
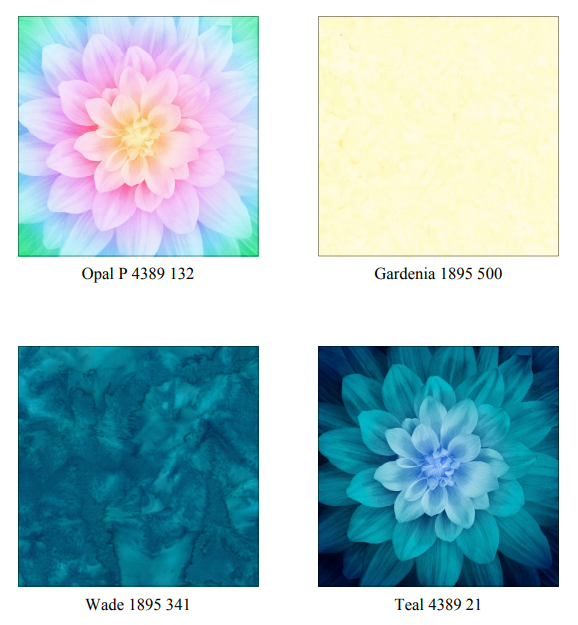
The PDF presents three coordinated versions. Fabric names and stock numbers are useful when original yardage is available, but the role of each fabric is more important when planning a substitution.
| Colorway | Center panel | Middle-border panel | Background and outer borders | Binding |
|---|---|---|---|---|
| Teal with Opal | Dream Big Opal, P4389 132 – 1 panel | Dream Big Teal, P4389 21 – 1 panel | Gardenia, 1895 500 – 1 1/2 yards | Wade, 1895 341 – 5/8 yard |
| Fire with Orchid | Dream Big Orchid, P4389 223 – 1 panel | Dream Big Fire, P4389 310 – 1 panel | Plumeria, 1895 510 – 1 1/2 yards | November, 1895 596 – 5/8 yard |
| Ivory with Wild Rose | Dream Big Wild Rose, P4389 94 – 1 panel | Dream Big Ivory, P4389 22 – 1 panel | Blush, 1895 391 – 2 1/8 yards total, including binding | Cut from the Blush total |
The Teal with Opal yardage chart is repeated on the second page of the PDF, while the other two options appear on the cover. The Ivory with Wild Rose version combines the border and binding quantity rather than listing a separate 5/8-yard binding fabric.
Backing and batting are required but are not assigned exact quantities in the PDF. For a 64-inch square top, begin by asking how much overage your quilting method requires. Four inches beyond every edge would call for pieces at least 72 x 72 inches. A longarm quilter may request a different amount, and ordinary quilting cotton will need a pieced backing. Calculate from the usable fabric width rather than buying from a generic chart.
Tools and supplies that make the project easier
In addition to fabric, batting, thread, and a sewing machine, prepare a long ruler, a square ruler larger than 6 1/4 inches, rotary cutter, fresh blade, cutting mat, removable marking tool, and at least thirty-six labels.
A design wall is helpful but not essential. A clean table can hold the border pieces in order. Keep the tags attached until each piece reaches its border row, and photograph every completed layout in case pieces are disturbed. Test the marking tool on a panel offcut.
Check the panels before cutting
Do not assume that two panels with the same printed design are identical in usable size, print placement, or squareness. Open both, press from the wrong side, and measure the printed area. Check that the flower is complete, the edges are not damaged, and the version chosen for the center can yield a clean 42 1/2-inch square.
Decide which panel will remain whole before making any cut. The center is the dominant image, so compare color balance, flower placement, and any printing irregularity. Reserve the other panel for the fragmented middle border.
Mark the top edge of both panels with a removable label. This is not optional housekeeping. The second panel will soon become thirty-six similar squares, and many pieces contain petals without an obvious upright direction. The labels preserve the original orientation even after the grid has been separated.
Measure before deciding whether to prewash. The pattern depends on specific available dimensions, so washing a marginal panel may make the required cuts impossible. Treat the project fabrics consistently and test a spare panel if uncertain.
Make a cutting map for the second panel
The official PDF tells you to copy the grid-tag chart, cut the tags apart, and attach the correct tag to the top center of each patch. That procedure is the organizational core of Simple Path.
Prepare the thirty-six tags before the rotary cutter touches the panel. Each needs two identities: its original grid position, such as A1 or D5, and its future position in the quilt, such as a top, bottom, left, or right border location. The diagonal lines on the official tags also show which outer corners receive background squares.
After the initial trimming specified in the PDF, the panel is cut into six 6 1/4-inch rows. Each row is then subcut into six 6 1/4-inch squares. Attach the matching tag immediately after cutting each square. Do not cut the entire grid and plan to identify the pieces later; adjacent areas of the flower can be surprisingly similar once separated.
Place every tagged square into a temporary 6 x 6 reconstruction. The image should resemble the uncut panel. This quick check catches a reversed row or transposed tag before snowball corners obscure the original boundaries. Then sort the pieces into four groups for the left, right, top, and bottom borders, following the official chart.
Keep each tag near the top center and clear of the seam line. Removable labels or clips can be safer than loose pins.
Why the pattern needs exactly 76 snowball squares
The background fabric is subcut into seventy-six 2 1/2-inch squares, each marked on one diagonal. The count is a useful quality-control test:
- thirty-two regular middle-border patches receive two snowball squares each, using sixty-four;
- four corner patches receive three each, using twelve;
- sixty-four plus twelve equals seventy-six.
If squares remain after all thirty-six patches have been prepared, stop and compare every unit with its grid tag. A missing folded corner changes the negative-space pattern. If you run short, check whether a three-corner unit was mistakenly given four or whether some regular patches received snowballs on both inner and outer edges.
Sew directly on the marked diagonal as the PDF directs, then trim the excess 1/4 inch beyond the seam. Before trimming, fold the small background square back and verify that it covers the original corner completely. If it falls short, restitch slightly closer to the outer corner. This check prevents a distorted unit and preserves the full 6 1/4-inch square.
Press consistently without stretching the diagonal seam. The floral square must remain the same size so its border row reaches the published length.
Assemble the quilt in controlled stages
1. Frame the center panel
Add the narrow 2 1/2-inch background strips to the 42 1/2-inch center panel in the order shown in the PDF. Measure the panel through the center before cutting or joining each border. The framed center should be 46 1/2 inches square.
Pin at the ends, center, and quarter points. If the border and panel differ slightly, distribute the ease rather than pulling one layer while sewing. A flat center makes every later border easier to fit.
2. Prepare one sample folded-corner patch
Choose a non-corner unit and compare its tag with the diagram. Sew its two background squares, verify that both corners open fully, trim, and press. The patch should still measure 6 1/4 inches square. Use it to confirm needle position, marking accuracy, thread color, and pressing direction before chain-piecing the remaining units.
3. Build the side borders first
Arrange the eight tagged pieces for the left side in order and photograph the row. Repeat for the right side. Join each row with accurate 1/4-inch seams. Eight 6 1/4-inch squares consume seven 1/2-inch seam allowances when joined, so the arithmetic is:
8 x 6 1/4 inches – 7 x 1/2 inch = 46 1/2 inches.
That matches the height of the framed center. If a side border is noticeably different, check individual patch sizes and seam allowances instead of stretching it into place. Attach the left and right rows only after their flower fragments and background points match the diagram.
4. Add the top and bottom borders
The top and bottom rows each use ten 6 1/4-inch patches. Nine joining seams consume 4 1/2 inches in total:
10 x 6 1/4 inches – 9 x 1/2 inch = 58 inches.
After the side rows are attached, the quilt center is also 58 inches wide. Assemble all ten positions for the top and all ten for the bottom using the grid-tag chart and Border Diagram 2. Pin at matching points, sew, and verify that the center now measures approximately 58 inches square.
5. Fit the outer border to the measured top
The final background strips add a calm outer frame. Measure the quilt vertically through its center and twice more before preparing the side borders. Measure horizontally after those side borders are attached before preparing the top and bottom strips. Average only small differences; correct significant distortion first.
There is an apparent half-inch discrepancy in the PDF’s outer-border instructions, explained below. Do not force a longer strip onto a shorter quilt center. Fit borders to the actual center measurement while keeping the final 64 x 64-inch goal in view.
Two PDF details to verify before sewing
The official file is the correct primary source, but two lines do not agree with its own grid and measurement checkpoints.
First, the final assembly text refers to “Top1-Top8” and “Bot1-Bot8.” The cutting chart actually assigns Top1 through Top10 and Bot1 through Bot10, and the illustrated rows contain ten patches. The 58-inch border math also requires ten 6 1/4-inch squares. Lay out all ten tagged positions on each horizontal side.
Second, the PDF states that the middle-border stage should measure 58 x 58 inches, then specifies outer side strips at 58 1/2 inches and outer top/bottom strips at 64 1/2 inches. Those strip lengths appear one-half inch longer than the edges they are meant to join, while the stated finished quilt remains 64 x 64 inches.
Because the publisher does not include an instruction to ease or trim that extra half inch, measure your own top and fit the borders to it. If exact adherence to the original cutting line is important, ask Hoffman Fabrics to confirm the intended lengths before cutting. This guide will not silently replace a publisher measurement with an unverified correction.
Accuracy checkpoints that prevent wavy borders
Check the project at these moments:
- center panel after trimming: 42 1/2 inches square;
- center after the first background border: 46 1/2 inches square;
- each tagged panel patch before and after folded corners: 6 1/4 inches square;
- each eight-patch side row: 6 1/4 x 46 1/2 inches;
- each ten-patch horizontal row: 6 1/4 x 58 inches;
- center after all middle-border rows: approximately 58 inches square;
- completed quilt: 64 x 64 inches finished.
Measure in several places, not only along an edge. Border strips cut to the center measurement help control fullness. Press each seam before measuring the next stage, and support the quilt’s weight so the digital panels do not stretch while hanging from the ironing board.
For more help with diagonal corner units, see the site’s Folded Corners block guide. The construction principle is related, although Simple Path’s placement must follow its own grid tags.
Quilting, backing, and binding ideas
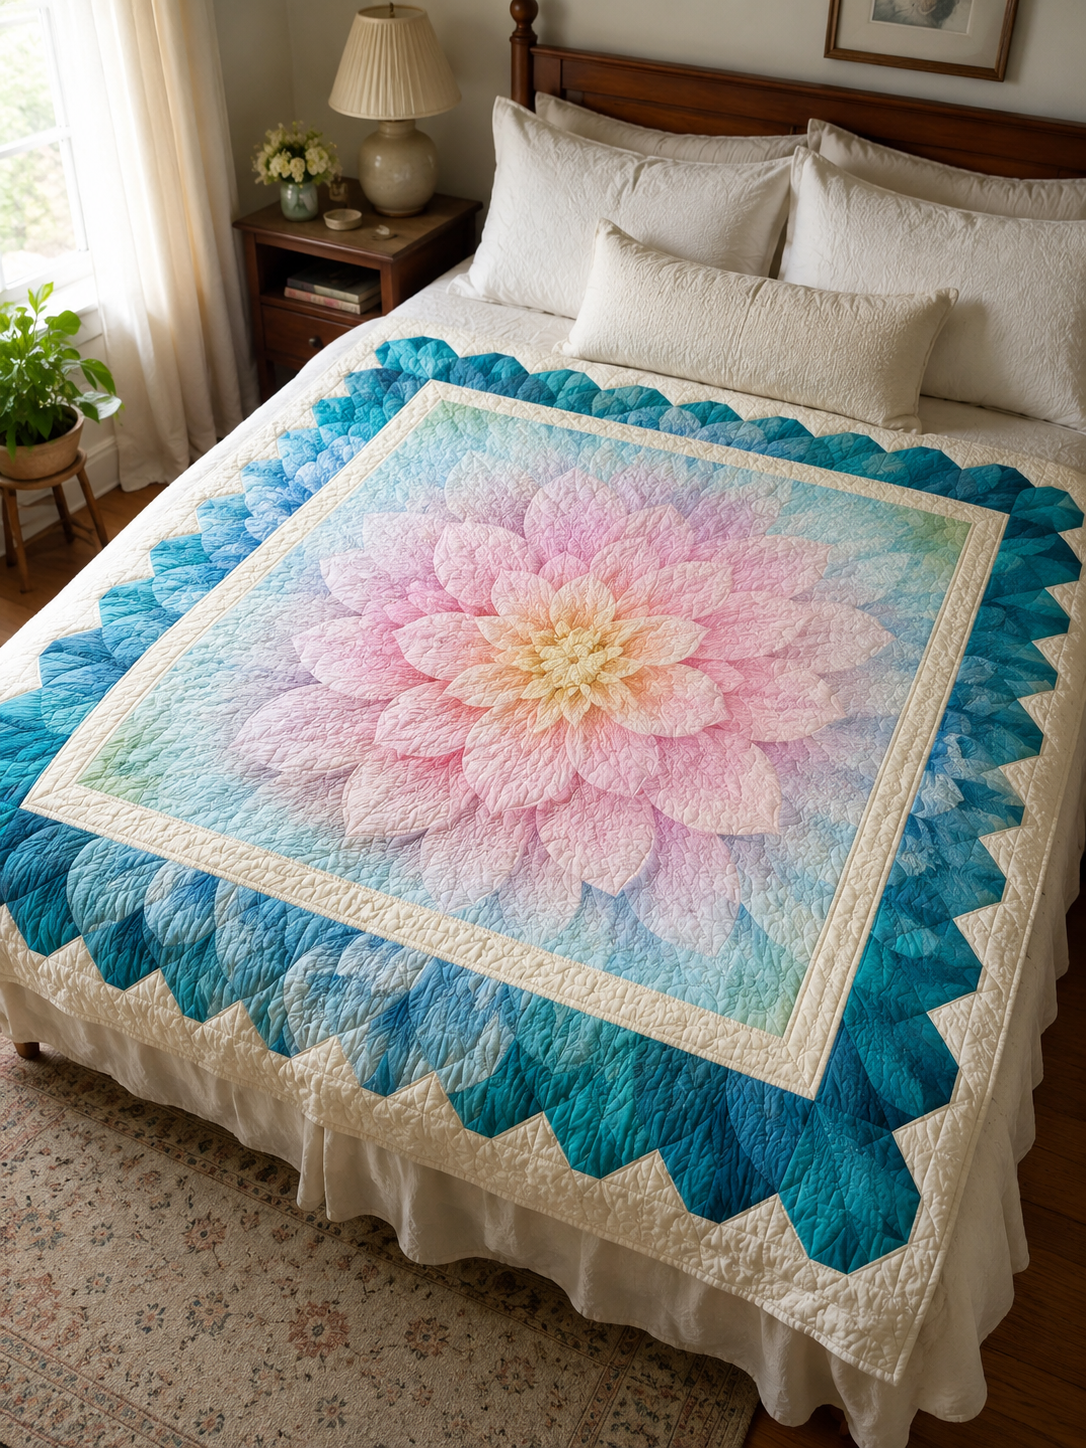
Curved echo lines can follow selected petals in the center, while a light texture keeps the background borders quiet. Avoid dense quilting that competes with the fragmented flower.
Plan quilting after assembly because the middle-border seams interrupt the printed shapes. Test thread on both panels and the pale background; a color that disappears on the flower may be prominent on Gardenia, Plumeria, or Blush.
Prepare batting and backing with the overage required by your method. Remove loose dark threads before basting a pale-background version because they may shadow through the top.
The Teal and Fire versions use seven 2 1/2-inch WOF binding strips. A 64-inch square has a 256-inch perimeter. Seven strips cut from roughly 40 usable inches provide about 280 inches before diagonal joining, leaving practical room for seams, corners, and overlap. The Ivory version reserves binding from its combined Blush yardage.
Substituting fabrics when Dream Big panels are unavailable
Simple Path is engineered around Hoffman’s panel dimensions and printed flower placement. A random square panel is not automatically interchangeable. Before buying a substitute, confirm that one panel can yield a 42 1/2-inch center and that a second can yield the full 6 x 6 grid of 6 1/4-inch squares after the preliminary trimming.
Choose two panels from the same design and scale so the border fragments visually relate to the center. They may be different colorways, as in the featured quilts, but the flower structure should align. A panel with text, animals, or small isolated motifs may look disconnected when divided and rearranged.
Select a low-volume background that contrasts with both panels. The seventy-six folded corners create the repeated points, so poor contrast can make the design disappear. Use a binding that defines the outer edge without competing with the center.
Different panel dimensions turn the project into a redesign requiring recalculated patches, rows, borders, and yardage.
Pattern credits
Simple Path was designed by Lyn Brown and published by Hoffman California Fabrics, featuring the Dream Big Spectrum Digital Print collection and Bali Watercolors. The pattern instructions, diagrams, fabric artwork, and publisher photography remain the work of their respective creators and rights holders.