
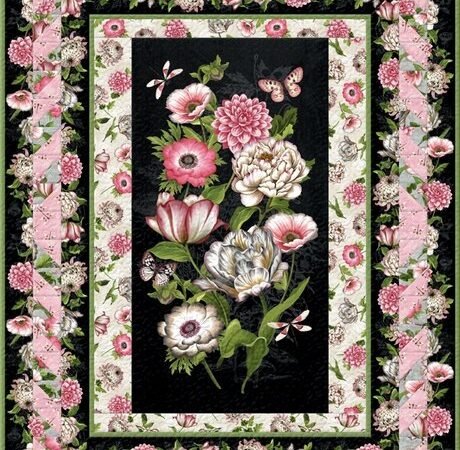
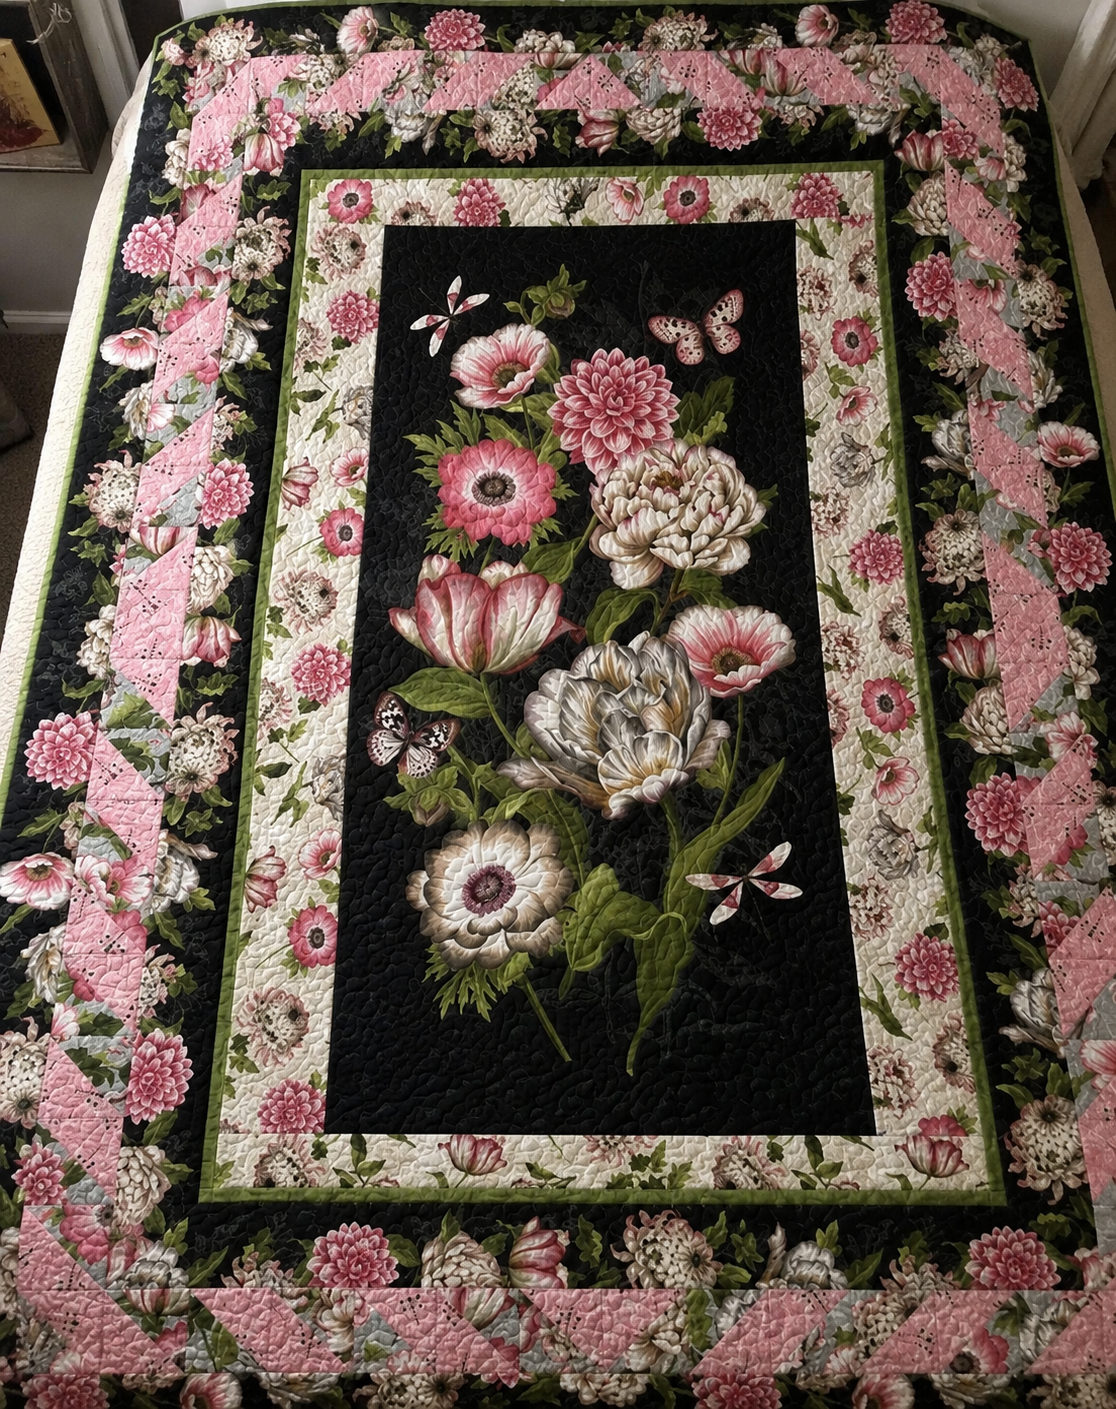
The Tivoli Garden quilt turns one dramatic floral panel into an elegant framed composition. Instead of dividing the focal print into small patches, the design keeps the bouquet intact and builds outward with narrow accents, floral stripes, pieced triangle rows, and wide finishing borders. The result has the detail of a carefully planned medallion quilt while allowing the fabric artwork to remain the center of attention.
Tivoli Garden was designed by Anne Rowan for Wilmington Prints. The original project sheet, identified as Q3007, includes small throw, twin, and queen versions. This article is an independent companion guide: it explains how to plan the project, where accuracy matters, how to handle the specialty prints, and how to avoid common construction problems. Use it alongside the official pattern, not in place of the pattern’s fabric requirements, cutting chart, diagrams, and assembly directions.
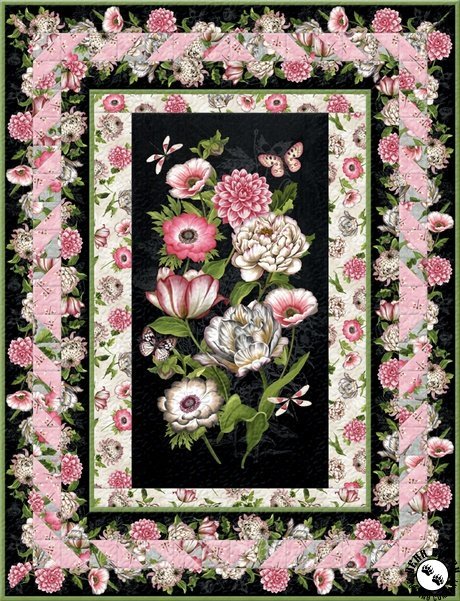
Tivoli Garden Quilt at a Glance
| Detail | Information |
|---|---|
| Pattern | Tivoli Garden, project Q3007 |
| Designer | Anne Rowan |
| Fabric company | Wilmington Prints |
| Quilt style | Panel-centered medallion quilt with multiple borders |
| Sizes in the PDF | Small throw, twin, and queen |
| Nominal finished sizes | Approximately 48″ × 63″, 64″ × 84″, and 83″ × 93″ |
| Main techniques | Panel trimming, coping borders, half-square-triangle units, flat piping, directional border prints, and mitered corners |
| Suggested experience | Confident beginner to intermediate |
| Seam allowance | 1/4″, according to the pattern |
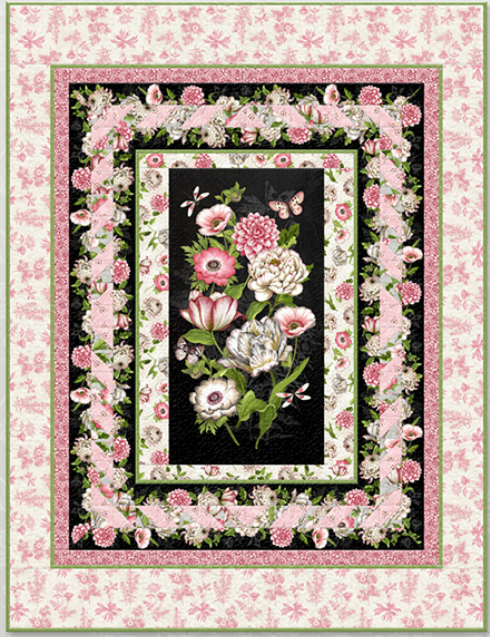
The small throw is the most direct version because it contains the complete decorative center. The twin and queen quilts begin with that same core and add more borders. This modular structure is helpful: you can complete and check one stage before deciding whether to continue to a larger size.
What Makes This Pattern Different
Many panel patterns simply add rectangular borders around a printed picture. Tivoli Garden is more carefully layered. Its visual order moves from the central bouquet to a light frame, a narrow green accent, a dark floral stripe, a ring of triangle units, and another striped frame. The larger versions add broad floral borders without weakening the center.
Three choices give the quilt its distinctive look:
- The bouquet panel remains whole rather than being cut into patchwork blocks.
- The repeating floral stripe is fussy cut so its motifs form deliberate borders.
- Narrow flat piping creates a crisp line between larger printed areas.
Those details also explain why this is not a completely automatic beginner pattern. The basic sewing is straight, but several steps depend on careful measuring and print placement. A quilter who can maintain an accurate 1/4″ seam and is ready to learn mitered corners should find the project manageable. If this is your first quilt, practice the miter on scrap strips before cutting the specialty border print.
The Three Quilt Sizes
The original PDF presents three versions. The dimensions printed on the pattern covers are nominal finished sizes, while the assembly directions refer to tops that are about 1/2″ larger before quilting and binding. That distinction is normal in quilt patterns and explains why you may see both whole-inch and half-inch measurements associated with Tivoli Garden.
| Version | Approximate finished size | Good use |
|---|---|---|
| Small throw | 48″ × 63″ | Sofa quilt, reading quilt, generous wall display, or gift |
| Twin | 64″ × 84″ | Twin bed, daybed, or long lap quilt |
| Queen | 83″ × 93″ | Queen bed with a modest drop or a large decorative quilt |
Do not choose a version from the name alone. Measure the mattress or the place where the quilt will be displayed. For a bed quilt, decide whether it should cover only the mattress top, hang down the sides, or also cover the pillows. Mattress depths vary, and the pattern’s queen size may provide less side drop on a very deep modern mattress.
The small throw is also a useful stopping point. Because it is the structural center of the two larger quilts, you can make the throw-sized top, hang it on a design wall, and evaluate it in the intended room. If you want more coverage, continue with the twin or queen borders specified in the PDF.
Read the PDF Before Shopping
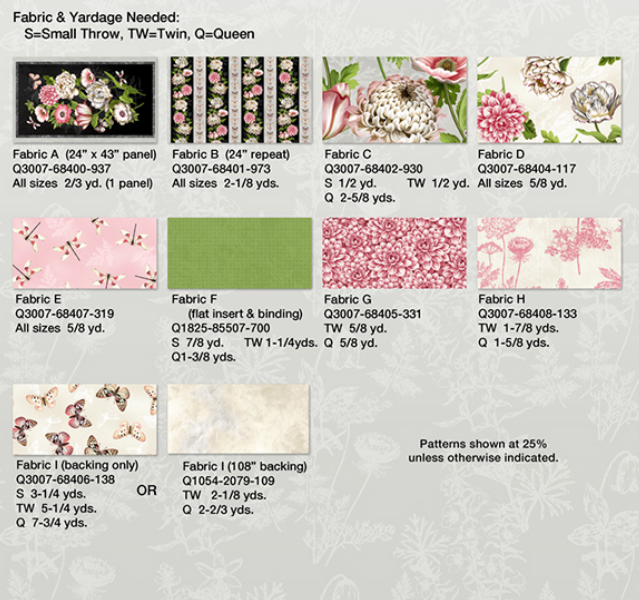
Tivoli Garden was designed around a coordinated fabric collection, including a bouquet panel and a repeating stripe. Those are structural fabrics, not merely color suggestions. A substitute panel may be taller, shorter, wider, or printed off grain. Another border stripe may have a different repeat or may not contain enough usable bands across the fabric width.
Before purchasing fabric:
- Download the official ten-page PDF.
- Choose the size you intend to make.
- Highlight only the fabric requirements and cutting directions for that size.
- Check whether you have the original panel and border stripe or substitutes with compatible usable dimensions.
- Add a reasonable allowance for shrinkage, print skew, fussy cutting, and cutting errors when buying replacement fabrics.
The original fabric guide identifies a panel approximately 24″ × 43″ and a coordinating stripe with a 24″ repeat. These descriptions help you recognize the intended materials, but the actual usable printed area is more important than the number printed on a shop label. Measure from the design elements you need to keep, not only from the raw fabric edges.
Because the collection may be older or difficult to find, avoid buying isolated pieces until you know that the main panel and stripe work together. A beautiful floral panel is not enough if no border fabric can reproduce the design’s long, balanced frames.
Understanding the Fabric Roles
The PDF assigns letters to the original Wilmington Prints fabrics. Keeping those letters on labels or clips will prevent confusion after the yardage is cut.
| Pattern role | What it does in the design | What to check in a substitute |
|---|---|---|
| Center panel | Creates the main bouquet focal point | Usable motif size, straightness, and space for trimming |
| Repeating floral stripe | Forms the prominent mitered borders | Repeat length, direction, matching motifs, and sufficient unbroken length |
| Floral coordinates | Supply triangle units and larger outer borders | Contrast, scale, and enough visual quiet around the center |
| Narrow accent fabric | Becomes flat piping and binding | Strong contrast and a color that can visually frame the prints |
| Outer-border fabrics | Enlarge the twin and queen versions | Stable print, appropriate scale, and adequate continuous yardage |
| Backing | Completes the quilt sandwich | Enough width and length for the quilting method you plan to use |
The original palette combines black, ivory, blush pink, green, butterflies, and lush botanical motifs. You can change the palette, but preserve the value structure. A dark stripe around a dark panel can disappear; a pale piping against another pale border may not provide the fine outline that makes this layout readable.
Photograph your fabrics in grayscale before cutting. If every fabric appears the same shade of gray, strengthen the light-dark separation. The narrow accent should remain visible from several feet away, and the triangle row should read as a frame rather than as a single blended band.
Can You Use Different Fabrics?
Yes, but substituting this pattern successfully requires more planning than changing colors in a block quilt.
Replacing the panel
Start with the printed image, not the overall panel dimensions. Identify the portion you want to preserve, then check whether a coping border can bring that trimmed center to the size required by the official layout. A panel that is slightly smaller may be adaptable with a wider coping border. A panel that is larger can be more difficult because important artwork may need to be removed.
Do not trim a substitute panel to the final target size immediately. Square the motif visually, leave extra fabric around it, and calculate the coping border only after measuring the trimmed panel through the center in both directions.
Replacing the border stripe
The original design depends on long floral stripes with directional motifs. A replacement should provide four compatible border segments for each mitered frame. Check the usable length of each printed band and the distance between repeats. If the motifs cannot be centered in opposite borders, the corners may be technically correct but visually unbalanced.
A non-directional floral can be used, but it changes the character of the quilt and reduces the effect of the miters. If you do not want to work with a stripe, a tone-on-tone print or solid border is easier. In that case, the result is an adaptation inspired by the layout rather than a close reproduction of the original sample.
Replacing the accent color
The narrow green accent works because it separates black floral areas from pale floral areas. Choose your substitute by contrast, not by habit. Pull one secondary color from the panel and test a folded strip between the intended borders. Step back six to eight feet. If the line disappears, choose a darker, lighter, or more saturated fabric.
Tools That Make the Project Easier
In addition to a sewing machine and normal quilting supplies, the following tools are especially useful:
- A large cutting mat and a long acrylic ruler
- A smaller square ruler for checking triangle units
- A 45-degree line on a ruler for mitered corners
- Fine pins, flat-head pins, or fabric clips
- Removable fabric marker suitable for your fabrics
- Stiletto or seam guide for controlling narrow piping
- Design wall or clean floor for arranging long borders
- Painter’s tape or labeled clips for identifying fabrics and border positions
- A fresh rotary blade for clean fussy cutting
- Starch or a light pressing spray, tested first on scrap fabric
Use a reliable 1/4″ presser foot or seam guide, but test it before starting. Sew three accurately cut fabric strips together, press them, and measure the center strip. If it finishes too narrow or too wide, adjust the needle position or guide. Small seam errors multiply across the triangle rows and can make a border too short for the quilt center.
Prepare the Panel Before Cutting Everything Else
Printed panels are rarely perfect rectangles. The grain may be slightly distorted, the printed frame may not be parallel to the selvage, and the motif may be placed differently from one copy to another. The Tivoli Garden PDF acknowledges this variation and uses a coping-border stage to bring the panel to the required size.
Lay the panel flat and let it relax. If you prewash, do so before measuring, understanding that shrinkage may affect the available printed area. Press from the wrong side with an appropriate temperature and avoid stretching the fabric diagonally.
Next, decide what must appear level in the finished quilt. Usually the printed picture matters more than the raw grain. Use multiple reference points in the artwork and trim gradually, alternating sides so the bouquet remains centered. Leave the allowance directed by the official pattern around the design.
After the first trim, take three measurements across the width: near the top, through the center, and near the bottom. Repeat for the height. If the numbers differ, do not pull the panel until they match. Correct gently through pressing and conservative trimming. Severe print skew cannot always be eliminated without sacrificing part of the image; in that case, aim for visual balance.
What Is a Coping Border?
A coping border is a calculated frame used to bring a center panel or block unit to the dimensions needed for the next pieced border. It absorbs small differences between the printed panel and the pattern target.
The principle is simple:
- Measure the prepared center through the middle, not along a possibly stretched edge.
- Compare that measurement with the unfinished target stated in the PDF.
- Subtract the center measurement from the target.
- Divide the difference between the two opposite borders.
- Include seam allowances when determining strip width.
The Tivoli Garden pattern supplies the relevant construction measurements for the original panel. If your panel matches the intended print, follow those directions. Recalculate only when substituting a differently sized panel. Write the arithmetic down and make a small diagram before cutting. A coping border that is off by 1/4″ on each side changes the next border by 1/2″ overall.
Sew side borders first, press, measure again through the center, and then add the top and bottom borders. After this stage, the center should be flat, rectangular, and at the unfinished measurement required for the next round.
Flat Piping Without the Bulk of Cord
The narrow accent in Tivoli Garden is flat piping, sometimes called a flange. It is a folded fabric strip inserted into a seam without cord inside it. Only a slim folded edge remains visible after the adjacent border is attached.
For a clean result:
- Cut and join the strips exactly as the PDF directs.
- Press the strip in half lengthwise with the wrong sides together.
- Keep the raw edges aligned with the quilt edge.
- Baste the piping in place before adding the next border.
- Maintain an even seam allowance so the visible accent stays consistent.
Do not press the folded edge directly with excessive heat until you have tested the fabric. A firm crease is useful, but distortion in a long, narrow strip can create waves. During basting, guide the piping without stretching it. If the visible line changes width after the next border is sewn, check whether the seam wandered rather than trying to fix the problem with pressing.
Making Accurate Triangle Rows
The pieced frame uses pairs of triangles joined into square units. Because the pieces are created by cutting squares diagonally, some edges are on the bias and can stretch easily.
Work in batches:
- Cut a small test group first.
- Sew with a consistent seam allowance and a short leader before the first unit.
- Press without dragging the iron across the bias edge.
- Measure the test units against the unfinished size stated in the PDF.
- Adjust the seam or pressing method before chain piecing the remaining units.
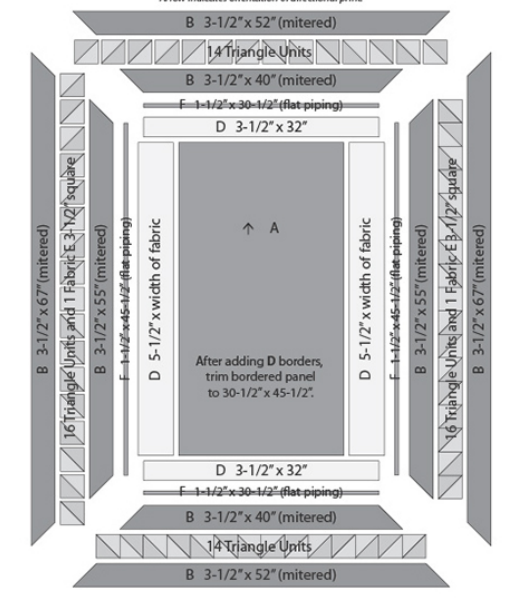
The original throw center uses 60 triangle units, arranged as vertical and horizontal rows with corner squares where specified. A tiny error in every unit can become a noticeable difference over a long row. If your units are consistently oversized, trim them evenly while keeping the diagonal seam centered. If they are undersized, do not stretch them to fit; diagnose the cutting or seam allowance before continuing.
Lay out each row beside the quilt before sewing. The direction of the two fabrics creates rhythm. Stack the units in order and label the top, bottom, left, and right rows. This five-minute step prevents a correctly sewn border from facing the wrong way.
How to Handle Directional Mitered Borders
Mitered corners let a stripe turn the corner at a 45-degree angle, producing the appearance of a continuous frame. In Tivoli Garden, the technique is functional and decorative: the flower stripe should meet gracefully rather than ending abruptly in a straight seam.
First, fussy cut the border strips according to the official image and dimensions. Compare opposite borders side by side. Their motifs should occupy similar positions so the quilt looks balanced. Mark the center of each border and the center of each quilt edge.
When attaching a mitered border, sew between the seam-intersection points rather than across the seam allowances at the corners. Leave the border ends free. Fold the quilt diagonally with right sides together, align the border edges, and use the ruler’s 45-degree line to mark the miter. Baste the corner first, open it, and inspect the motif from the front.
Only after the corner looks correct should you sew the permanent seam and trim the excess. Check all four corners before cutting. A seam can be unpicked; a border trimmed too early cannot be restored.
If the printed motifs do not match perfectly, prioritize these elements:
- A flat corner with no tuck or gap
- A straight 45-degree seam
- Similar visual weight on both sides of the corner
- Exact motif matching, when the print repeat allows it
The first three create a professional-looking quilt even when the flowers cannot meet as a perfect mirror image.
Construction Roadmap
Keep the official PDF open for all exact measurements and cutting instructions. At a high level, the project progresses as follows:
- Prepare the focal panel. Square the printed bouquet visually and add the coping frame that establishes the required center size.
- Add the first flat-piping accent. Baste the folded accent strips in place without stretching them.
- Frame the panel with the first floral stripe. Center the motifs, sew the borders, and form the mitered corners.
- Make the triangle units. Test the unit size, chain piece the remainder, and arrange the four border rows.
- Attach the triangle frame. Add opposite sides in pairs and keep the rows from bowing.
- Add the second striped frame. Center and miter this border using the same careful process.
- Stop for the small throw or continue. The small throw top is the decorative core used by the larger versions.
- Build the twin borders. Add the specified floral border, flat piping, and wide outer border.
- Build the queen borders if selected. Continue from the established center with the additional wide frames shown in the queen layout.
- Quilt and bind. Square the completed top, prepare backing and batting with suitable extra coverage, quilt, and attach the binding.
This is intentionally an overview, not a replacement for the designer’s directions. The PDF contains the size-specific strip dimensions, layout drawings, yardage, and order of assembly needed to make the quilt correctly.
Border Measurement: The Rule That Prevents Waves
Never cut a border from the length of a stretched quilt edge. Measure through the center of the quilt in three places. If the measurements differ slightly, use the center measurement or an average appropriate to the pattern and ease the quilt edge to the border.
Cut opposite borders to exactly the same length. Mark each border and the corresponding quilt edge at the center and quarters. Pin those points first, then distribute any tiny fullness evenly between them. Sew with the fuller layer against the feed dogs when practical, allowing the machine to help ease it.
After each pair of borders:
- Press according to the pattern and the needs of the piping.
- Place the top on a flat surface.
- Confirm that the corners remain square.
- Measure across the center in both directions.
- Correct a problem before adding another border.
Adding a new round does not cure a wavy old one. It makes the distortion harder to remove.
Pressing Strategy
There is no single direction that works for every seam in this quilt. Use the construction and the visual result to decide.
- Press ordinary border seams toward the less bulky side unless the pattern needs the flat piping to lie over a particular border.
- Press triangle-unit seams consistently so the units behave the same way.
- Press miter seams open to reduce bulk at the corners.
- Use a pressing cloth when working with heavily printed dark fabric.
- Lift and lower the iron on bias edges instead of sliding it.
After pressing a long border, allow it to cool on the ironing surface before moving it. Fabric can stretch while warm. If steam makes the border ripple, let it dry completely and reassess before trimming anything.
Accuracy Checkpoints
| Checkpoint | What to inspect | Correct before continuing if… |
|---|---|---|
| Prepared panel | Motif is centered and panel lies flat | Printed frame visibly tilts or opposite sides differ greatly |
| Coping border | Center matches the target in the PDF | Next border would need to be stretched or gathered |
| Test triangle units | Units are square and consistent | Points float unpredictably or units finish undersized |
| Triangle rows | Units follow the planned direction | A row reverses the color sequence or bows |
| Flat piping | Folded edge shows evenly | Accent width varies along the seam |
| First mitered frame | Corners lie flat and motifs balance | Corner puckers, gaps, or angles away from 45 degrees |
| Each added border | Opposite borders match and top stays square | Center bubbles or outer edges wave |
| Completed top | Final dimensions are close to the pattern | Large discrepancy suggests cumulative seam or cutting errors |
Measurements do not need to be mathematically perfect to the last thread, but they should be consistent. A flat top one-quarter inch different from a printed number is usually easier to quilt than an exact-size top that was stretched into place.
Common Problems and Practical Fixes
The panel is smaller than expected
Confirm that you measured the usable motif rather than the raw panel. If the difference is modest, a recalculated coping border may solve it. If the artwork itself is too small for the design, do not add random narrow strips without checking how every later border will fit.
The printed image is crooked
Decide whether the eye follows the print or the grain. Trim for visual alignment while preserving enough fabric for the coping stage. Mild skew may be improved with careful pressing, but forcing a badly skewed print square can create ripples.
The triangle border is too long
Measure individual units and count them again. If the units are correct, check the row seam allowances. Do not take one oversized seam at the end of the row; distribute any small correction across multiple seams so the pattern stays balanced.
The miter has a pucker
The border attachment seams may have extended too far into the corner, or the two border edges may not have been aligned before marking the 45-degree seam. Unpick only the corner, realign it, baste, and inspect from the front.
The floral stripe is upside down on one side
Directional borders must be labeled before sewing. If the seam is still accessible, correcting the reversed strip is worth the time. For future borders, place all four pieces around the quilt on a design wall and photograph the layout before carrying them to the machine.
The outer border waves
This usually happens when the border was cut from the longer edge measurement or stretched while sewing. Remove the affected border, measure the quilt through the center, recut or resew the border to that measurement, and ease any small fullness evenly.
Quilting Ideas for a Busy Floral Design
The quilt top already contains strong printed detail, so the quilting does not need to compete with it. Choose a plan based on how the quilt will be used and how visible you want the stitches to be.
For a soft bed quilt, an open allover floral, leaf, or gentle meander can connect the layers without overpowering the bouquet. Use thread that blends across the darkest and lightest fabrics, or switch thread colors between major areas if high contrast is distracting.
For more definition, quilt each frame differently:
- Outline prominent flowers in the center panel.
- Use simple echo lines in the coping border.
- Stitch in the ditch beside the flat piping to emphasize the narrow accent.
- Quilt diagonal or continuous-line motifs through the triangle row.
- Use parallel lines, a cable, or a flowing feather in the wide outer borders.
Avoid dense quilting directly beside completely unquilted areas unless you want a strong difference in texture. Distribute density across the top. Stabilize the quilt by stitching major structural lines first, then add decorative quilting.
Before quilting over the panel, test thread color and tension on a layered scrap containing both dark and light prints. Bobbin dots that disappear on black fabric can be obvious on ivory flowers.
Backing, Batting, and Binding
The project sheet provides backing requirements for standard-width fabric and, for larger versions, a 108″ wide alternative. Use the chart for your chosen size and confirm the needs of your longarm quilter before purchasing. Many longarm professionals request several inches of extra backing and batting on all sides, but the exact amount varies.
Choose batting according to use. A low- or medium-loft cotton blend gives the quilt a comfortable drape and lets the border details remain crisp. A puffier batting can add dimension to the floral panel but may make numerous border seams feel bulkier.
The original accent fabric also serves as binding, which repeats the narrow framing color at the outer edge. A dark floral stripe can be attractive too, but check how the motifs will look once cut into narrow binding. Prepare enough length for your actual quilt perimeter rather than relying only on a generic strip count if your top dimensions changed.
Square the quilt after quilting, not by removing large amounts from the unquilted top. Keep the outer border widths visually consistent, especially at the corners.
A Realistic Skill and Time Assessment
The pattern’s straight seams make it approachable, but the specialty details reward patience. Consider it a confident-beginner project if you already understand accurate rotary cutting, 1/4″ seams, basic border construction, and binding. Consider it intermediate if panel correction, flat piping, and mitered directional borders are new to you.
The project is easier when divided into sessions:
- Session 1: read, label fabrics, and prepare the panel
- Session 2: calculate and sew the coping frame
- Session 3: make test units, then chain piece the triangle units
- Session 4: prepare flat piping and fussy-cut border strips
- Session 5: assemble and check the throw-sized center
- Session 6: add twin or queen borders if required
- Session 7: prepare backing, quilt, and bind
Do not schedule all mitered borders for the end of a tiring day. Accurate matching and cautious trimming are much easier when you are rested and have good light.
Frequently Asked Questions
Is the Tivoli Garden pattern really free?
Yes. An authorized retailer currently lists the ten-page PDF for $0. The design and instructions are still intellectual property; “free download” does not mean that other websites may repackage, sell, or redistribute the file without permission.
Who designed Tivoli Garden?
The PDF credits Anne Rowan and carries Wilmington Prints branding. The project identifier shown on the sheet is Q3007.
Does the PDF include more than one size?
Yes. The PDF includes small throw, twin, and queen versions. Some retailer copy highlights only the 64″ × 84″ twin size, but the actual project sheet also contains the smaller and larger layouts and instructions.
Is this a beginner quilt?
It is suitable for a confident beginner who can sew an accurate seam and is willing to practice mitered corners. A true first-time quilter may prefer to make a simpler panel quilt before working with directional stripe matching and flat piping.
Do I need the original Tivoli Garden fabrics?
No, but the panel and repeating stripe influence the dimensions and layout. Substitutes must be measured carefully, and a different panel may require a recalculated coping border.
Can I skip the mitered corners?
You can adapt a border to use straight or corner-square construction, but the cutting lengths and appearance will change. Do not use the mitered-border cutting measurements unchanged for a different corner method.
Should I prewash the panel?
That is a project choice. Prewashing can reveal shrinkage or color bleeding, but it may also reduce the already limited usable panel area. If you prewash one fabric, treat all fabrics consistently and measure the panel afterward. Test dark prints for colorfastness.
Can I make the quilt wider or longer?
The safest options are the three sizes already engineered in the PDF. If you need different bed coverage, add planned outer borders only after completing the selected version. Calculate symmetry, binding, backing, and quilting requirements before cutting.
How should I print the PDF?
The pattern uses measurements rather than full-size templates for the main construction. Print at actual size when possible, make sure no pages are omitted, and keep the layout pages in color or view them on screen so the fabric labels remain easy to follow.
Download the Official Pattern
The official project sheet contains the fabric chart, exact cutting instructions, size-specific assembly order, and layout diagrams for all three versions. Download it from the authorized pattern page below and keep the page bookmarked in case the file is updated or moved.
Download the free Tivoli Garden quilt pattern
Before starting, read all ten pages, mark the directions for your chosen size, and compare every fabric label with the final yardage chart. This prevents instructions for the twin or queen borders from being mixed into the throw version.
Final Thoughts
Tivoli Garden succeeds because every border has a purpose. The panel provides the focal image, the coping strips establish accurate dimensions, the flat piping separates large prints, the triangle rows add movement, and the mitered floral stripes turn the entire center into a formal frame. None of those techniques is unusually difficult by itself; the polished result comes from measuring and checking at each stage.
Begin with the small throw center, resist the urge to stretch a border into place, and test every unfamiliar technique on scrap fabric. With a square panel, consistent triangle units, and carefully basted miters, the quilt will remain flat and the floral design will look intentional from the center to the binding.
Pattern Credit
Tivoli Garden (project Q3007) was designed by Anne Rowan for Wilmington Prints. The original project sheet, quilt design, cutting directions, diagrams, fabric artwork, and pattern images belong to their respective rights holders. Easy Quilting Patterns did not create the original pattern and is not affiliated with or endorsed by Anne Rowan, Wilmington Prints, or Fat Quarter Shop.
This article is an independently written companion guide by Easy Quilting Patterns. It does not reproduce or replace the designer’s complete instructions. Please download the pattern from the authorized source linked above and respect any use terms included by the publisher. Do not upload or redistribute the PDF unless the copyright owner has expressly granted permission; link readers to the authorized download page instead.