
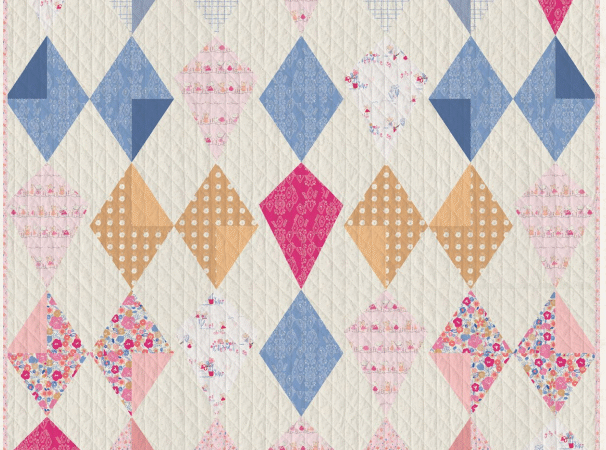
The Of Mice & Thread quilt pattern turns a playful fabric story into a sophisticated geometric quilt. Designed by AGF Studio for Patty Basemi’s Tails & Threads fabric collection, the finished quilt measures 70 × 75 inches—large enough for a generous throw, a decorative bed layer, or a memorable gift.
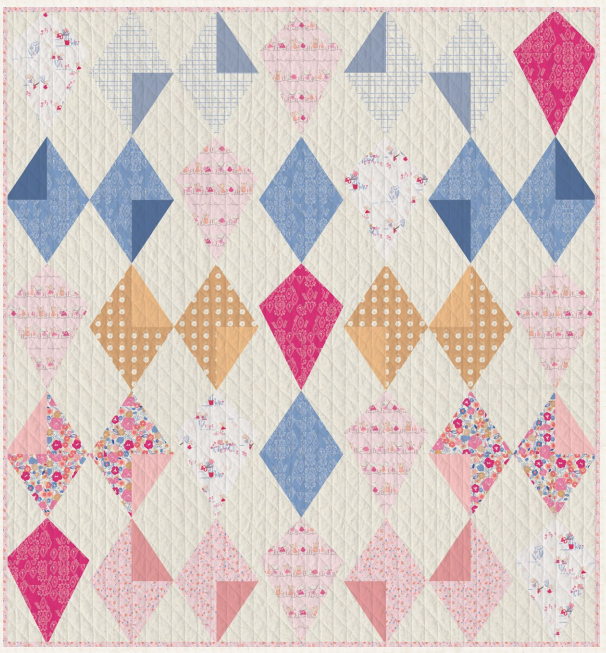
At first glance, the layout appears to be an energetic arrangement of arrows, diamonds, and flying geese. Look longer, and the structure begins to emerge: repeated template-pieced shapes travel across five horizontal rows, while changes in color and print keep the rhythm lively. The original Tails & Threads prints add tiny sewing-themed and storybook details, but the design also works beautifully in solids, blenders, scraps, or another coordinated collection.
This guide is an independent companion to the publisher’s free pattern. It will help you understand the project, choose fabrics, organize the templates, improve piecing accuracy, and avoid common problems. Keep the official instructions beside you for the complete cutting diagrams, numbered templates, block illustrations, and assembly order.
Project at a Glance
| Detail | Information |
|---|---|
| Pattern | Of Mice & Thread |
| Quilt designer | AGF Studio |
| Featured collection | Tails & Threads by Patty Basemi |
| Finished size | 70 × 75 inches |
| Construction | Traditional machine piecing with printed templates and stitch-and-flip flying geese |
| Layout | Eight block families or variations assembled into five rows |
| Seam allowance | 1/4 inch, included in the pattern |
| Suggested skill level | Intermediate |
| Official pattern price | Free PDF from Art Gallery Fabrics |
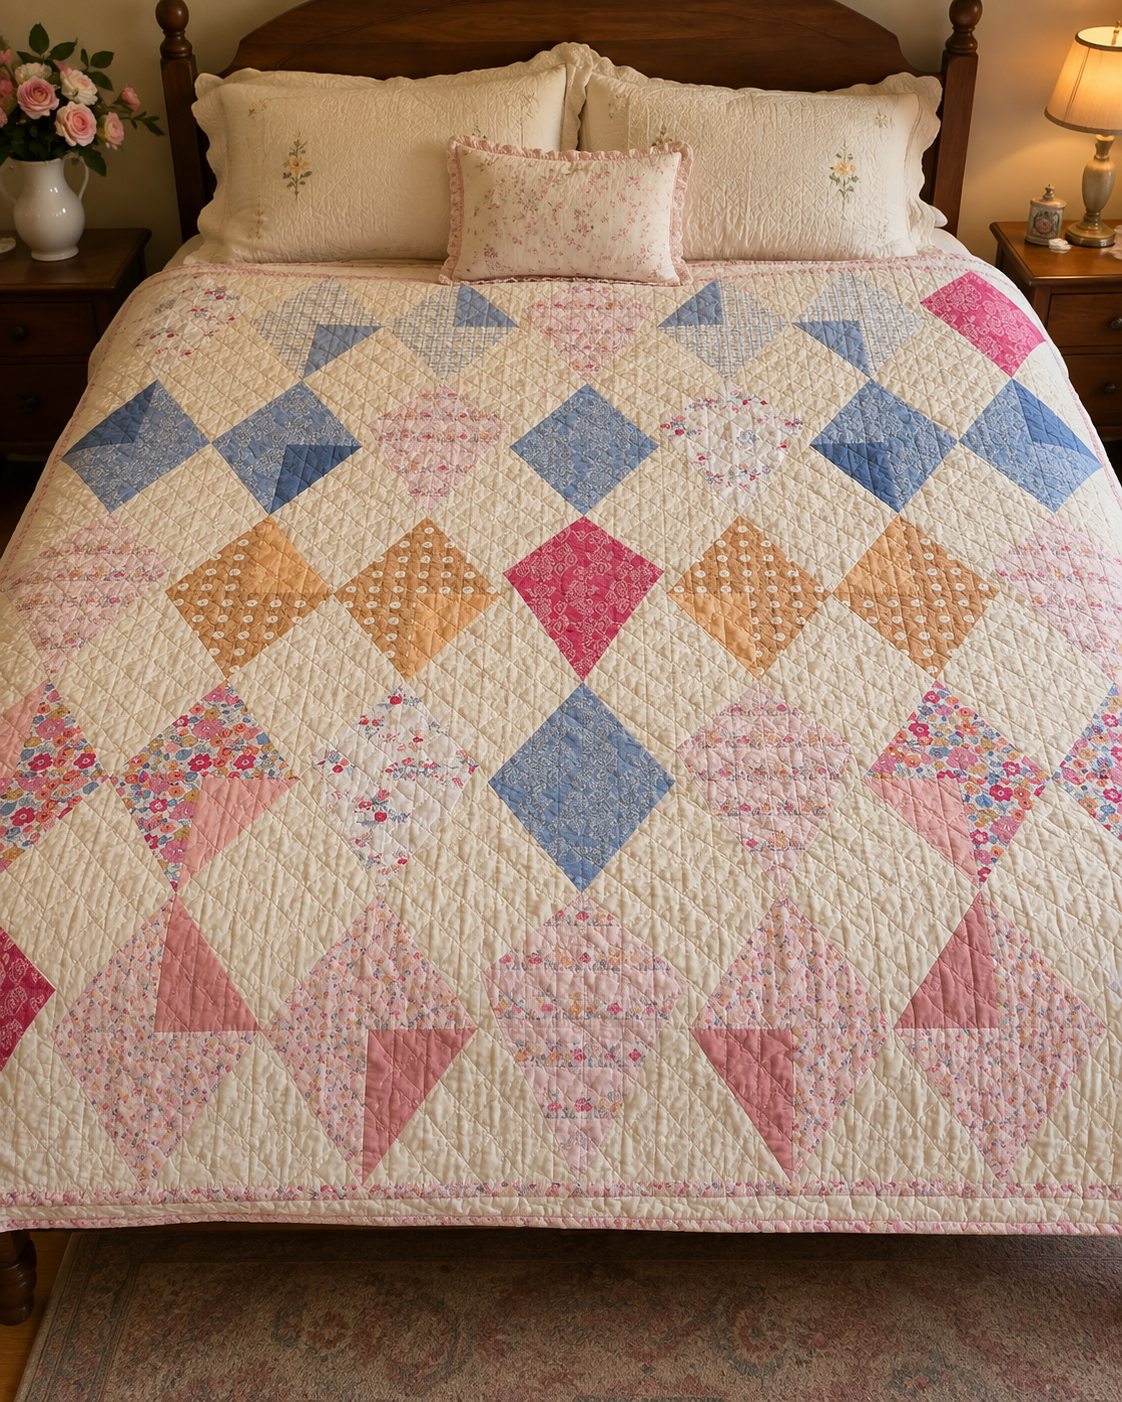
The quilt is only five inches longer than it is wide, so it has a balanced, almost square presence. Its scale makes it practical as a large couch quilt or a topper on a full- or queen-size bed. Before using it as a bed quilt, compare 70 × 75 inches with your mattress measurements and decide whether you want additional borders for more side drop.
Is This Quilt Beginner-Friendly?
Of Mice & Thread is best treated as an intermediate quilt pattern. A confident beginner who is comfortable following diagrams may enjoy it, but it is not the easiest choice for a first quilt.
The challenge does not come from one advanced technique. It comes from managing several accuracy-sensitive tasks at once:
- printing and using multiple template pages;
- sewing long angled seams without stretching the bias edges;
- trimming different units to the correct dimensions;
- making oversized stitch-and-flip flying geese accurately;
- tracking numerous fabrics, mirrored shapes, and block variations;
- keeping a five-row directional layout organized.
You should be comfortable sewing a consistent 1/4-inch seam, reading rotary-cutting instructions, pressing without distorting a unit, and checking measurements as you work. If these skills are new, make one complete test unit from spare fabric before cutting every piece.
This pattern is conventional machine piecing with templates. It is not foundation paper piecing, and the visual motifs do not require appliqué. The paper shapes guide cutting and trimming; they are not sewn permanently into the quilt.
The Story Behind the Fabrics
Patty Basemi’s Tails & Threads collection tells a whimsical story about a cat and a mouse becoming friends while sewing a garden together. The collection includes small florals, stitched details, gentle novelty motifs, and soft coordinates. Those narrative prints give the original quilt its charming title even though the main patchwork design is geometric rather than a literal mouse-shaped quilt.
The palette moves through peach, rose, blue, cream, tan, and warm low-volume prints. AGF Studio uses those value changes strategically: the lighter background opens negative space around the colorful units, while deeper prints create movement from one block to the next.
You do not need the original collection to make a successful version. The most important feature to preserve is contrast. Lay your candidates on a table, step back, and take a phone photo in grayscale. If the colored units remain distinct from the background in black and white, the design will probably read clearly from across the room.
Official Fabric Requirements
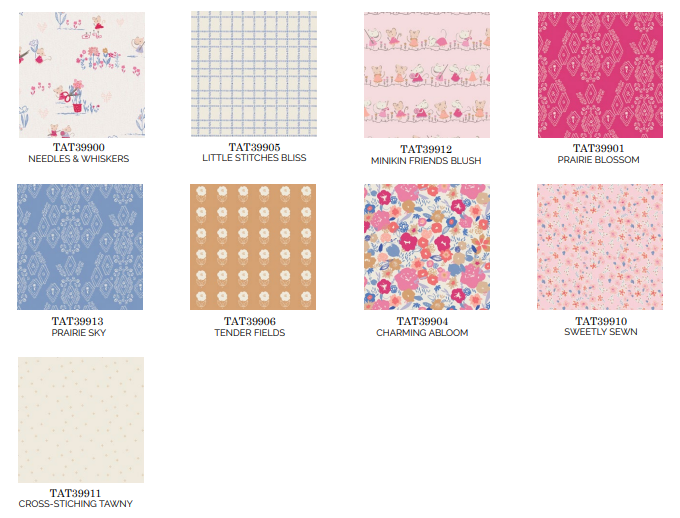
The pattern uses fourteen labeled fabrics. The names and quantities below match the official PDF. “Fabric N” is the principal background, while Fabric L also supplies the binding.
| Label | Original fabric | Amount |
|---|---|---|
| A | TAT39900 Needles & Whiskers | 3/4 yard |
| B | TAT39905 Little Stitches Bliss | 3/8 yard |
| C | PE-530 Atmospheric | 1/4 yard |
| D | TAT39912 Minikin Friends Blush | 1 1/8 yards |
| E | TAT39901 Prairie Blossom | 5/8 yard |
| F | TAT39913 Prairie Sky | 5/8 yard |
| G | PE-415 Parisian Blue | 1/4 yard |
| H | TAT39906 Tender Fields | 3/8 yard |
| I | PE-509 Georgia Peach | 1/4 yard |
| J | TAT39904 Charming Abloom | 3/8 yard |
| K | PE-420 Crystal Pink | 1/4 yard |
| L | TAT39910 Sweetly Sewn | 3/4 yard |
| M | PE-411 Quartz Pink | 1/4 yard |
| N | TAT39911 Cross-stitching Tawny | 3 1/2 yards |
| Backing | TAT39900 Needles & Whiskers suggested | 5 yards |
The 3/4-yard Fabric L requirement is not solely binding yardage. It includes pieces used in the quilt top as well as seven 1 1/2-inch width-of-fabric binding strips. Avoid buying only 3/4 yard of a substitute for the binding and then using all of it for blocks.
If you prefer the familiar 2 1/4- or 2 1/2-inch double-fold binding method, calculate and purchase that binding separately. The publisher’s finishing method uses narrow 1 1/2-inch strips joined into a strip approximately 300 inches long, attached with a 1/4-inch seam, turned to the back, and hand finished. Follow the official method only if you are comfortable working with that narrow width.
The suggested five yards of backing allows for a conventional pieced backing, but the precise need can change with usable fabric width, seam direction, shrinkage, and your longarmer’s required margin. Confirm the backing layout before cutting. Most longarm quilters request several extra inches on all four sides.
Choosing Substitute Fabrics
A controlled palette makes the many shapes easier to read. Begin with the background. Fabric N occupies the largest area, so choose something that looks calm from a distance. A subtle low-volume print can add interest, but a busy multicolor background may compete with the pieced units.
Next, sort the remaining fabrics into value groups rather than trying to match every original color. Aim for a mix of light, medium, and dark accents with enough separation from the background. One useful formula is:
- one quiet background;
- three or four stronger anchor colors;
- several medium-value supporting prints;
- a few light accents that still contrast with the background.
Small-scale prints are easy to use in template pieces because the motif remains recognizable after cutting. Large florals or obvious stripes can also work, but they require more planning. Decide whether directional prints should point consistently, mirror one another, or appear intentionally random. Mark the desired top edge on template pieces before carrying them to the sewing machine.
For a scrappy interpretation, keep the background consistent and substitute scraps within related value groups. That repeated background will unify the design. Cut one block’s pieces first and audition them on a neutral surface; this quickly reveals whether adjacent prints merge together.
Solids create a particularly modern version. Use strong value contrast and consider repeating each solid in more than one area so the palette travels through the quilt rather than forming isolated color spots.
Print and Prepare the Templates Correctly
Template accuracy is fundamental. A small scaling error may seem harmless on one piece, but it compounds across repeated units and can make rows difficult to join.
Open the official PDF in a full PDF reader and select Actual Size or 100% in the print dialog. Turn off options such as Fit, Shrink Oversized Pages, or Scale to Printable Area. Print one template page first, then compare its printed reference or the resulting trimmed unit with the dimensions stated in the pattern before printing the remaining pages.
The PDF includes piecing templates labeled 1a/1b, 2a/2b, 3a/3b, and 4a/4b, plus separate trimming templates 1 through 4. Keep those two functions clear: the lettered templates guide the component pieces, while the numbered templates help establish the final unit shape.
For repeat use, print on paper and trace the shapes onto template plastic, card stock, or another stable material. Transfer every useful label, alignment line, and orientation mark. When cutting fabric, use a sharp rotary blade and a small ruler where possible rather than running the blade freehand along thin printer paper.
Do not assume two similar-looking shapes are interchangeable or rotate a non-symmetrical template casually. Make separate envelopes or zip bags for each template family, and label both the paper template and the cut fabric pieces.
Before You Cut
Read the entire PDF once before unfolding the first yard of fabric. The pattern’s block diagrams make more sense when you already know that the units will eventually become five rows.
Prewashing is a personal choice, and the publisher suggests washing and ironing the fabrics if desired. If you prewash one fabric, prewash all fabrics used in the quilt top so their behavior is consistent. Whatever you choose, press out folds and straighten the fabric gently before cutting.
Create labels for Fabrics A through N that include both the letter and a small swatch. The letters are essential because several colors are close in value. As pieces are cut, group them by fabric and template number. A shallow tray, sheet pan, project box, or design board for each block family prevents accidental mixing.
Do not cut every directional print until you understand how the mirrored shapes sit in the finished unit. A test set can save a surprising amount of fabric. It is also wise to keep the remaining yardage intact until the test block has been measured successfully.
Understanding the Construction
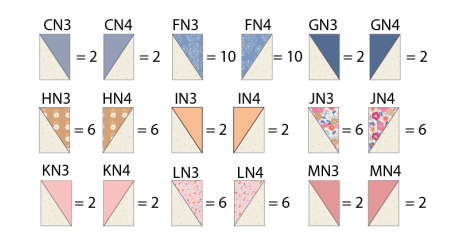
The design is built from two broad groups of template-pieced units plus large flying geese.
The first template family uses the 1a/1b and 2a/2b shapes. After piecing, these units are trimmed to 10 1/2 × 5 1/2 inches. Units from this family combine with flying geese in the early block arrangements.
The second family uses the 3a/3b and 4a/4b shapes. These units are trimmed to 8 × 5 1/2 inches and repeat in longer geometric sequences elsewhere in the quilt.
The flying geese begin with a 10 1/2 × 5 1/2-inch colored rectangle and two 5 1/2-inch background squares. The squares are sewn to opposite ends using a stitch-and-flip method. This technique does create trimmed corner offcuts, so it should not be described as a no-waste flying-geese method. Save sufficiently large offcuts for another project if you like, but prioritize accurate primary units.
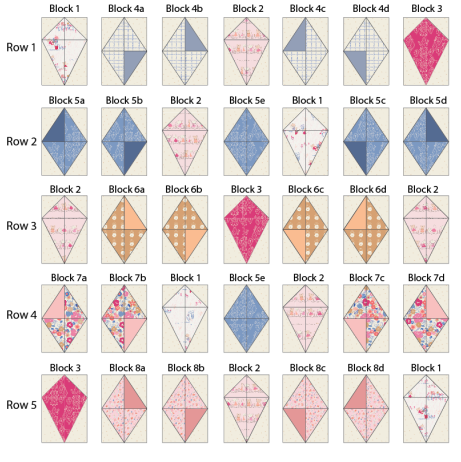
The official instructions develop Blocks 1 through 8, including labeled variations, and then arrange them across Rows 1 through 5. The repeated height of the units helps the different geometric combinations fit together.
This overview is meant to orient you, not replace the diagrams. Use the PDF for the exact color placement, quantity of each unit, block sequence, and row order.
Accurate Template Piecing
Template pieces often have angled edges and exposed bias. Handle them lightly and avoid pulling them through the machine. If a piece stretches, steam and aggressive pressing usually make the distortion worse.
Mark the 1/4-inch seam intersections at pointed corners when the diagrams require precise alignment. Pin through the matching points first, then add a pin or clip near each end. If one piece extends beyond another, check the pattern illustration before trimming anything; offset ends are sometimes necessary so the seam begins and ends in the correct place.
Sew with a neutral, fine piecing thread and a shorter stitch than you might use for long straight strips. The seam should remain secure when the unit is trimmed. Press each seam in the direction shown in the pattern when specified. Otherwise, test which direction reduces bulk and helps neighboring seams nest.
“Press” is the key word: lift and place the iron instead of sliding it across the unit. Let the patchwork cool on a flat surface before trimming. Warm fabric can change shape more easily.
Trim only after the complete template unit is assembled. Align the proper trimming template carefully, checking the outer edges and any reference points before making the first cut. The target sizes—10 1/2 × 5 1/2 inches for the first family and 8 × 5 1/2 inches for the second—are useful checkpoints, but also preserve the intended point placement within the unit.
Better Stitch-and-Flip Flying Geese
Draw a fine diagonal line on the wrong side of each 5 1/2-inch background square. A mechanical pencil, removable fabric marker, or Hera marker can work; test any marking tool first.
Place the square on the colored rectangle exactly as illustrated in the PDF. Sew just to the waste side of the marked line. This tiny adjustment compensates for the fold and thread width, helping the flipped triangle reach the edge of the base rectangle. Before trimming, fold the corner back and confirm that it covers the underlying rectangle completely.
Trim the excess layers to a 1/4-inch seam allowance, press the triangle open, and repeat on the opposite side. After both corners are complete, check that the unit still measures 10 1/2 × 5 1/2 inches and that approximately 1/4 inch remains beyond the goose point for the next seam.
Make one flying goose first. If it is undersized, check square placement, seam position, thread width, and pressing before chain piecing the full set.
Pressing, Trimming, and Point Protection
The most visible mistakes in a geometric quilt usually come from lost points or stretched angled edges. Three habits prevent most of them.
First, verify unit size before assembling blocks. An inaccurate small unit cannot become more accurate when surrounded by other pieces.
Second, watch the needle as it crosses a point. The ideal seam passes just outside the tip, preserving the design after the seam is pressed. If your unit has the required 1/4-inch allowance beyond each point, this becomes much easier.
Third, distribute bulk. At intersections with several layers, press seams in opposite directions for nesting or press open if the pattern and your quilting plan allow it. A tailor’s clapper can help a freshly pressed seam lie flat without adding more heat or distortion.
Perfection is not required for a beautiful quilt. Prioritize overall row alignment and clear shapes. Minor differences disappear once the quilt is layered, quilted, washed, and used.
Quilting and Finishing Ideas
The top already contains abundant movement, so the quilting can be simple. Evenly spaced straight lines emphasize the modern geometry and are achievable on a domestic machine. Lines following the long row direction can make the quilt feel calmer; a diagonal grid echoes the angled pieces.
For free-motion quilting, a soft meander or loose loop provides texture without competing with the prints. Another option is to quilt the background more densely and use simpler lines inside the colored units, allowing the shapes to rise subtly.
Choose batting according to use. A low-loft cotton or cotton-blend batting gives a traditional drape and keeps seam bulk manageable. Polyester adds loft and lightness. Follow the batting manufacturer’s minimum quilting-distance requirement.
Make a backing at least as large as required by your basting or longarm method. Baste carefully, beginning near the center and smoothing outward. After quilting, square the quilt without cutting off the patchwork points at the perimeter.
If using the narrow binding specified in the pattern, make a test on a small quilt sandwich first. If using wider double-fold binding, recalculate the number of strips from the quilt’s measured perimeter, add extra length for joins and corners, and follow your preferred binding method.
Download the Official Free Pattern
Download the official Of Mice & Thread quilt PDF from Art Gallery Fabrics.
The free PDF contains 23 pages, including the fabric requirements, cutting directions, illustrated block construction, row assembly, finishing instructions, and full-size template pages. Because the templates are essential to the design, download the file directly from the publisher and retain the complete document rather than relying on isolated screenshots.
You can also find the pattern in the Art Gallery Fabrics free quilting pattern library and explore the Tails & Threads fabric collection.
Final Checklist
Before sewing, confirm that you have:
- downloaded the complete official PDF;
- printed every required template at Actual Size or 100%;
- verified one sample page or finished test unit;
- labeled Fabrics A through N;
- separated piecing templates from trimming templates;
- planned the orientation of directional prints;
- tested one unit from each template family;
- tested one stitch-and-flip flying goose;
- reserved Fabric L for both patchwork and the published binding;
- prepared enough backing for your chosen quilting method;
- labeled Blocks 1 through 8 and Rows 1 through 5.
Of Mice & Thread rewards patient organization. Its many pieces become much less intimidating when treated as repeatable unit families rather than one enormous layout. Print accurately, label everything, measure the first unit before chain piecing, and use the official diagrams for orientation. The result is a generous geometric quilt with playful fabric details and graceful movement from edge to edge.
Pattern Credits
Quilt design: AGF Studio
Featured fabric collection: Tails & Threads, designed by Patty Basemi
Publisher: Art Gallery Fabrics / Art Gallery Quilts LLC
Official pattern copyright: © 2022 Art Gallery Quilts LLC. All rights reserved.
This independent educational companion was written by Easy Quilting Patterns. The pattern, templates, illustrations, fabric artwork, and original quilt imagery belong to their respective copyright owners. Download the pattern from the publisher’s official website.