
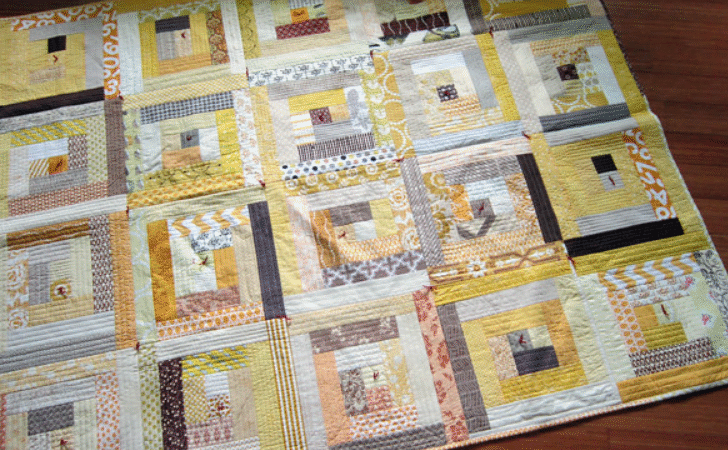
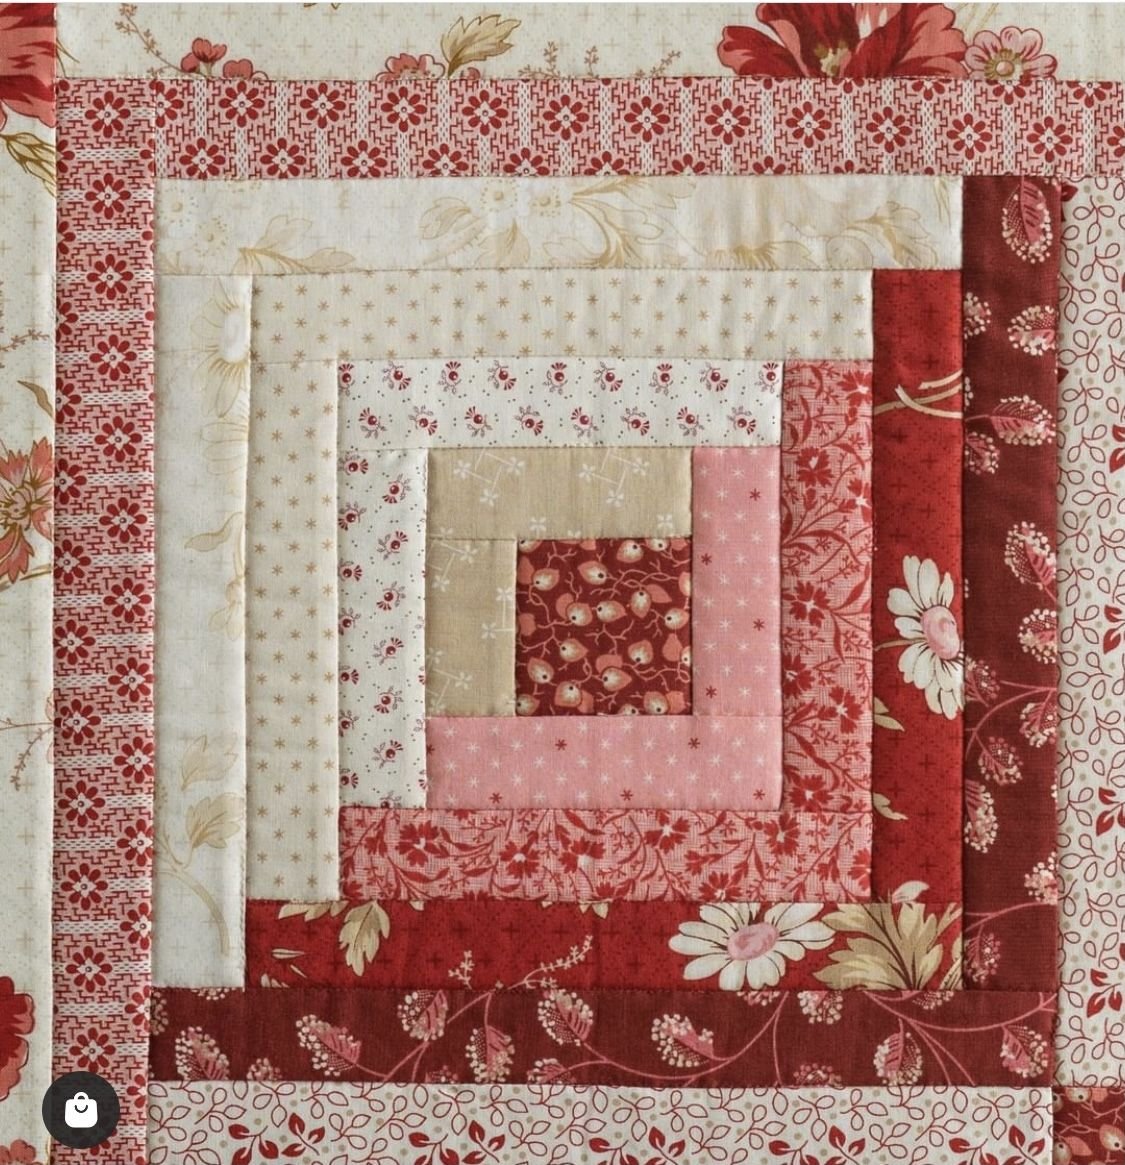
The Log Cabin is one of quilting’s most adaptable blocks. Change the color placement and the same simple sequence of squares and strips can create straight furrows, chevrons, diamonds, or a dramatic barn-raising layout.
This version adds another useful feature: the block is quilted as it is pieced. Each fabric piece is sewn directly onto batting, then quilted before the next piece is added. By the time the block is complete, most of the quilting work is already done.
The finished block measures 14 inches, or 14½ inches before it is joined to other blocks. It uses standard 2½-inch strips, so it works well for scraps, leftover precut strips, or a coordinated fabric collection.
This article is an independent companion to the original Quilt-As-You-Go Log Cabins tutorial by Rachel LaBour, formerly Rachel Hauser, of Stitched in Color. You will find links to Rachel’s original tutorial and official PDF near the end of this guide.
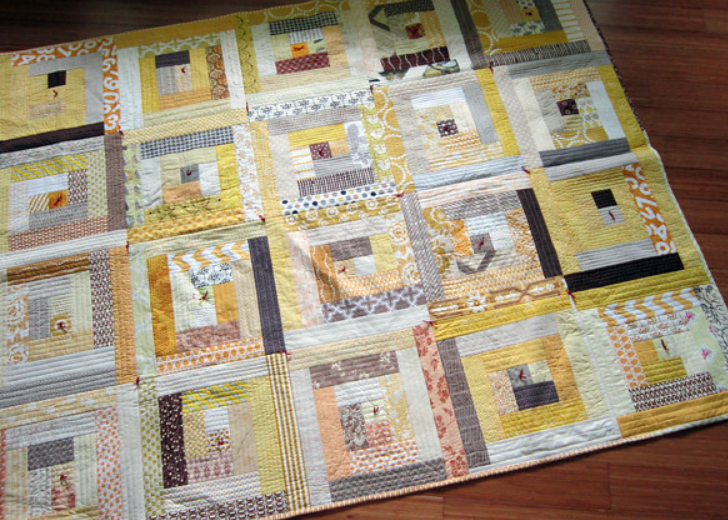
Pattern at a Glance
| Detail | Measurement or recommendation |
|---|---|
| Finished block size | 14 inches square |
| Unfinished block size | 14½ inches square |
| Strip width | 2½ inches |
| Finished log width | 2 inches |
| Batting for one block | At least 15 inches square |
| Seam allowance | ¼ inch |
| Construction method | Quilt as you go, top and batting only |
| Suggested skill level | Confident beginner |
The most important detail is that the backing is not placed behind each block during piecing. In this method, the fabric is sewn and quilted to the batting only. The completed blocks are joined first, and a single backing is added afterward. This keeps bulky joining strips off the front and back of the quilt.
Why Make a Quilt-As-You-Go Log Cabin?
A large quilt can be difficult to maneuver through the throat of a domestic sewing machine. With this method, the decorative quilting is completed on one manageable block at a time.
It is a practical choice when you want to:
- quilt on a regular home sewing machine;
- use small fabric scraps in a planned way;
- make a project in short sewing sessions;
- test different straight-line quilting designs;
- avoid handling the entire quilt top during most of the quilting process.
The technique does not eliminate every finishing step. You will still need to join the blocks, add and secure the backing, and bind the quilt. However, the dense quilting inside each block is already complete.
Materials and Tools
For one block, gather:
- one batting square measuring at least 15 inches;
- 2½-inch-wide fabric strips in assorted lengths;
- coordinating thread for piecing and quilting;
- a sewing machine with a straight stitch;
- a ¼-inch presser foot, if available;
- a walking foot for quilting, if available;
- a rotary cutter, cutting mat, and quilting ruler;
- a removable fabric marker or hera marker;
- an iron and pressing surface.
Low-loft cotton or an 80/20 cotton-polyester blend is usually easier to piece through than a very lofty batting. Check the batting manufacturer’s instructions for the maximum recommended distance between quilting lines. The quilting in each block must be close enough to keep the batting stable.
A walking foot is helpful but not mandatory. If your layers feed evenly with a standard foot, use the setup that gives you the best result. A fresh size 80/12 or 90/14 universal or quilting needle is a sensible starting point; choose the needle according to the thread weight and fabric.
Plan the Colors Before Cutting
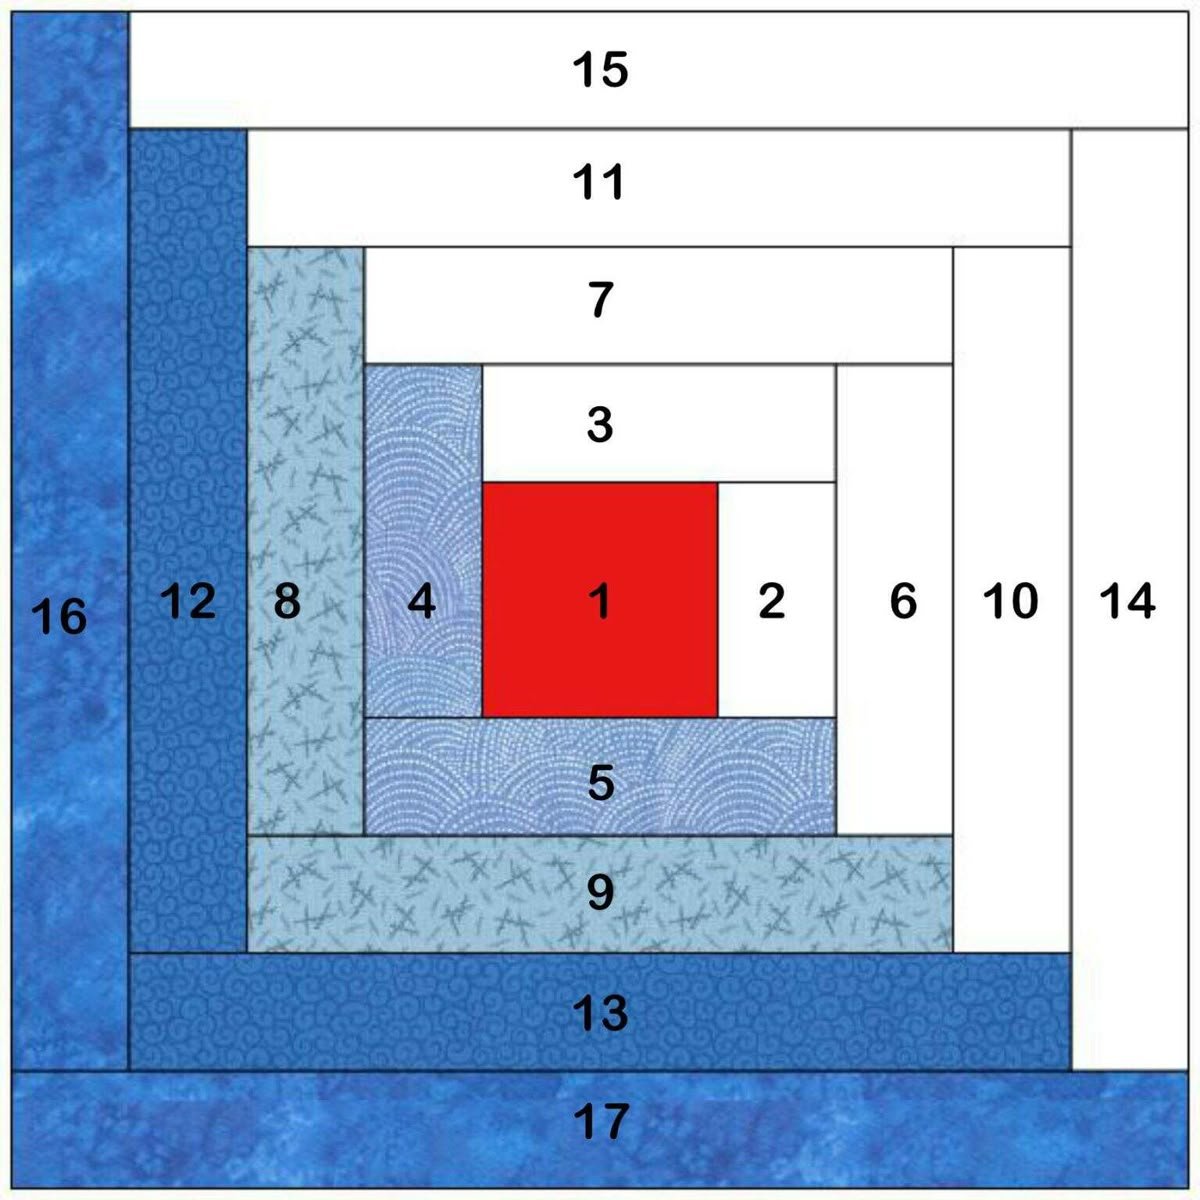
Traditional Log Cabin blocks often place light fabrics on one side of the center and dark fabrics on the other. When the blocks are rotated, that light-and-dark division creates the larger design across the quilt.
Here are four reliable color plans:
Light and Dark
Use light-value fabrics for the logs on two adjacent sides and medium-to-dark fabrics on the other two sides. This produces the strongest secondary designs when the blocks are arranged together.
Scrappy but Controlled
Choose two broad color families—for example, low-volume creams and saturated blues. Fabrics can vary within each group, but the value contrast keeps the Log Cabin structure visible.
Color Gradient
Begin with the darkest fabrics near the center and move gradually toward lighter fabrics, or reverse the order. A gradient makes each block feel organized even when many prints are used.
Fully Scrappy
Mix all colors around the center for a lively block. For visual balance, repeat a few colors or prints in different places rather than using every fabric only once.
Place potential fabrics side by side and take a grayscale phone photo. If the light and dark groups remain distinct without color, the contrast will usually read clearly in the finished quilt.
Cutting Guide for One 14-Inch Block
All pieces are cut 2½ inches wide. The cutting sequence used in Rachel’s original tutorial is summarized below so you can prepare a block efficiently.
| Piece length | Quantity |
|---|---|
| 2½-inch square | 2 |
| 2½ × 4½ inches | 2 |
| 2½ × 6½ inches | 2 |
| 2½ × 8½ inches | 2 |
| 2½ × 10½ inches | 2 |
| 2½ × 12½ inches | 2 |
| 2½ × 14½ inches | 1 |
This is a useful precutting list, but do not be alarmed if a strip needs a tiny trim as the block grows. Seam allowance, thread weight, pressing, and quilting density can cause small variations. For the best accuracy, many quilters prefer to cut strips slightly long, sew them in place, and trim the excess even with the block edge.
If you are making many blocks, cut the logs by length into labeled groups. Keep the two color or value families separate so it is easy to maintain the light-and-dark sides.
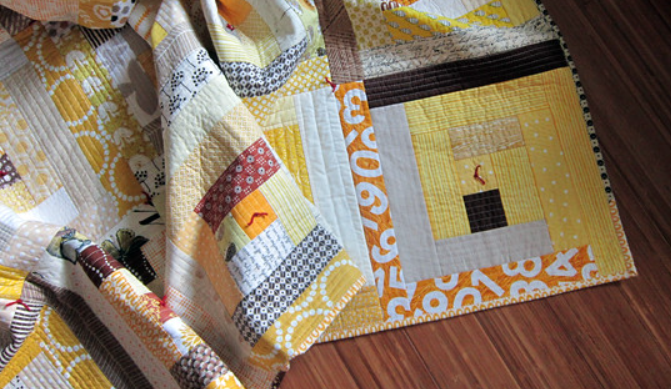
Prepare the Batting
- Cut a low-loft batting square at least 15 inches on each side.
- Find the center by folding the batting gently in half vertically and horizontally. Finger-crease the folds or mark the center with a removable marker.
- Draw a horizontal and vertical guideline through the center if that helps you position the first pieces.
- Smooth the batting on the work surface without stretching it.
The batting is deliberately larger than the unfinished block. Piecing and quilting can draw in the layers, and the extra margin allows the block to be squared accurately to 14½ inches at the end.
Test any marking tool on a batting scrap. Avoid heavy pencil or permanent ink, which may show through a pale fabric.
How the Stitch-and-Flip Sequence Works
Every new log follows the same basic rhythm:
- Position the new strip right sides together with the exposed edge of the previous pieces.
- Sew through the fabric pieces and batting with a ¼-inch seam.
- Open the new strip away from the seam.
- Press carefully.
- Quilt the newly added strip to the batting.
- Add the next strip around the block.
Quilt each log before covering its raw edge with the next one. Waiting until several logs have been added may leave areas that are awkward or impossible to quilt evenly.
Use a slightly longer quilting stitch than the piecing stitch if you like the look—approximately 2.5 to 3.0 mm is a common starting range. Test the settings on fabric and batting scraps before working on the block.
Step-by-Step Block Assembly
1. Place the Center Pieces
Position the first 2½-inch square near the center of the batting, right side up. Place the second square on top of it, right sides together, aligning the edge where the center seam will be sewn.
Sew the ¼-inch seam through both squares and the batting. Open the second square and press it away from the seam. The two squares should now form a 2½ × 4½-inch unit centered on the batting.
Quilt the two center pieces. You can stitch close to the seam, add one or two parallel lines, or use another simple design that holds the fabric flat.
2. Add the First Logs
Place a 4½-inch log right sides together along the matching edge of the center unit. Sew, flip, press, and quilt the strip. Add the second 4½-inch log to the next side in the same way.
Continue around the center in the same direction. Consistency matters more than whether you work clockwise or counterclockwise.
3. Continue with Increasing Lengths
Add the pairs of 6½-, 8½-, 10½-, and 12½-inch logs in order. Finish the round with the 14½-inch strip.
After each addition:
- check that the strip covers the batting beneath it without pulling;
- press the seam before quilting;
- quilt the new strip all the way to the edge that will be covered next;
- trim any overhanging strip end even with the existing patchwork;
- confirm that the block is still growing square.
Do not pull the fabric or batting while sewing. Let the feed dogs move the layers. Stretching either layer can cause curved seams or a block that refuses to lie flat.
4. Use an Accuracy Check as You Sew
In this construction, each 2½-inch strip should contribute 2 inches after the ¼-inch seam is sewn. Before the next log is added, the exposed log should measure about 2¼ inches from the seamline to its raw edge. The final ¼ inch will disappear into the next seam.
If the exposed width is consistently smaller than 2¼ inches, check your seam allowance and pressing. Correcting the problem early is easier than trying to recover missing width at the final round.
5. Square the Block
Once all the logs are attached and quilted, place the block on a cutting mat. Use a large square ruler, or combine two rulers carefully, to trim the block to exactly 14½ inches square.
Align the ruler with the seam lines and the visual center, not just the batting edges. Trim a small amount from each side when possible so the design stays centered.
The block will finish at 14 inches after it is joined with ¼-inch seams.
Straight-Line Quilting Ideas
The quilting is part of the block’s design, so it can be as quiet or noticeable as you choose.
Parallel Lines
Quilt lines approximately ½ inch apart across each new log. A guide bar attached to the presser foot can help keep the spacing consistent.
Stitching Near the Seams
Stitch just beside each seam rather than directly in the ditch. This secures the fabric while avoiding the difficulty of staying inside the seam groove.
Alternating Directions
Quilt one log from left to right and the next from right to left. Alternating the direction can reduce the tendency for the fabric to creep toward one side.
Decorative Lines
Gentle waves, serpentine stitches, or repeated angled lines add texture. Keep the design simple enough that each strip remains flat, and make sure the spacing follows the batting requirements.
When using contrasting thread, every change in direction will be visible. Matching or blending thread is more forgiving for a first block.
How Many Blocks Do You Need?
Because each block finishes at 14 inches, quilt-top dimensions are easy to estimate. The measurements below do not include borders.
| Block layout | Number of blocks | Approximate quilt size |
|---|---|---|
| 2 × 3 | 6 | 28 × 42 inches |
| 3 × 3 | 9 | 42 × 42 inches |
| 3 × 4 | 12 | 42 × 56 inches |
| 4 × 5 | 20 | 56 × 70 inches |
| 5 × 6 | 30 | 70 × 84 inches |
| 6 × 7 | 42 | 84 × 98 inches |
Measure your mattress or intended display space before choosing a layout. If the quilt needs more width or length, add blocks or borders. Remember that washing may cause additional shrinkage depending on the fabrics and batting.
Log Cabin Layout Ideas
Before joining anything, place all the completed blocks on a design wall or clean floor. Rotate them until the light and dark areas form the larger pattern you want.
Barn Raising
Rotate groups of blocks so the dark halves form concentric diamonds. This is one of the most recognizable Log Cabin layouts and benefits from strong value contrast.
Straight Furrows
Align the light and dark diagonals to create repeated diagonal bands across the quilt. The layout feels directional and works especially well on a rectangular quilt.
Chevron or Zigzag
Alternate the direction of adjacent blocks so the values form V shapes. This arrangement can look modern when made with a limited palette.
Sunshine and Shadow
Arrange blocks so light areas gather into one region and dark areas into another. The gradual movement of value creates more atmosphere than a rigid geometric repeat.
Take a photo of the final layout before stacking the blocks. Label each row with a removable note and stack from left to right so the arrangement does not get lost on the way to the sewing machine.
How to Join and Finish the Blocks
This method differs from quilt-as-you-go techniques that include backing on each individual block. Here, the backing is added after the quilted blocks become one top.
1. Join Blocks into Rows
Place two blocks right sides together. Align the patchwork edges and sew a ¼-inch seam through the top and batting layers. Continue joining blocks until each row is complete.
Use clips or pins to prevent the batting from shifting. A walking foot can help feed the slightly thicker layers evenly.
2. Press the Seams Open
Open the joined blocks and press the seam allowances open. Use moderate heat and check the care instructions for your batting. If the batting contains polyester, excessive heat can damage it.
Join the rows in the same way, matching the block intersections as carefully as possible. Press those seams open as well.
3. Add One Large Backing
Prepare a backing that extends several inches beyond the quilt top on every side. Smooth or press it, then baste the backing to the assembled quilted top using the method you prefer: curved safety pins, temporary basting spray used according to the manufacturer’s directions, or hand basting.
4. Secure the Backing
The earlier quilting holds the top to the batting, but it does not yet attach the backing. Secure the backing by stitching along the block-joining seams, using a narrow zigzag over those seams, or hand tying at regular intervals.
The attachment method and spacing must be sufficient for the batting. Inspect the back frequently to catch folds or puckers before they become difficult to remove.
5. Trim and Bind
After the backing is securely attached, trim the outer edges and bind the quilt using your preferred binding method. A final line of quilting near the quilt perimeter can keep the layers stable while the binding is applied.
For additional photographs of this finishing method, see Rachel’s separate guide to assembling and finishing quilt-as-you-go blocks, linked in the resources section below.
Efficient Workflow for Multiple Blocks
Making one complete block at a time is ideal while learning the method. Once the measurements and seam allowance are reliable, a small production system can save time.
- Cut and label logs by length.
- Prepare all batting squares.
- Sew the centers on several blocks.
- Press and quilt those centers.
- Add the next log to each block.
- Continue one round at a time.
Avoid sewing several unquilted rounds before returning to the machine. Each strip should still be quilted before the next strip covers its edge.
Pause to measure every few rounds. If all blocks are drifting in the same way, adjust the seam guide or pressing method before continuing the entire batch.
Troubleshooting Common Problems
The Block Is Becoming Crooked
Check that each strip is straight before sewing and that the previous edge was trimmed even. Alternate the direction of quilting lines, avoid pulling the layers, and measure the exposed log width after each round.
The Fabric Has Ripples or Puckers
The fabric may not have been smoothed completely before quilting, or the presser foot pressure may be too high. Press the strip flat after flipping it open and quilt from the secured seam toward the raw edge. A walking foot may improve feeding.
The Block Is Too Small to Trim to 14½ Inches
A seam allowance wider than ¼ inch, incomplete pressing, or heavy quilting shrinkage may be responsible. Sew a test unit and verify the seam allowance. If the block is only slightly undersized, do not trim all the other blocks smaller until you know whether they share the same measurement.
Batting Shows in a Joining Seam
The block may have been trimmed unevenly, or the ¼-inch joining seam may not fully enclose the batting edge. Sew slowly with aligned raw edges. If necessary, reinforce a small area before adding the backing, but avoid creating a bulky ridge.
The Backing Develops Tucks
Baste more closely, smooth the backing from the center outward, and check the underside after every joining-seam line. Stitching all lines in the same direction can push excess fabric across the back, so alternate direction when practical.
The Quilting Lines Look Uneven
Use the edge of the presser foot or a quilting guide instead of drawing every line. Minor differences tend to disappear in the overall texture. Consistent stitch quality matters more than perfectly identical spacing.
Frequently Asked Questions
Is this block compatible with jelly-roll strips?
Yes. Standard precut strips are usually 2½ inches wide, which matches the width used here. Measure the strips before cutting because some precuts include pinked edges, and manufacturers may measure that width differently.
Is backing included while each block is pieced?
No. In this particular method, the block is quilted to batting only. A single backing is basted and secured after all the blocks have been joined.
Can I use foundation fabric under the batting?
It is not required for the original method. Adding another layer changes the bulk and may affect stitching. Make a test block before adding foundation fabric to an entire quilt.
Can I make a different block size?
Yes, but the number or width of the logs must change. Draft the block from the center outward and include seam allowances in every piece. Make a sample and confirm the unfinished size before cutting a full quilt.
Should the strips be cut on the grain?
Whenever possible, cut strips on the straight grain for stable outer edges. Scraps can still be used, but very stretchy bias edges require gentler handling.
Do I need to backstitch every seam?
Seams that will be crossed by the next log are generally secured by that following seam. At exposed edges, a short backstitch or reduced stitch length can prevent the seam from opening during trimming and joining.
Should I prewash the fabric?
Either approach can work, but be consistent. Combining prewashed scraps with unwashed fabrics may produce uneven shrinkage. Precuts are often not prewashed because their narrow width can fray or distort.
How much fabric is needed for a full quilt?
The amount depends on the number of blocks, color plan, cutting efficiency, and whether scraps or precuts are used. Make one sample block, weigh or measure the fabric it consumes, then calculate for the chosen layout with extra fabric for trimming and mistakes. Backing and binding are calculated separately.
Free Original Tutorial and PDF
The exact construction was originally published by Rachel LaBour, formerly Rachel Hauser, at Stitched in Color. Please use the creator’s own pages for the tutorial and download:
- Read the original Quilt-As-You-Go Log Cabins tutorial
- Open the official free PDF on Google Drive
- See the original guide to assembling and finishing the blocks
The external PDF opens in Google Drive. Download availability and terms remain under the original creator’s control.
Pattern Credit
The Quilt-As-You-Go Log Cabins tutorial and its downloadable PDF were created by Rachel LaBour (formerly Rachel Hauser) of Stitched in Color and originally published in 2013. Easy Quilting Patterns does not claim authorship or ownership of that tutorial, PDF, or the creator’s photographs. All rights to the original material remain with its creator.
This Easy Quilting Patterns article is an independently written companion guide. It adds planning help, measurement checks, layout calculations, finishing guidance, and troubleshooting while directing readers to the original source for the creator’s tutorial and PDF.
Final Thoughts
A quilt-as-you-go Log Cabin is most successful when accuracy is checked throughout the process. Keep the ¼-inch seam consistent, press every strip fully open, quilt each log before adding the next, and measure the block as it grows. Those small habits make the final squaring and block assembly much easier.
Start with one sample block before preparing an entire quilt. The sample will reveal whether the batting, thread, quilting density, and seam allowance work well together and it can become a pillow front, tote-bag panel, or the first block of a larger quilt.