
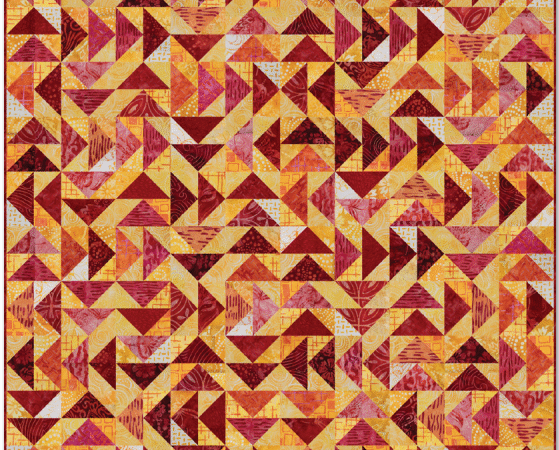
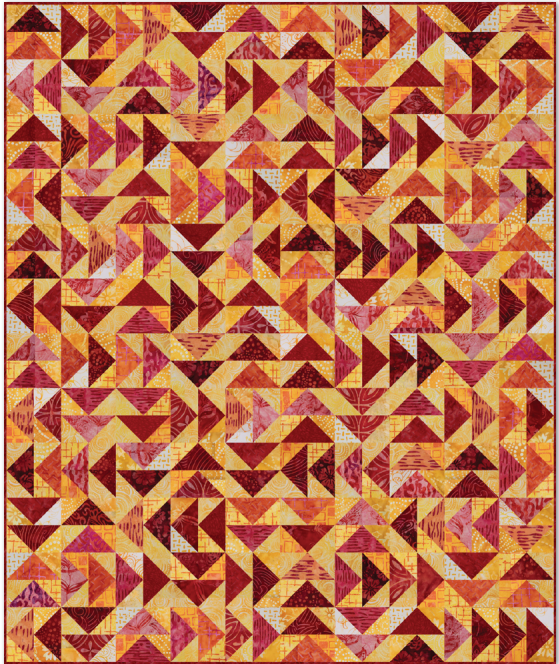
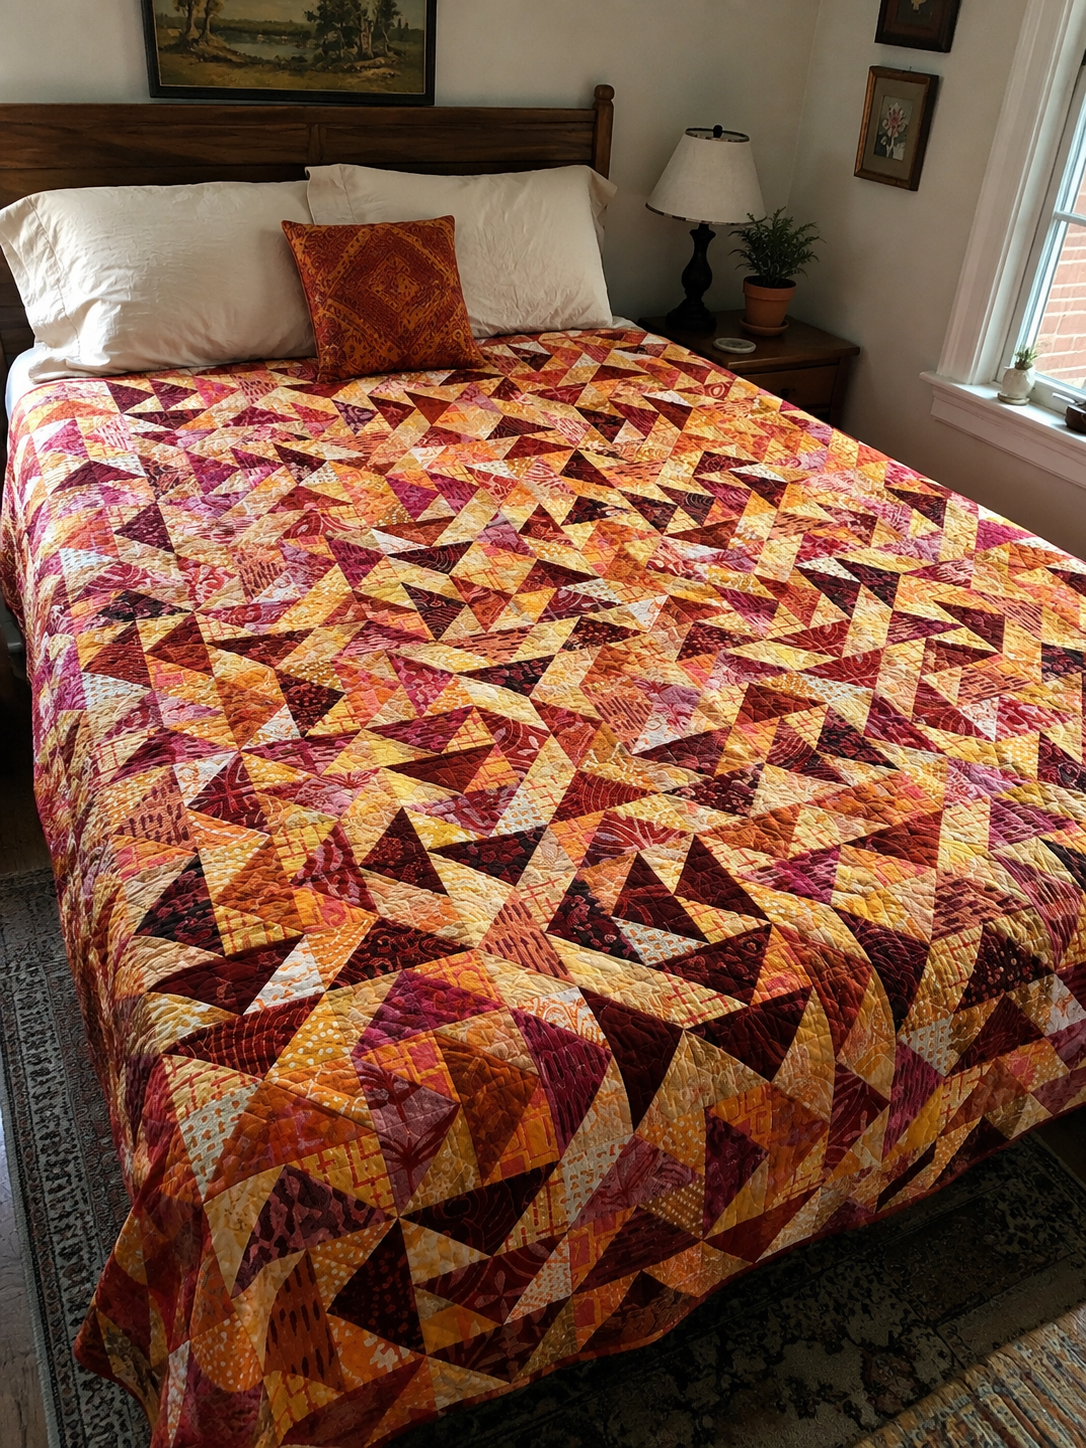
The Gooseberry Lemonade Quilt turns one classic patchwork unit into a bright, energetic throw filled with diagonal movement. Designed by the RBD Designers for Riley Blake Designs, the pattern was created to feature the Berry Lemonade Expressions Batiks collection. Its mix of golden yellow, orange, pink, raspberry, and deep red gives the quilt the feeling of a summer drink made in fabric.
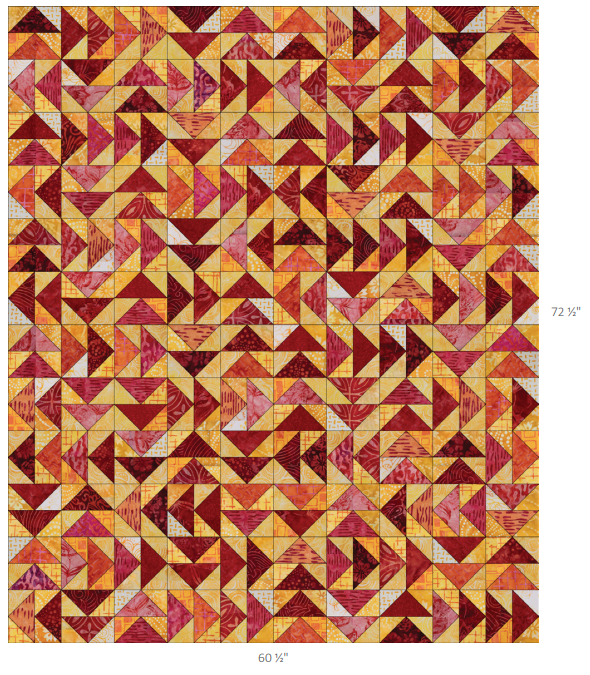
The finished quilt measures 60 1/2″ × 72 1/2″. It is large enough for a generous sofa throw, a colorful layer at the foot of a bed, or a picnic quilt, yet its construction remains easy to understand. The top contains no sashing or elaborate borders. Instead, 240 flying geese units are paired to form 120 square blocks, which are arranged in 12 rows of 10.
Simple structure does not mean careless sewing, however. Repeating the same unit many times makes small variations more noticeable. Accurate cutting, consistent seams, careful trimming, and an organized layout will make a greater difference than sewing quickly.
This independent guide explains how to plan the project, choose substitute fabrics, improve flying geese accuracy, manage the large number of units, and finish the quilt successfully. Use it with the official five-page PDF, which contains the publisher’s complete cutting directions, diagrams, and color placement chart.
Gooseberry Lemonade Quilt at a Glance
| Project detail | Official information |
|---|---|
| Pattern name | Gooseberry Lemonade |
| Quilt designer | The RBD Designers |
| Publisher | Riley Blake Designs |
| Featured collection | Berry Lemonade Expressions Batiks |
| Pattern date | May 1, 2024 |
| Finished size | 60 1/2″ × 72 1/2″ |
| Main technique | Four-at-a-time flying geese |
| Flying geese units | 240, measuring 3 1/2″ × 6 1/2″ unfinished |
| Square blocks | 120, measuring 6 1/2″ × 6 1/2″ unfinished |
| Final layout | 10 blocks across × 12 blocks down |
| Seam allowance | 1/4″ |
| Suggested level | Confident beginner |
Riley Blake Designs states that the pattern requires basic knowledge of quilting techniques and terminology. A beginner who already understands rotary cutting, quarter-inch seams, pressing, and quilt finishing should be able to follow it. The main challenge is volume: making 240 matching-size flying geese calls for patience and a reliable workflow.
Download the Official Free Pattern
Riley Blake Designs provides Gooseberry Lemonade as a free five-page pattern. The PDF includes the complete fabric list, exact cutting quantities, the four-at-a-time flying geese diagram, block construction, final layout, and finishing directions.
Visit the official Berry Lemonade collection page
Open the official Gooseberry Lemonade PDF
Before cutting, check the Riley Blake Designs pattern updates page for any revisions. The PDF itself asks makers to complete this check before starting.
Save the official file for reference or print it at normal size. This project does not rely on a full-size paper template, but the layout diagram is valuable when sorting the blocks. Keep it beside the sewing machine and mark completed groups in pencil rather than trying to remember every count.
Understanding the Design
Each flying goose places a dark or saturated triangle against two lighter side triangles. The geese are then joined in pairs to form square units. Because the two geese within a block may use different prints, the surface feels scrappy even though the structure is carefully controlled.
The original collection divides naturally into two value groups:
- light, warm colors such as cream, pale peach, yellow, and soft orange;
- darker colors such as coral, watermelon, raspberry, cranberry, and red.
That light-versus-dark relationship is more important than finding the exact original fabrics. The pale triangles create breathing room around the stronger center shapes, while the dark colors establish the directional rhythm. If all fabrics have a similar value, the flying geese will blend together and the design will lose much of its movement.
The official layout distributes the different prints across the top, but the pattern also permits makers to create their own arrangement. This flexibility makes Gooseberry Lemonade suitable for a coordinated collection, a carefully sorted stash, or a controlled scrappy palette.
Verified Fabric Requirements
Use the official PDF as the authority for shopping and cutting. The following summary helps explain how the original fabric plan works.
| Material | Official requirement |
|---|---|
| Main prints | One FQ-BL-24 Berry Lemonade fat quarter bundle |
| Additional light fabrics | 1/4 yard each of seven named light prints |
| Binding | 5/8 yard Choke Cherry, BTAP1311 |
| Backing | 2 yards wide-back fabric; Dijon, BTWB142, is suggested |
| Batting | Amount appropriate for the finished 60 1/2″ × 72 1/2″ top |
| Other supplies | Basic quilting and sewing supplies |
The 24-piece fat quarter bundle contains seven light prints and seventeen dark prints. The pattern supplements the light group with another quarter yard of each of those seven colors because the smaller side triangles are used more heavily.
The listed cuts produce slightly more than the exact number of small light squares required. Keep those extra squares until the quilt top is complete. They are useful if a square is miscut, a seam must be resewn, or one fabric combination looks too similar after assembly.
The backing recommendation assumes wide-back fabric. A two-yard cut of ordinary 42″-wide quilting cotton will not make the backing shown without additional planning and seams. If using standard-width yardage, calculate the number and orientation of backing panels from the actual top and include the extra space required for basting or longarm quilting.
Choosing Substitute Fabrics
You do not need the Berry Lemonade collection to preserve the character of the quilt. Begin by choosing a light group and a dark group with a clear value difference.
For the light group, consider low-volume cream, pale yellow, light peach, or soft pink. For the dark group, use coral, berry, red, burgundy, or plum. The colors can change completely as long as the contrast remains visible.
Possible alternatives include:
- Coastal: white, sand, pale aqua, turquoise, teal, and navy;
- Garden: ivory, soft pink, lilac, leaf green, raspberry, and plum;
- Autumn: cream, wheat, gold, rust, terracotta, and brown;
- Holiday: snow white, pale gray, red, burgundy, forest green, and charcoal;
- Modern neutral: white, oatmeal, warm gray, taupe, chocolate, and black.
Take a grayscale phone photo of the fabrics before cutting. The dark prints should remain clearly darker than the light group after the color disappears from the image. If two fabrics merge into the same gray, place them in the same value group or replace one of them.
Scale also matters. Batiks and small tonal prints are easy to use because every cut retains color and texture. Large florals can work, but some triangles may show only background while others contain a full motif. That variation can be attractive in a scrappy quilt, although it will look less uniform than the original.
Directional prints require extra thought. The four-at-a-time method rotates the resulting pieces, so words, faces, stripes, or one-way motifs may point in several directions. Choose nondirectional prints unless varied orientation is part of the design.
Before You Cut
The official pattern advises against prewashing the featured fabrics. Following one consistent preparation method helps all pieces behave similarly. If you choose to prewash substitute fabrics, prewash every fabric—including binding and backing—and allow for shrinkage before calculating usable yardage.
Press out strong folds without stretching the fabric. Square one end, then cut with a sharp rotary blade and a reliable ruler. The project depends on two square sizes, and even a small cutting error can affect four flying geese at once.
Organize the project in three stages:
- Label the small light squares A and the larger dark squares B, following the PDF.
- Separate complete four-at-a-time sets before sewing.
- Reserve space for finished geese, paired blocks, and completed rows.
Avoid piling all 240 units into one basket. Use trays, zip bags, paper plates, or small project boxes labeled by batch. A simple count sheet with 60 boxes is helpful because each four-at-a-time batch produces four geese. Crossing out one box after every completed batch makes the total much easier to control.
Make a Test Batch First
Before chain piecing the entire quilt, make one set of four flying geese from scrap fabric cut to the official dimensions. Use the same ruler, marking tool, thread, needle, and seam guide planned for the quilt.
After sewing and pressing, trim all four test units to 3 1/2″ × 6 1/2″ unfinished. Check four things:
- the top point has a full 1/4″ seam allowance above it;
- the two side points reach the lower corners;
- the unit lies flat rather than bowing;
- the unfinished measurement is correct in both directions.
If the units are too small, sewing exactly 1/4″ away from the marked diagonal may be consuming too much fabric. Move the needle slightly toward the outer edge of the square so the seam is a thread-width outside the marked line. If the units are oversized, that is usually fine because the pattern expects trimming; the important point is to leave enough fabric around every triangle.
Do not begin production until the test can be trimmed accurately. Correcting the setup once is far faster than repairing dozens of undersized units later.
Four-at-a-Time Flying Geese: The Essential Logic
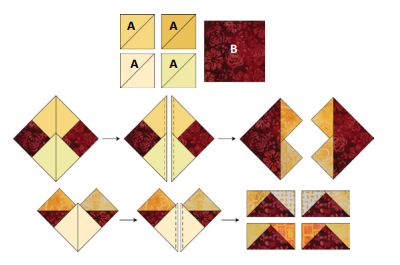
The official PDF provides the complete illustrated method. In summary, one larger dark B-square combines with four smaller light A-squares to create four matching-size flying geese.
The small squares are added in two stages. Diagonal lines guide seams on both sides, the sewn sections are cut apart, and the resulting pieces are pressed between stages. This method is efficient and avoids handling individually cut triangles, but it depends on accurate diagonal marking.
Use a fine mechanical pencil, removable fabric marker, or a creasing tool. Draw from exact corner to exact corner. A wide or crooked line changes the seam position and can make the final unit uneven.
When placing the first two A-squares on the B-square, their inner corners overlap slightly. This is normal. Match the outer raw edges and let the diagonal guidelines form one continuous route across the larger square, as shown in the official diagram.
After the first cut, press the small triangles away from the larger triangle without pulling on the bias edge. Add the remaining A-squares, sew the second set of seams, cut, and press again. The result should be four geese ready for trimming.
Trimming for Accurate Points
Trimming is the step that makes 240 units behave like a single system. Use a flying geese ruler that supports the required size or a standard quilting ruler with a clear 45-degree line.
For a 3 1/2″ × 6 1/2″ unfinished unit, preserve the quarter-inch margin above the center point. Align the diagonal seam lines before trimming the first two sides, rotate the unit, and then trim to final size. Do not center the triangle by eye alone.
Trim in short sessions. Repetitive ruler work can lead to hand fatigue and mistakes. Groups of 20 or 24 are easier to count, inspect, and store than one very large pile.
Place a small piece of painter’s tape on the ruler to highlight the correct measurement lines. The tape should not cover the cutting edge, but it can prevent accidentally trimming one batch to the wrong size.
Save several offcuts from the first group and compare later batches with the same standard. If the waste suddenly becomes much wider or narrower, stop and check the seam position before continuing.
Pairing the Geese into Square Blocks
The pattern joins two flying geese of different prints to make each 6 1/2″ × 6 1/2″ unfinished block. Before sewing, confirm that both units measure correctly and that the points have not been trimmed away.
Place the units right sides together and pin near the critical point. Sew with the intersection visible when possible. A useful technique is to sew with the unit containing the visible point on top, then guide the needle just outside the tip rather than directly through it. This preserves the point when the seam is opened.
Make a small selection of blocks before pairing every unit. Lay them side by side and inspect the fabric balance. If two dark prints are nearly identical, move one goose to another block. If one color is visually dominant, distribute it across several areas rather than forming an accidental cluster.
Press consistently. Seams pressed in alternating directions can help adjacent blocks nest, while open seams reduce bulk and make block orientation more flexible. Either approach can work, but choose the pressing plan before making all 120 blocks.
Planning the 10 × 12 Layout
The final top contains 10 blocks across and 12 blocks down. Because each block finishes at 6″ square, the patchwork finishes at 60″ × 72″ before the outer seam allowances are counted. This confirms the official unfinished top measurement of 60 1/2″ × 72 1/2″.
A design wall is ideal, but a clean floor, bed, flannel sheet, or portable design boards also work. Begin by distributing the darkest reds and strongest yellows. Then fill the spaces between them with mid-value colors.
Step back frequently or take a photo. A small phone image makes color clusters easier to notice than looking at the full layout from close range. Converting the photo to grayscale also reveals whether the lights and darks remain evenly spread.
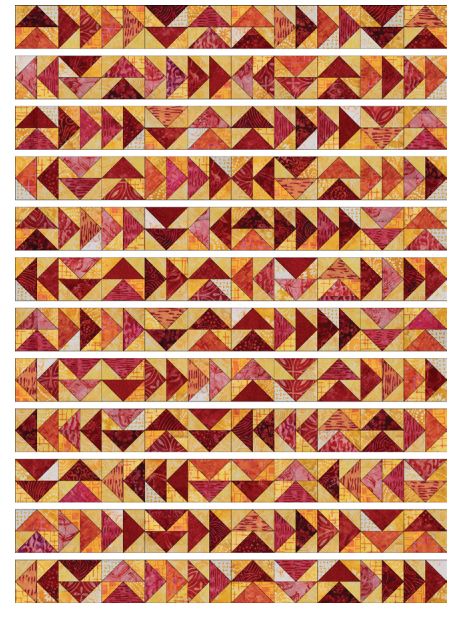
Once satisfied, label every row from 1 to 12 and mark its left edge. Stack each row from left to right, keeping a numbered label on top. Photograph the final arrangement before removing any blocks.
Sew blocks into rows, checking orientation after each addition. Then measure the rows. They should be consistent in length; a row that differs noticeably may contain a narrow seam or a rotated block. Correct it before joining the complete top.
Keeping the Quilt Top Flat
Long rows can develop waves when seams vary or pressing stretches the fabric. Support the row on the ironing surface and lift the iron rather than sliding it. Allow each section to cool before moving it.
When joining rows, match the block intersections first, then pin between them. If seams were pressed in alternating directions, nest the allowances at each intersection. If they were pressed open, use fine pins or clips to prevent shifting.
Sew one pair of rows, press, and place it back on a flat surface. Continuing in pairs—rows 1 and 2, rows 3 and 4, and so on—keeps the sections manageable. Join the pairs only after confirming their measurements.
Do not stretch a short row to fit a long one. Find the source of the difference. A few millimeters can often be eased across the entire seam, but a larger mismatch indicates inconsistent block sizes or seam allowances.
Quilting Ideas
The geometric surface supports both straight and curved quilting. Choose a design that complements the colorful fabric without hiding the flying geese.
- Straight vertical lines emphasize the 12-row structure and are manageable on a domestic machine.
- Diagonal lines echo the slopes of the geese and create a secondary diamond grid.
- In-the-ditch quilting keeps attention on the fabric but requires accurate seams.
- A gentle all-over meander softens the geometry and is forgiving for a utility quilt.
- Loops or loose waves contrast with the sharp triangle points and add playful texture.
Test thread on a fabric scrap. A warm cream or pale gold can blend across the original yellow-to-red palette, while a light neutral works well for high-contrast substitutes. Strongly contrasting thread will make every wobble visible, so reserve it for confident, intentional quilting.
Prepare backing and batting with the extra margin required by your quilting method. Longarm quilters often specify their own minimum overage, so confirm the required dimensions before cutting the backing.
Binding and Final Finish
The official pattern uses seven 2 1/2″ width-of-fabric strips cut from the 5/8-yard Choke Cherry binding fabric. The quilt perimeter is approximately 266″ before adding joining and corner allowance; seven strips from standard quilting width provide a practical margin.
Join strips with diagonal seams to distribute bulk, trim the joins, and press them open. Fold the completed strip lengthwise with wrong sides together for double-fold binding. Attach it using the method you prefer, taking care at the corners and the final join.
If the quilt top changed size during construction, calculate binding from the actual trimmed measurement rather than the pattern measurement. Add the four sides, then include at least 10″ to 12″ for corners and joining.
A final gentle wash can soften the quilt and reveal the texture of the quilting, but follow the care instructions for every fabric, batting, and thread used. Add a label with the quilt name, maker, place, and year before gifting or storing it.