
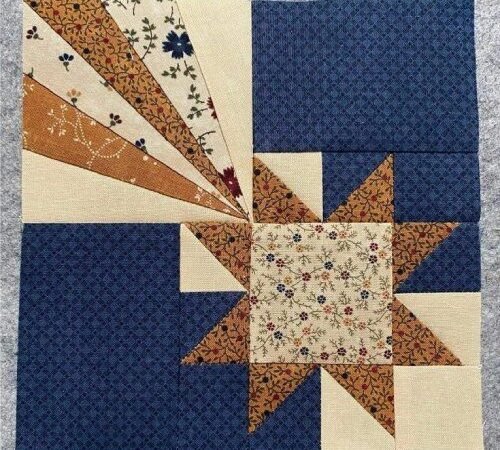
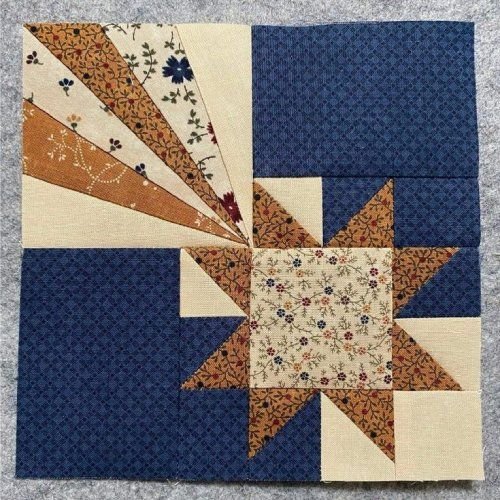
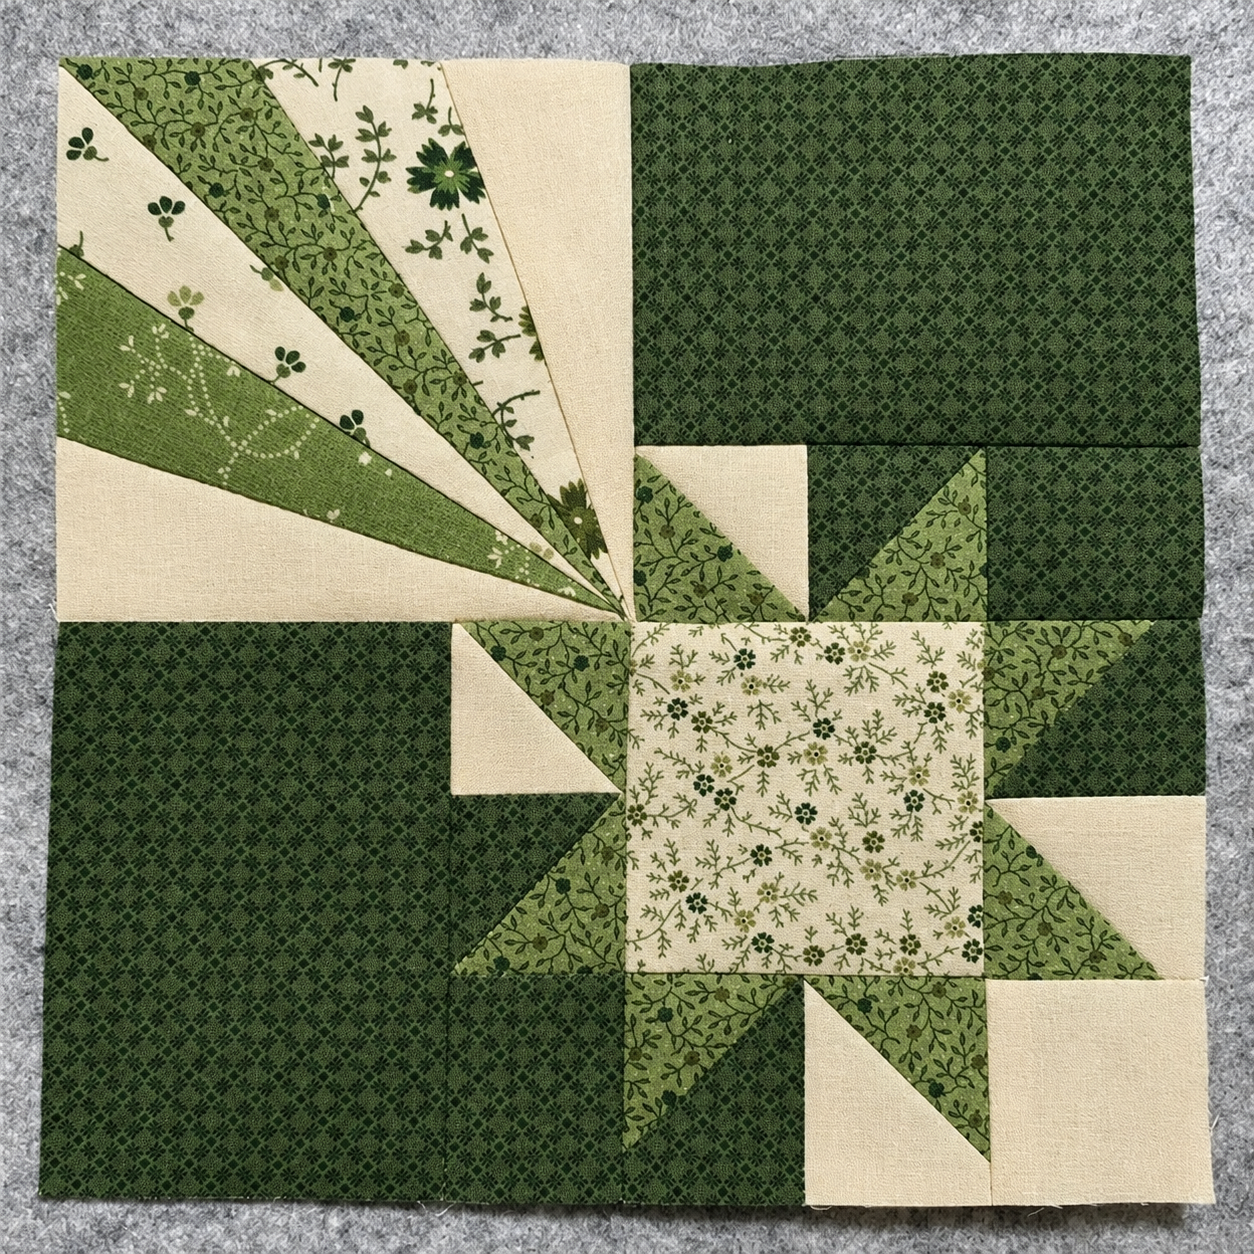
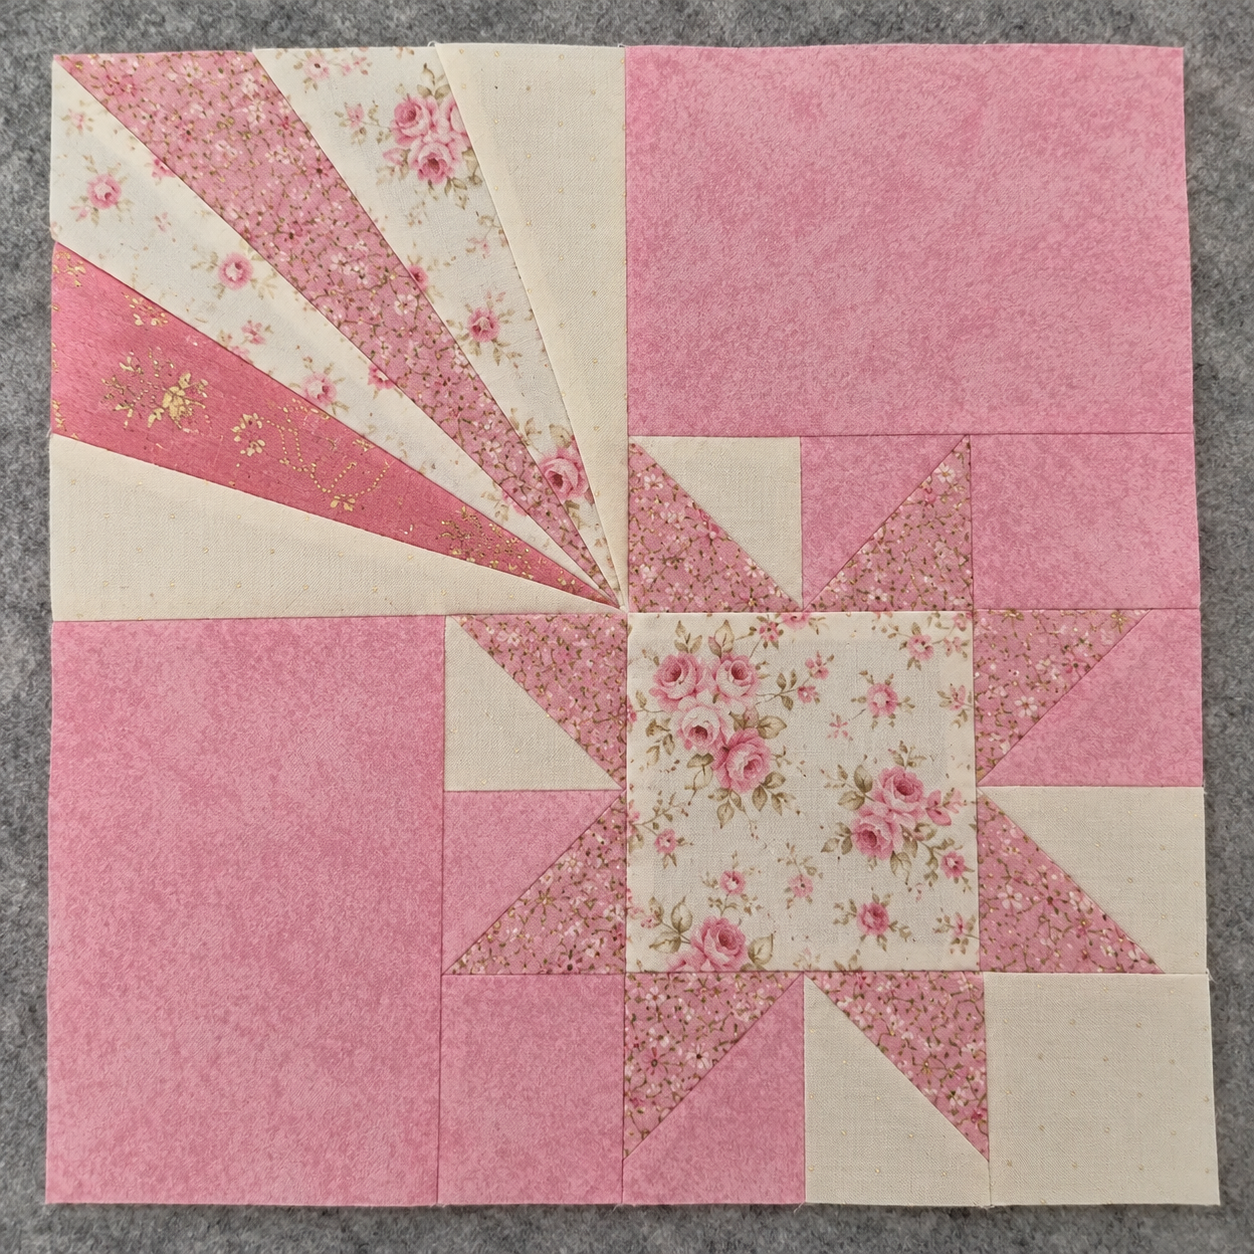
The Falling Star quilt block combines a long, angular streak with smaller geometric star shapes, creating the feeling of light moving across a night sky. Unlike a symmetrical eight-point star, this design has a clear direction and works especially well as a sampler centerpiece, wall hanging, pillow, or repeated celestial quilt.
Designed by Sarah Watts of Ruby Star Society, Falling Star was released as Group 2, Block 23 of the Moda Blockheads 5 quilt-along. The official pattern includes 6-inch and 12-inch finished blocks and uses both foundation paper piecing and traditional patchwork.
This independent companion guide does not replace Sarah’s pattern or templates. Instead, it explains how to prepare the pattern, print the FPP section correctly, organize the many labeled pieces, make accurate half-square triangles, check each unit, choose fabrics, and solve common problems. Links to the official Moda pattern and PDF appear near the end.
Pattern at a Glance
| Detail | Information |
|---|---|
| Pattern name | Falling Star |
| Designer | Sarah Watts of Ruby Star Society |
| Original series | Moda Blockheads 5, Group 2, Block 23 |
| Finished sizes | 6 inches or 12 inches |
| Unfinished sizes | 6½ inches or 12½ inches |
| Main techniques | Foundation paper piecing, HSTs, traditional piecing |
| Fabrics | Five contrasting or coordinating fabrics |
| Seam allowance | Scant ¼ inch unless the template indicates otherwise |
| Suggested skill level | Intermediate or adventurous confident beginner |
The 12-inch block is the friendlier choice for someone learning FPP. Its patches are larger, the paper lines are easier to see, and the small HST units finish at a more manageable size. The 6-inch block is attractive in a sampler but demands careful cutting, stitching, trimming, and pressing.
What Makes This Block Different?
Most of the block is traditionally pieced from squares, rectangles, and HST units. One elongated section—the falling star’s dramatic trail—is foundation paper pieced. This hybrid construction lets each technique do the work it handles best:
- FPP produces the sharp, unusual angles in the star trail;
- two-at-a-time HSTs create repeatable small triangle units;
- conventional rows and square units simplify final assembly.
The key is to treat the pattern as a group of four larger sections rather than dozens of unrelated pieces. Once the foundation-pieced section and three traditionally pieced units are complete, they fit together like a simple four-patch.
Download the Official Pattern Before Cutting
Use the official Moda PDF for the cutting chart, numbered FPP templates, fabric-placement diagram, coloring blocks, and exact illustrations. Decide whether you are making the 6-inch or 12-inch block before cutting because the dimensions are not interchangeable.
Keep the PDF open or print the instruction pages. Highlight the column for your chosen size so your eye does not accidentally move to the other measurements.
The free official resources are linked near the end of this guide.
Print the FPP Template at Actual Size
Correct printing is essential. A template reduced by even a few percent will not fit the traditionally pieced units.
- Download the PDF to your computer instead of printing from a small browser preview.
- Open it with a reliable PDF reader.
- Select the template page for the chosen block size.
- Choose Actual Size or 100% in the print dialog.
- Turn off options such as Fit, Shrink Oversized Pages, or Scale to Page.
- Print one template page first.
- Measure the one-inch test square with a quilting ruler.
The test box must measure exactly 1 × 1 inch in both directions. If it does not, change the print settings before using the template. Never enlarge or reduce only the FPP template in an attempt to create a different block size; all traditionally pieced measurements would need to be redrafted too.
Ordinary printer paper works, but lightweight foundation paper is easier to fold and remove. Whatever paper you choose, test that it feeds through the printer correctly.
Tools and Materials
Gather:
- the official Falling Star PDF;
- five quilting cottons with visible contrast;
- neutral or coordinating 50-weight thread;
- a fresh universal or quilting needle, size 70/10 or 80/12;
- sewing machine with a straight stitch;
- rotary cutter and cutting mat;
- quilting rulers, including a small square ruler;
- removable fabric marker;
- paper scissors for separating printed templates;
- fabric scissors or rotary cutter for fabric;
- postcard, template plastic, or thin folding card;
- Add-A-Quarter ruler, if available;
- glue stick suitable for fabric or a flat-head pin;
- iron, pressing surface, or seam roller.
Do not use fabric scissors to cut paper. Paper dulls a fabric blade quickly. A separate rotary blade reserved for paper is also useful.
Choose a Five-Fabric Color Plan
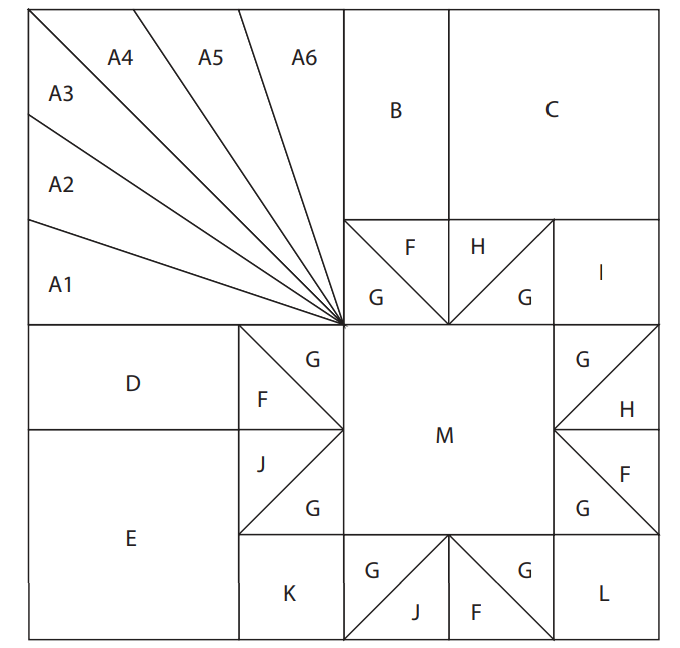
The official pattern labels five fabrics. Mark your fabrics 1 through 5 with removable notes and use the swatch boxes in the PDF. The letters A through M identify individual pieces or units; the numbers identify the fabrics. Keeping those two systems separate prevents cutting mistakes.
Night-Sky Palette
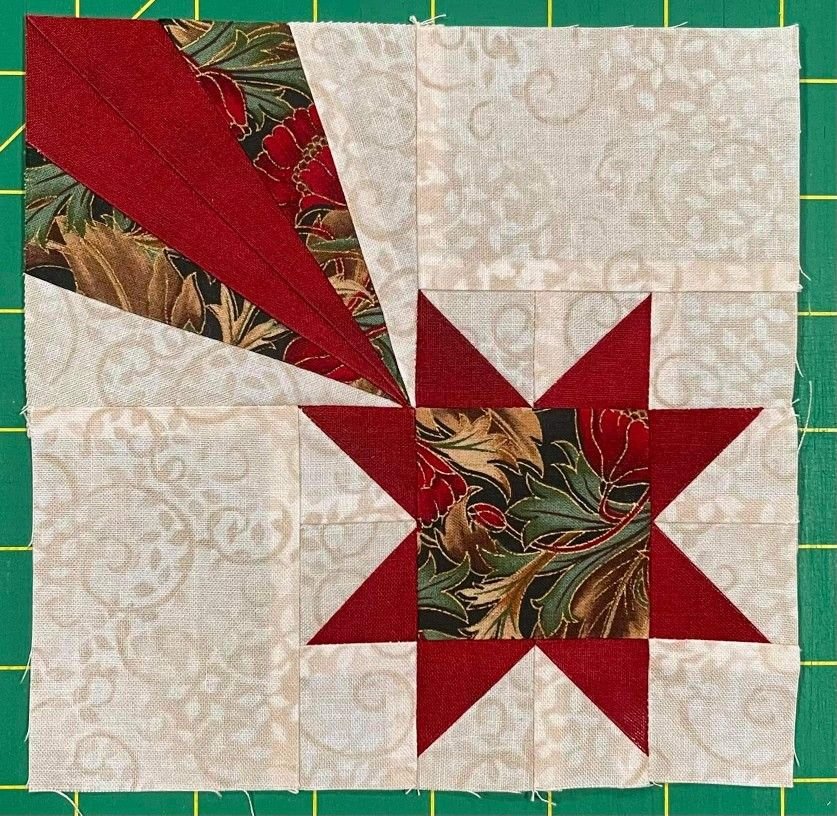
Use navy or charcoal as the sky, then select icy blue, white, gold, and violet for the star and its trail. Strong light-and-dark contrast makes the direction of the design obvious.
Modern Solids
Choose five solids with graduated values. A monochromatic range from pale aqua to deep teal creates movement without relying on prints.
Scrappy Version
Assign several scraps to each fabric role but keep their values consistent. For example, every piece assigned to Fabric 5 might be a different dark print. This preserves the pattern while increasing variety.
Low-Volume Background
Use pale low-volume prints for the background role and saturated colors for the star elements. Avoid background prints with large dark motifs that could interrupt the star’s outline.
Rainbow Trail
Progress from warm to cool colors through the FPP section. Color the planning diagram first so the HSTs and adjacent traditional units support the same direction of movement.
Photograph the fabrics in grayscale before cutting. If two important roles merge into the same gray value, replace one fabric or use a stronger contrast elsewhere.
Organize the Cutting Chart
The PDF assigns letters A through M, and several letters are subdivided within the foundation section. Cutting and sorting everything at once can feel complicated, so use a simple system:
- Circle either the 6-inch or 12-inch cutting column.
- Cut one fabric at a time.
- Label each piece immediately with its letter.
- Place the A1–A6 pieces in one group for FPP.
- Group B with C and D with E.
- Keep the HST squares F, H, J, and G together.
- Place I, K, L, and M in a final-assembly group.
Small removable notes are safer than writing directly on the right side of the fabric. If using numbered pins, keep them away from the sewing line.
The FPP rectangles are intentionally generous. Do not trim them to the printed shape before sewing. The extra fabric provides coverage after each piece is flipped over the seam.
Foundation Paper Piecing Basics
FPP can feel reversed at first because you sew on one side of the paper while the fabric grows on the other.
- The printed side of the template faces up while sewing.
- The fabric sits against the unprinted side.
- The first piece is placed wrong side against the paper.
- Every later piece is added right sides together with the previous fabric.
- Pieces are sewn in numerical order: A1, A2, A3, and so on.
- The finished fabric image is the mirror of the printed template.
Before using the cut fabrics, make a tiny practice foundation with scrap pieces. Learning the fold, trim, sew, and press rhythm on scraps can prevent recutting the actual pattern pieces.
Machine Settings for FPP
Reduce the stitch length to approximately 1.5–1.8 mm. Short stitches perforate the paper and make it easier to remove later. They also protect the seam when the paper is torn away.
Use a fresh needle and a neutral thread that blends with the fabrics. Backstitch briefly at the beginning and end of each printed seam, extending a few stitches beyond the intersection when the template requires it.
Return the stitch length to your normal piecing setting before assembling the traditionally pieced parts. Writing a note beside the machine can prevent accidentally sewing the entire block with the short FPP stitch.
Make the Foundation-Pieced A Section
The official template and diagrams control the exact placement, so keep them beside the machine.
1. Position A1
Place A1 on the unprinted side of the paper with its wrong side touching the paper. Hold the paper and fabric against a light source to confirm that the fabric extends at least ¼ inch beyond every boundary of section A1.
Secure A1 with a small amount of fabric-safe glue or a flat pin positioned away from the first seam.
2. Prepare the A1–A2 Seam
On the printed side, place the folding card along the line between A1 and A2. Fold the paper back over the card. Trim the fabric beneath to a ¼-inch seam allowance using an Add-A-Quarter ruler or a standard quilting ruler.
3. Position A2
Place A2 right sides together with A1, aligning its edge with the freshly trimmed allowance. Before sewing, test the flip: hold the future seam and fold A2 open. It must cover the entire A2 area plus at least ¼ inch beyond all outer lines.
This coverage test is one of the most valuable FPP habits. Angled pieces often appear large enough before sewing but move in an unexpected direction after they are flipped.
4. Sew and Press
Return the paper to its flat position with the printed side up. Stitch directly on the line between A1 and A2 using the shortened stitch length. Turn the work over, open A2, and press it away from the seam.
Use a dry iron or seam roller. Steam can distort lightweight paper and make the ink transfer or run.
5. Continue in Numerical Order
Repeat the same cycle for A3 through A6:
- fold the paper on the next seam line;
- trim the previous fabrics to a ¼-inch allowance;
- position the new fabric right sides together;
- test that it will cover the full numbered area after flipping;
- sew on the printed line;
- open and press.
Do not change the order. The numbering is part of the construction logic.
6. Trim the Completed Section
After all six fabrics are attached, trim the foundation unit on the outer dashed line. That dashed outline includes the ¼-inch seam allowance. Cutting on the inner finished line would make the section too small.
Remove the paper carefully after the unit is trimmed, following the designer’s sequence. Fold each paper section sharply at the stitching and tear from the outer pieces toward the center while supporting the seam with one hand.
Make the B/C and D/E Units
The block includes two traditionally pieced rectangular units:
- join B to C to create the B/C unit;
- join D to E to create the D/E unit.
Use a normal piecing stitch and a scant ¼-inch seam. Press as shown in the official diagram or in the direction that will reduce bulk in the next seam.
Check the measurements before continuing:
| Unit | For 6-inch block | For 12-inch block |
|---|---|---|
| B/C | 2½ × 3½ inches | 4½ × 6½ inches |
| D/E | 2½ × 3½ inches | 4½ × 6½ inches |
If a rectangular unit is too small, verify the seam allowance rather than trimming the matching units to the same error.
Make Eight Half-Square Triangles
The Falling Star pattern uses the two-at-a-time HST method—not stitch-and-flip.
You will make:
- four F/G HSTs;
- two H/G HSTs;
- two J/G HSTs.
1. Mark the Squares
Draw a diagonal line on the wrong side of the F, H, and J squares indicated in the official cutting chart.
2. Pair with Fabric G
Place each marked square right sides together with a G square. Align the edges and pin if necessary.
3. Sew, Cut, and Press
Sew a scant ¼-inch seam on both sides of the marked diagonal. Cut the pair apart on the drawn line and press the seams toward the darker G triangles, as directed in the pattern.
4. Trim Every HST
Trim the HSTs to:
- 1½ inches for the 6-inch block;
- 2½ inches for the 12-inch block.
Align the ruler’s 45-degree line with the diagonal seam. The seam should end exactly in two opposite corners after trimming.
Keep the three HST combinations in labeled groups. Their sizes are identical, but their colors and positions are not interchangeable.
Build the Three Traditional Square Units
The remaining patchwork becomes three square units. Each must measure:
- 3½ inches for the 6-inch block;
- 6½ inches for the 12-inch block.
Unit One
Join one F/G HST, one H/G HST, and square I into a row according to the official orientation diagram. Attach that row below the B/C rectangle.
Unit Two
Join one F/G HST, one J/G HST, and square K into a row. Attach it to the indicated side of the D/E rectangle.
Unit Three
Combine square M with the remaining F/G, H/G, and J/G units and square L according to the PDF diagram. Assemble the smaller row first, then join it to the M section.
Do not rely on color names alone while arranging these units. Follow the lettered diagram because several HSTs have similar shapes but different fabric combinations and rotations.
Measure all three square units before final assembly. They must match one another and the relevant dimensions above.
Assemble the Full Falling Star Block
Lay out the completed FPP section and the three traditional square units as shown in the official pattern. The fabric-side view is the correct reference for the final arrangement; remember that the letters in the FPP template appear reversed from the finished fabric view.
Before sewing:
- confirm that the falling trail points in the intended direction;
- compare every HST rotation with the official diagram;
- ensure that the FPP section has its full outer seam allowance;
- photograph the layout.
Join the units into two sections, nest or pin the intersections, and complete the final seam. Press carefully without stretching the angled FPP edges.
The unfinished block should measure:
- 6½ × 6½ inches for the 6-inch version;
- 12½ × 12½ inches for the 12-inch version.
When squaring, preserve a full ¼ inch beyond every point that will touch an outer seam. Removing that allowance will cut off the star points when the block is joined to another block or border.
Accuracy Checkpoints
| Stage | 6-inch version | 12-inch version |
|---|---|---|
| HSTs after trimming | 1½ inches | 2½ inches |
| B/C rectangle | 2½ × 3½ inches | 4½ × 6½ inches |
| D/E rectangle | 2½ × 3½ inches | 4½ × 6½ inches |
| Each traditional square unit | 3½ inches | 6½ inches |
| Complete unfinished block | 6½ inches | 12½ inches |
Stop and correct discrepancies at the stage where they appear. A small HST cannot be repaired accurately by stretching the final row, and an undersized FPP section should not be hidden with a narrower joining seam.
Pressing Without Distortion
The combination of paper, bias seams, and small units makes pressing important.
- Set each seam before opening it.
- Lift and lower the iron instead of pushing it across the fabric.
- Use a dry iron on the paper-pieced section.
- Press HST seams toward G as the pattern recommends.
- Use a seam roller when repeatedly moving between the machine and pressing station.
- Allow the block to cool flat before measuring.
If intersections become bulky, press selected final seams open. Use a shorter regular piecing stitch on seams that will be pressed open so they remain secure.
Troubleshooting Foundation Paper Piecing
The Fabric Does Not Cover the Entire Section
The piece was probably positioned at the wrong angle. Before sewing, test-flip every fabric around the future seam. If the seam has already been sewn, remove it carefully and reposition the piece; do not try to stretch the fabric into place.
The Finished FPP Section Is Reversed
FPP produces a mirror image of the printed template. Use the finished fabric-placement diagram, not the printed-side template, when arranging the full block.
The Paper Tears While Sewing
The stitch may be too short, the needle may be dull, or the paper may be damp from steam. Use a fresh needle, dry pressing, and a stitch length around 1.5–1.8 mm rather than an extremely tiny stitch.
The Paper Is Difficult to Remove
Fold each seam line sharply, begin with the outermost paper sections, and hold the stitches while tearing. Fine tweezers can remove small pieces without pulling the seam.
The FPP Unit Is Too Small
The most common cause is trimming on the solid finished line instead of the outer dashed seam-allowance line. Reprint the template and verify the one-inch test box before remaking the unit.
The Angled Seams Have Gaps
Start and end a few stitches beyond the printed intersection or backstitch briefly as directed. Seams that stop too early can open when the adjacent paper is removed.
Troubleshooting Traditional Piecing
HSTs Are Inconsistent
Trim every unit individually with the 45-degree ruler line on the seam. Do not assume that all two-at-a-time pairs finish identically without trimming.
Points Disappear in the Final Seam
Check that each HST diagonal reaches the corners and that ¼ inch remains beyond visible points. Pin at important intersections and sew with a consistent scant seam.
The Square Units Do Not Match
Measure the B/C and D/E rectangles before attaching their HST rows. Confirm that the HSTs were trimmed to the correct size for the chosen block.
The Complete Block Is Wavy
Avoid steam and sideways pressure on bias seams. Check for bulky folded allowances and let the block cool under a flat ruler or pressing board.
I Mixed Measurements from Both Sizes
Separate all remaining pieces and compare them with the official chart. It is safer to recut a questionable component than force a 6-inch-version piece into the 12-inch construction.
Choosing Between the 6- and 12-Inch Blocks
| Consideration | 6-inch block | 12-inch block |
|---|---|---|
| Best for | Detailed samplers and small projects | Samplers, pillows, throws, and practice |
| Piece handling | Small and less forgiving | Larger and easier to control |
| FPP learning curve | More demanding | Better first version |
| HST unfinished size | 1½ inches | 2½ inches |
| Visual effect | Delicate and intricate | Bold and graphic |
If you want both sizes in one sampler, sew the 12-inch block first. The larger version helps you understand the construction before working with the smaller pieces.
Planning a Repeating-Block Quilt
The measurements below assume blocks are joined without sashing or borders.
| Layout | Number of blocks | Using 6-inch blocks | Using 12-inch blocks |
|---|---|---|---|
| 3 × 4 | 12 | 18 × 24 inches | 36 × 48 inches |
| 4 × 5 | 20 | 24 × 30 inches | 48 × 60 inches |
| 5 × 6 | 30 | 30 × 36 inches | 60 × 72 inches |
| 6 × 8 | 48 | 36 × 48 inches | 72 × 96 inches |
Because Falling Star is directional, rotate blocks on a design wall before joining them. All trails can move in one direction, radiate from the center, form mirrored pairs, or scatter across the quilt like a meteor shower.
Sashing gives each asymmetric block more breathing room. Alternating Falling Star blocks with plain squares also creates space for decorative quilting and reduces the amount of FPP required.
Project Ideas
Sampler Block
Use the 6- or 12-inch version alongside other Moda Blockheads designs. Keep one background fabric consistent to connect blocks made by different designers.
Pillow Front
Add borders to a 12-inch block until it reaches the desired pillow size. Quilt the front before assembling the pillow cover.
Celestial Wall Hanging
Place one Falling Star block off-center and add generous dark borders. Quilt concentric arcs or scattered stars in the negative space.
Table Runner
Arrange three 12-inch blocks so their trails move across the runner. Test rotations before adding sashing and borders.
Meteor-Shower Quilt
Repeat the block in different color combinations and rotations. Use a consistent dark background so the separate stars remain part of one sky.
Quilting Ideas
- Echo the long FPP angles with parallel straight lines.
- Quilt gentle curves or swirls in the background to contrast with the sharp piecing.
- Stitch just beside the major seams to emphasize the star trail.
- Add small free-motion stars in open background areas.
- Use radiating lines that continue the movement beyond the block.
Avoid stitching directly over bulky intersections more than necessary. Test thread across all five fabrics because a color that disappears on the background may be highly visible on the star.
Frequently Asked Questions
Is Falling Star a beginner block?
It is better described as intermediate or suitable for an adventurous confident beginner. The techniques are learnable, but the block combines FPP, small HSTs, several fabric roles, and directional assembly.
Do I need a special foundation paper?
No. Standard printer paper works, although lightweight foundation paper is easier to fold and remove. Always confirm that the template prints at 100%.
Can I sew the entire block without paper piecing?
Not by simply replacing the template with standard rectangles. The A section contains unusual angles. Redrafting it for another method would require templates, seam allowances, and careful testing.
When should the paper be removed?
Follow the designer’s sequence. For this pattern, complete and trim the A foundation unit before carefully removing the paper and joining it to the traditionally pieced units.
Why are the template letters reversed in the completed block?
The printed paper is viewed from the back while sewing. The fabric side is therefore a mirror image. Use the coloring or fabric-placement diagram for the final layout.
Can I use directional fabric in the FPP section?
Yes, but it requires advance planning because the fabric flips and mirrors during construction. Test each piece with an oversized scrap before cutting the final directional print.
Can I use freezer paper?
An experienced paper piecer may adapt the pattern to a freezer-paper technique, but the official instructions use standard sew-through foundation piecing. Follow the published method for the first block.
What is the difference between HST and stitch-and-flip here?
The HSTs are made two at a time by sewing on both sides of a marked diagonal and cutting between the seams. Stitch-and-flip normally sews a smaller square to the corner of a larger patch and trims away the excess. They are different techniques.
Can I sell a quilt made from the block?
Pattern-use and commercial permissions belong to the designer and publisher. Consult the official pattern information or contact Moda/Ruby Star Society for permission questions. Giving credit does not automatically grant commercial rights.
Official Falling Star Pattern Resources
Download the pattern from Moda’s own website so the designer and publisher control the file and readers receive the official version:
- Read the official Moda Blockheads Falling Star post
- Download the official Falling Star PDF from Moda
- Browse the official Moda Blockheads 5 archive
The Moda article also includes a tutorial video and examples of completed blocks.
Pattern Credit
Falling Star was designed by Sarah Watts of Ruby Star Society for Moda Blockheads 5, Group 2, Block 23 and officially published by Moda Fabrics on June 5, 2024. The original PDF, templates, diagrams, cutting chart, written instructions, coloring pages, photographs, and branding belong to their respective creator and publisher.
Easy Quilting Patterns does not claim authorship or ownership of the Falling Star pattern or PDF. This independently written companion article adds printing guidance, FPP preparation, organizational strategies, accuracy checkpoints, troubleshooting, quilt-size planning, and project ideas while directing readers to Moda’s official pages.
Final Thoughts
Falling Star becomes much more manageable when it is divided into stages. Print and measure the template first, label every piece, complete the A foundation section in numerical order, trim all eight HSTs, verify the three square units, and only then assemble the full block.
For a first attempt, choose the 12-inch version and make a practice FPP section from scraps. The extra preparation takes only a few minutes and can prevent the most common problems: reversed fabric, incomplete coverage, an incorrectly scaled template, or a missing outer seam allowance.