
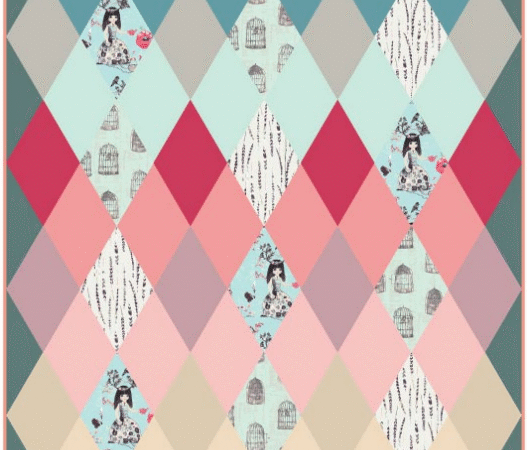
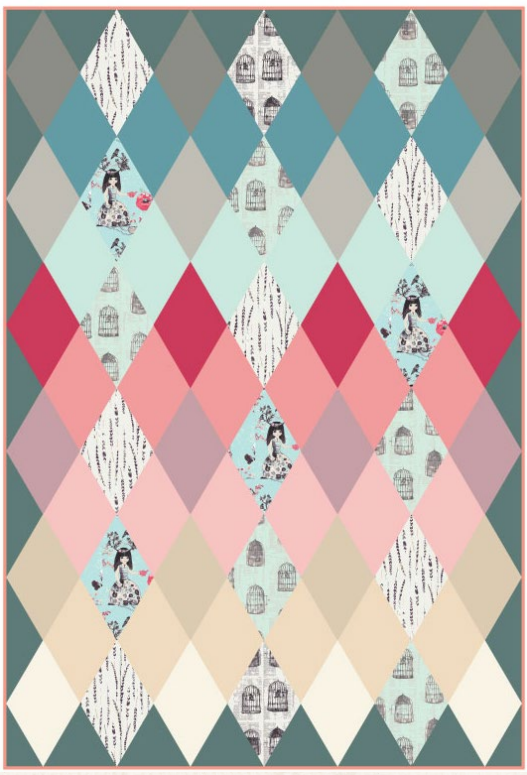
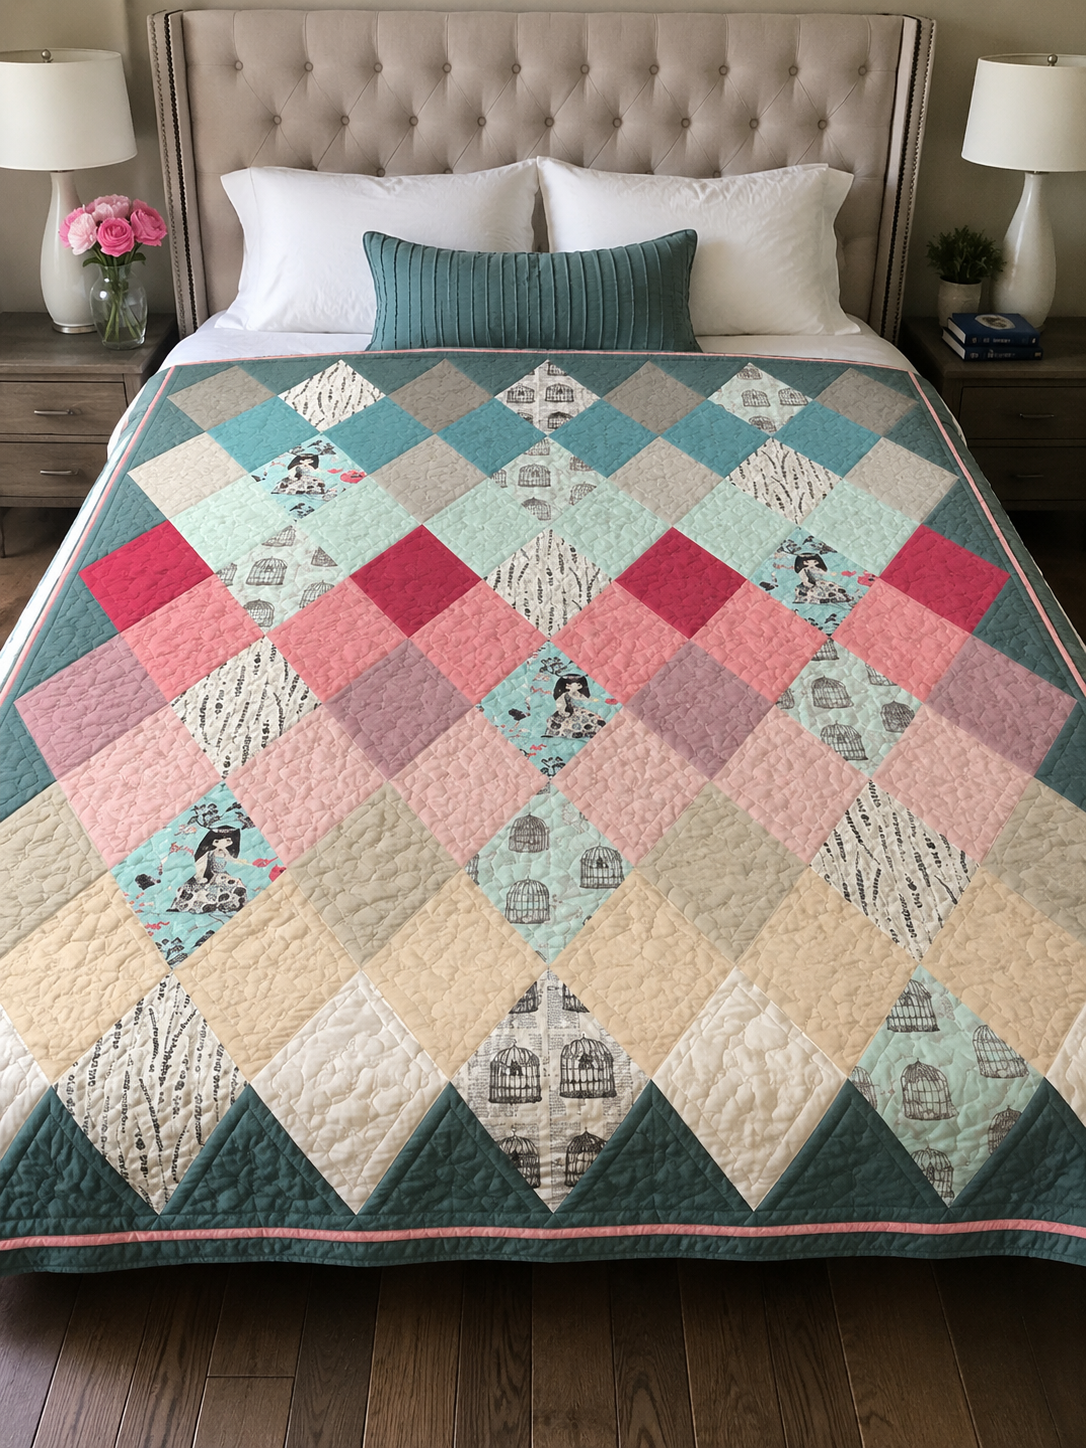
The Diamonds Suit Quilt is a modern geometric design made from rows of elongated rhombi that shift from cool blue and gray to vivid pink and soft cream. Designed by AGF Studio to feature the Wonderland collection by Katarina Roccella, the finished quilt measures approximately 49″ × 72″. It is a useful throw size, but its real appeal is the way a simple repeated shape creates a sophisticated field of color.
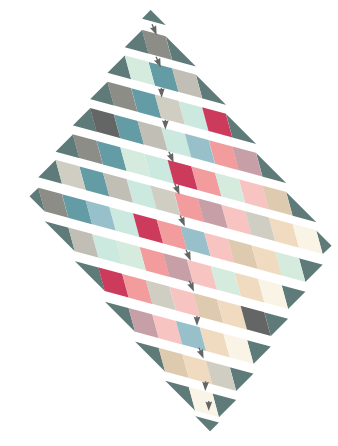
This is not a conventional block quilt. Instead of making identical square blocks, the pattern builds twelve strips of rhombi in different lengths and fabric sequences. Those strips are aligned from the center, joined into a large diamond-shaped top, and then rotated and trimmed into a rectangle. The construction is visually simple but depends on accurate templates, careful handling of bias edges, and organized fabric placement.
This independent guide explains the preparation, piecing logic, finishing choices, and an important wording inconsistency in the PDF. Use it alongside the official AGF instructions rather than as a replacement for the publisher’s template and layout diagram.
Diamonds Suit Quilt at a Glance
| Project detail | Official information |
|---|---|
| Pattern name | Diamonds Suit |
| Quilt designer | AGF Studio |
| Featured collection | Wonderland |
| Fabric collection designer | Katarina Roccella |
| Publisher | Art Gallery Fabrics / Art Gallery Quilts LLC |
| Finished size | Approximately 49″ × 72″ |
| Main shape | Elongated rhombus |
| Quilt-top structure | 12 centered strips |
| Seam allowance | ¼″ |
| Suggested backing | 3¼ yards |
| Binding fabric | ⅜ yard of Fabric Q, included in requirements |
| Recommended skill level | Intermediate |
An adventurous beginner could make this project after practicing angled seams, but it is better classified as intermediate. Rhombi do not align like ordinary squares. Their pointed ends must extend beyond neighboring pieces by the correct amount so the quarter-inch seam intersections meet cleanly.
Download the Pattern from the Original Publisher
Art Gallery Fabrics includes Diamonds Suit in its official gallery of free quilt patterns. The publisher’s six-page PDF contains the fabric chart, rhombus counts, E1 and E2 cutting diagrams, strip examples, full assembly illustration, binding instructions, and the required fold template.
Visit the official Art Gallery Fabrics free-pattern gallery
Open the official Diamonds Suit PDF
Print the template page at 100% or Actual Size. Do not choose “Fit,” “Shrink oversized pages,” or another automatic scaling option. The PDF does not show an obvious one-inch calibration box beside the template, so compare the printed page with the on-screen sheet proportions and make a paper test before cutting all the fabric.
The official PDF is copyrighted and marked “All Rights Reserved.” Linking to the publisher’s file is appropriate; downloading it and presenting a duplicate as a website-owned PDF is not necessary.
What Makes the Layout Work
The quilt’s basic unit is one tall rhombus, but the layout avoids looking repetitive. Printed Wonderland fabrics appear in selected vertical paths while Pure Elements solids move through muted teal, gray, red, pink, beige, and cream. Dark triangular shapes fill the four corners after the assembled diamond is trimmed into a rectangle.
Three design choices create the effect:
- Value movement: dark colors begin and end several rows, while lighter fabrics spread across the lower half.
- Controlled prints: whimsical Alice-inspired prints appear as accents rather than covering the entire surface.
- Centered alignment: strips of different lengths are matched at their centers, building a large symmetrical diamond even though their internal fabric order varies.
When selecting substitutes, reproduce those relationships rather than every original color. One or two focal prints, several calm solids or near-solids, and a clear dark-to-light progression will preserve the structure.
Original Fabric Requirements
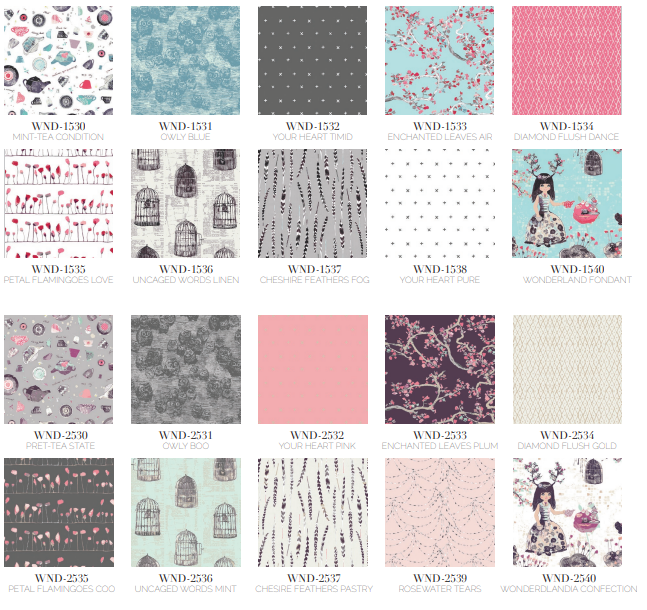
The official project uses four Wonderland prints and a broad selection of AGF Pure Elements solids. Always use the publisher’s chart for cutting; this condensed table is intended for planning and shopping.
| Fabric | Original code | Amount |
|---|---|---|
| A | WND-1536 | Fat quarter |
| B | WND-1540 | ½ yard |
| C | WND-2536 | ⅝ yard |
| D | WND-2537 | ⅝ yard |
| E | PE-452 | ⅞ yard |
| F | PE-410 | ½ yard |
| G | PE-415 | ⅝ yard |
| H | PE-431 | ½ yard |
| I | PE-451 | ⅝ yard |
| J | PE-405 | ½ yard |
| K | PE-411 | ⅝ yard |
| L | PE-425 | ½ yard |
| M | PE-420 | ⅝ yard |
| N | PE-432 | ½ yard |
| O | PE-436 | ⅝ yard |
| P | PE-408 | ½ yard |
| Q | PE-450 | ⅜ yard, including binding |
| Backing | PE-425 suggested | 3¼ yards |
The pattern calls for a different number of rhombi from fabrics A-P, with Fabric E supplying the largest group. Fabric Q is reserved for binding rather than the patchwork field.
Buy extra when prewashing, using fabric narrower than standard quilting cotton, changing the binding method, or matching directional motifs. Several Wonderland prints have recognizable figures, cages, feathers, or text-like marks. Decide whether those motifs should remain upright before tracing the first rhombus.
 Combination of fabrics
Choosing a New Color Palette
Begin with the value map. Take a grayscale photo of the original cover or make a small pencil sketch. Notice where the darkest corner triangles sit, where saturated pink crosses the center, and how cream quiets the lower portion.
A successful substitute palette could use navy, denim, aqua, coral, blush, sand, and white. For a dramatic version, try charcoal, emerald, gold, burgundy, and ivory. A scrappy layout can work, but sort scraps into value families so the large diamond remains visible.
Avoid using sixteen equally busy prints. The rhombi already create many seam lines, and every print competes for attention. Let solid, tonal, or small-scale fabrics occupy most positions, then place the strongest focal prints along a few deliberate paths.
Directional prints require special planning. A rhombus may rotate when the strips are assembled and the top is turned 45 degrees. Trace arrows on a paper layout to preview which motifs will point up, sideways, or down in the finished rectangle.
Preparing and Testing the Rhombus Template
The final PDF page supplies a half-template labeled “Cut on Fold.” Fold template paper along the indicated line, place the printed half on the fold, and cut the outline to produce a full symmetrical rhombus. Transfer it to template plastic or sturdy card if it will be used repeatedly.
Before cutting project fabric:
- Confirm the PDF was printed at Actual Size.
- Cut one complete paper template on the fold.
- Open it and verify that both halves mirror each other.
- Trace several test rhombi on scrap fabric.
- Sew three together using a true quarter-inch seam.
- Press and check whether the intersection lies flat and the points meet predictably.
Add alignment marks a quarter inch from each corner of the reusable template. These dots show where seam lines should cross. When two rhombi are placed right sides together, their pointed ends will not align flush. Offset them until the quarter-inch intersection marks meet.
Trace with a fine mechanical pencil or removable fabric marker. A thick line changes the effective size of every piece. Cut consistently on the same side of the line, and keep the template oriented with the grain arrow you have chosen.
Cutting and Labeling the Fabric
The official chart calls for rhombi from fabrics A through P. Cut one fabric group at a time and place the pieces in a labeled bag before moving to the next color. Include both the letter and a visual description, such as “C – mint cages.”
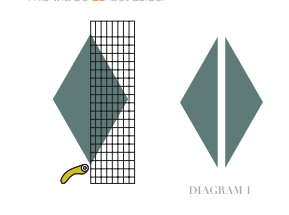
Fabric E needs special attention because all thirteen E rhombi are cut in half to create edge pieces. Five are divided in one direction to become E1 pieces; the remaining eight are divided in the other direction to become E2 pieces. Keep E1 and E2 in separate envelopes.
Do not stack uncut rhombi carelessly. Their long edges may contain bias grain and can stretch while being moved. A tray, piece of cardboard, or small design board keeps the points supported.
If using a rotary cutter around the template, rotate the cutting mat instead of walking around the table or twisting the fabric. Replace a dull blade before starting; repeated pressure can distort the shape.
Important E1 and E2 Wording Inconsistency
The construction text says to cut five Fabric E rhombi in half vertically for E1. It then says to cut the remaining eight “this time vertically” for E2. However, the two accompanying diagrams clearly show different directions: Diagram 1 uses a vertical division, while Diagram 2 shows a horizontal division across the rhombus.
This appears to be a duplicated word in the written instruction, but this article cannot issue an official correction. Before cutting Fabric E:
- compare Diagrams 1 and 2 on the official page;
- examine how the triangular E pieces finish the ends of the twelve strips;
- make paper copies of E1 and E2 first; and
- contact Art Gallery Fabrics if confirmation is needed.
The current article should retain this warning because Fabric E is central to the construction and a wrong cut could consume much of the ⅞-yard allocation.
Sewing Rhombi Without Losing the Points
Set the machine for an accurate quarter-inch seam and shorten the stitch length slightly. Mark the quarter-inch intersection on the wrong side of the first few pieces. Place two rhombi right sides together, offsetting their pointed tips until the marked seam intersections touch.
Begin and end exactly at those intersections when possible. After sewing, open the pair and check that the long edges continue in a straight line. If the unit bends, the offset was incorrect or the fabric stretched.
The PDF demonstrates one short strip in the order E2-F-E1 and a longer example in the order E2-C-G-H-E1. These examples teach the method, but the cover/layout illustration supplies the placement for the remaining strips. The finished quilt uses twelve strips with different lengths and internal sequences.
Press seams open as directed. An open seam distributes bulk where many angled pieces meet and makes center alignment easier. Use a dry iron or minimal steam, lift rather than slide, and let each strip cool flat before moving it.
Building and Joining the Twelve Strips
Lay out every strip before sewing. Add a numbered paper label and an arrow indicating the future top. Take a quick reference photo, then stack the pieces in sewing order.
After constructing the twelve strips, place them on a design wall in the large diamond arrangement. The strips have different lengths, so the outside edges will step inward toward the top and bottom. Match each strip from its center, as the PDF directs, rather than aligning one end.
Mark the midpoint of every strip with a pin in the seam allowance. Join neighboring strips at the midpoint first, then match the remaining intersections outward. Sew a few inches, check the points on the right side, and continue only when the alignment is satisfactory.
When many rhombi meet, perfect points matter less than a flat top and a continuous overall rhythm. Correct obvious gaps or shifted intersections, but avoid repeatedly unpicking fragile bias edges for a difference that will not be visible at normal viewing distance.
Rotating and Squaring the Quilt Top
Once all twelve rows are joined, the patchwork resembles a large diamond. The pattern then rotates the top 45 degrees and trims it into an approximately 49″ × 72″ rectangle.
This is the stage where patience protects many hours of piecing. Place the top on the largest flat surface available. Mark the vertical and horizontal centerlines with removable tape or thread. Decide how much of the four corner colors should remain and check that opposite sides are parallel.
If possible, stay-stitch just inside the intended trimming line before making the final cut. The new perimeter crosses many bias edges, and stay-stitching helps prevent stretching. Use several rulers and painter’s tape to preview the rectangle before cutting anything away.
Measure both diagonals after trimming. Equal diagonals indicate a square rectangle. Small variation is normal in a large textile, but a visible lean should be corrected before quilting.
Backing, Quilting, and Binding
The suggested backing is 3¼ yards. Plan the backing from the actual quilt-top measurement and the overage required by your basting or longarm method. A top near 49″ × 72″ normally needs more than one standard fabric width, so sketch the seam placement before cutting the yardage.
Straight-line quilting echoes the geometry beautifully. Lines can follow the long rhombus edges, cross through the center of each shape, or form a larger diamond grid. A gentle all-over curve provides contrast and is forgiving where points do not meet perfectly. Begin near the center and work outward to control shifting.
The original pattern uses Fabric Q for a 1½″-wide binding strip totaling approximately 252″. Its instructions describe turning the remaining raw edge under on the back, which is a narrow single-fold-style finish rather than the common 2¼″ or 2½″ double-fold binding used by many quilters today.
Follow the official method if using the stated ⅜ yard. If you prefer wider double-fold binding, recalculate the number and width of strips and buy additional Fabric Q if necessary. Do not assume the original ⅜ yard will support every alternative binding method.
Troubleshooting Common Problems
The rhombus row curves
Check the offset at each seam intersection and reduce pressure while pressing. Bias edges may have stretched. Let the row cool flat and compare it with the paper layout before adding more pieces.
Points are cut off
The seam intersection may not have been placed a quarter inch from the raw edge. Mark the dots on a test set and sew through them. Preserve those seam allowances when squaring the top.
The centers do not align between strips
Find and pin the midpoint of both strips first. Work outward in both directions. Do not align the top ends because the rows intentionally have different lengths.
E1 and E2 shapes look identical
Revisit the two official diagrams. One group is divided vertically and the other horizontally in the illustrations, despite the repeated word “vertically” in the text. Test the layout with paper before recutting fabric.
The assembled top stretches while trimming
Support the entire top, avoid hanging it from one corner, and stay-stitch inside the trimming line. Move rulers rather than dragging the quilt across the table.
The binding yardage seems insufficient
Confirm whether you are following the original narrow binding method. A wider double-fold binding consumes more fabric and requires a new yardage calculation.
Construction Checklist
Before cutting:
- Download the official six-page PDF.
- Print the fold template at Actual Size.
- Make a paper and scrap-fabric test.
- Label fabrics A-Q and identify directional prints.
- Review the E1/E2 inconsistency and diagrams.
Before joining strips:
- Twelve strips are numbered and oriented.
- Seam allowances are accurate and pressed open.
- Each strip lies flat without a curve.
- Midpoints are marked for centered alignment.
Before finishing:
- The rotated top is balanced before trimming.
- Bias edges are supported or stay-stitched.
- The top measures close to 49″ × 72″.
- Backing and batting include working overage.
- The binding method has been chosen before Fabric Q is cut.
Frequently Asked Questions
Who designed the Diamonds Suit Quilt?
AGF Studio designed the quilt. It features Wonderland fabrics designed by Katarina Roccella. The quilt design and fabric collection therefore require separate credits.
Is the pattern free?
Yes. Art Gallery Fabrics currently lists Diamonds Suit in its official free quilt-pattern gallery and provides the six-page PDF without charge.
Is this a beginner pattern?
The PDF does not display a formal skill rating, but intermediate is a reasonable recommendation because the project uses repeated rhombi, offset angled seams, centered rows, a large bias-edged top, and a fold template.
Can I use a 60-degree diamond ruler?
Only if it produces exactly the same shape and size as the official template. “Diamond” and “rhombus” rulers come in different angles and proportions. Compare the ruler directly with an Actual Size printout before cutting.
Can I use charm squares or jelly-roll strips?
Not directly. The template is larger and differently shaped than standard precuts. Some fat quarters may work for individual fabric groups, but verify the official piece counts and template dimensions first.
Must I use Wonderland fabrics?
No. Preserve value contrast, control busy prints, and plan directional motifs. Solids and tonal fabrics make the large diamond structure easier to see.
Why does the pattern cut Fabric E in two ways?
The E1 and E2 halves finish different ends of the variable-length strips. The written wording repeats “vertically,” but the diagrams show a vertical cut for one group and a horizontal cut for the other. Confirm with the publisher if uncertain.
Can I use standard double-fold binding?
Yes, but recalculate the fabric. The original ⅜-yard requirement accompanies a narrow 1½″ binding method, so a 2¼″ or 2½″ double-fold version may require more yardage.
Final Thoughts
Diamonds Suit creates a strong modern composition from one repeated template. Its success comes from accurate angled seams, controlled value placement, and patient center alignment rather than complicated block construction.
Make the template test, label every strip, protect the bias edges, and preview the 49″ × 72″ rectangle before trimming. Most importantly, compare the E1 and E2 diagrams instead of relying only on the duplicated wording. With those checks in place, the pattern becomes an engaging study in color, rhythm, and geometric piecing.
Pattern Credit
Diamonds Suit was designed by AGF Studio and features the Wonderland fabric collection by Katarina Roccella. The pattern, template, diagrams, quilt artwork, and fabric images belong to Art Gallery Fabrics, Art Gallery Quilts LLC, and their respective creators.
This article is an independent educational companion and is not affiliated with or endorsed by Art Gallery Fabrics. Download the complete instructions from the official AGF free-pattern gallery or open the publisher’s PDF.