

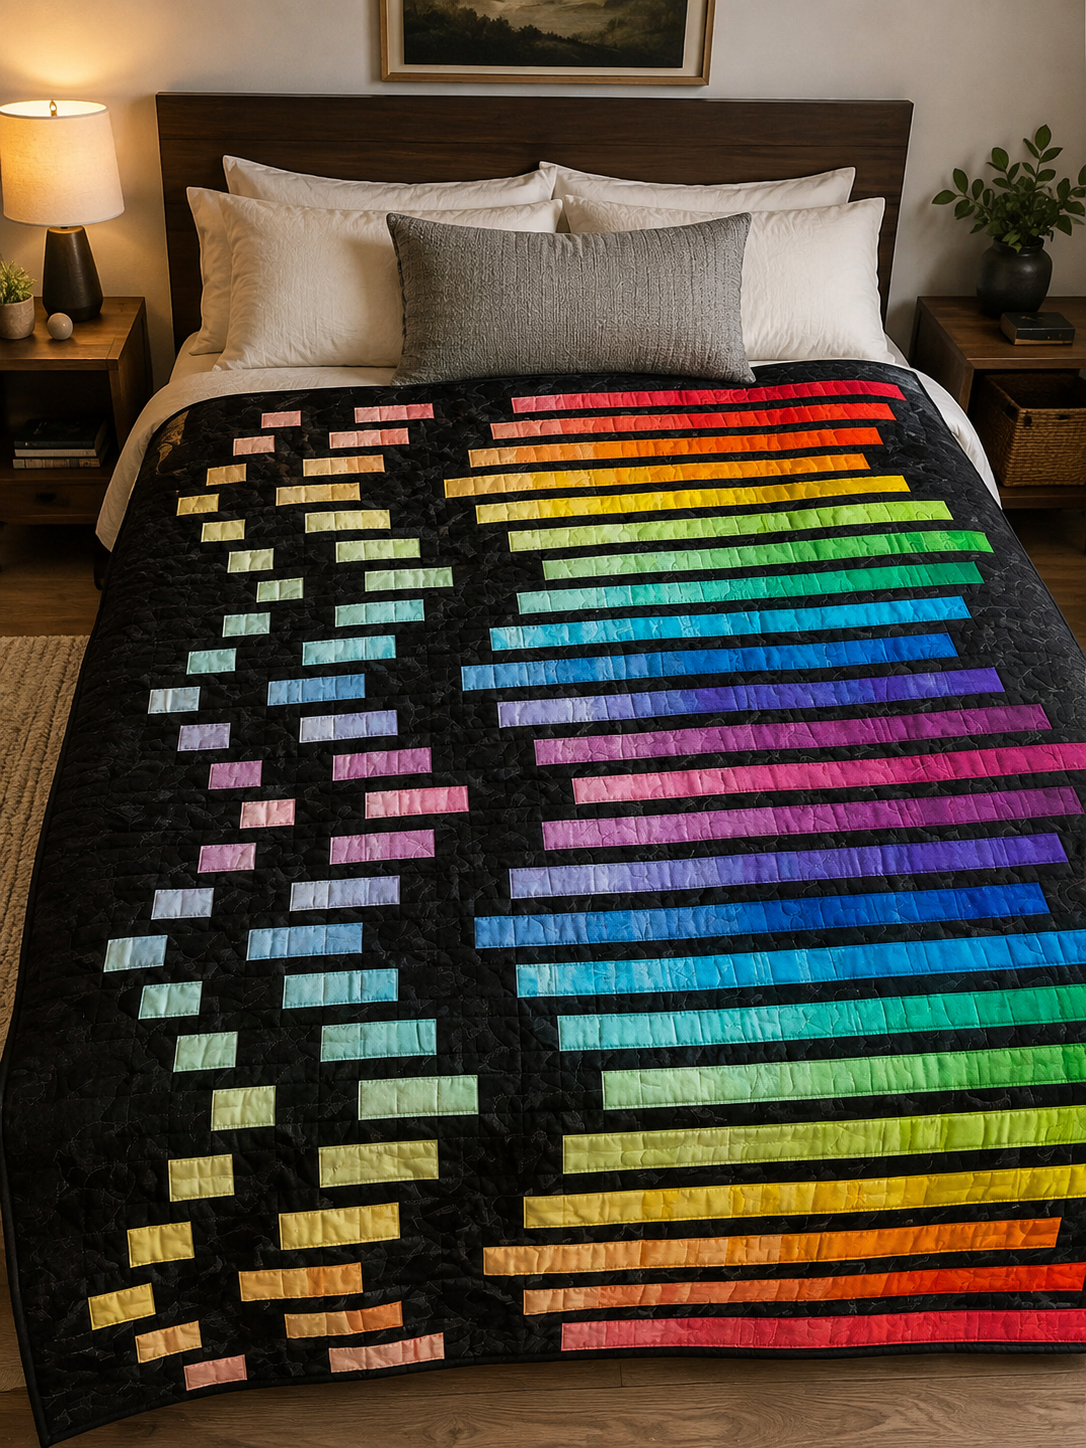
The Dart quilt pattern transforms twenty-five colorful 2 1/2-inch strips into a tall field of staggered horizontal bars. Designed by Ariga Wilson for Robert Kaufman Fabrics, the quilt finishes at 59 x 78 inches and is rated beginner. The featured version pairs an Artisan Batiks: Gradiance Roll Up with a deep Licorice batik, allowing the colors to glow against a nearly black background.
The piecing is based on rectangles rather than triangles or templates, but the visual effect depends on planning. Three pieces cut from each selected color must remain together. Their position shifts from row to row, and twenty-four narrow sashing strips keep the twenty-five pieced rows separated. A small labeling mistake can interrupt the gradient even when every seam is accurate.
This independently written guide explains the row structure, color planning, cutting risks, pressing, assembly, and troubleshooting that are only briefly covered in the pattern. Use it as a companion to the official Robert Kaufman PDF, which contains the complete cutting list and row-by-row placement diagram.
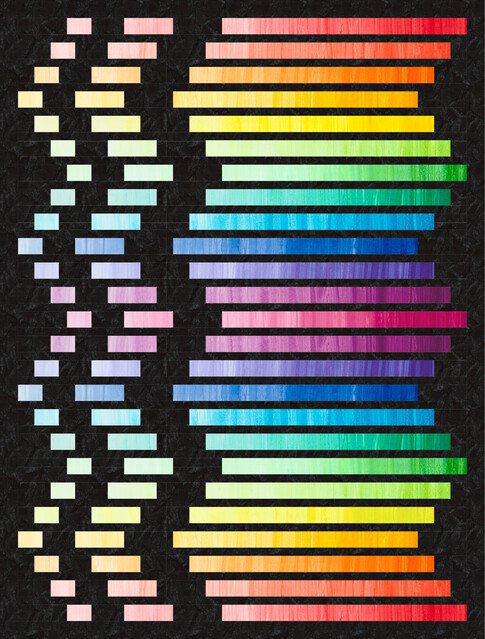
Dart quilt at a glance
| Detail | Official pattern information |
|---|---|
| Pattern name | Dart |
| Designer | Ariga Wilson for RK |
| Publisher | Robert Kaufman Fabrics |
| Featured collection | Artisan Batiks: Gradiance |
| Finished size | 59 x 78 inches |
| Difficulty | Beginner |
| Main method | Horizontal bar rows separated by narrow sashing |
| Color rows | 25 |
| Sashing rows | 24 |
| Precut requirement | One Gradiance Roll Up; select 25 strips |
| Background | AMD-7000-182 Licorice |
| Binding | Eight 2 1/2-inch width-of-fabric strips |
| Pattern copyright | 2024 Robert Kaufman; individual use only, not for resale |
The official title is simply Dart. The wording “AB Gradiance” seen in the PDF filename refers to the Artisan Batiks: Gradiance version of the design; it is not a separate construction method.
Download the official free pattern
Use these publisher links for the complete instructions and the most reliable current file:
- Dart pattern page at Robert Kaufman Fabrics
- Open the official Dart – Artisan Batiks: Gradiance PDF
- View the Artisan Batiks: Gradiance collection
The PDF has four pages and is dated 2024. It states that the pattern is for individual use, may not be reproduced without express permission, and is not for resale. Download your working copy directly from Robert Kaufman and send other quilters to the official pattern page rather than uploading or distributing the file yourself.
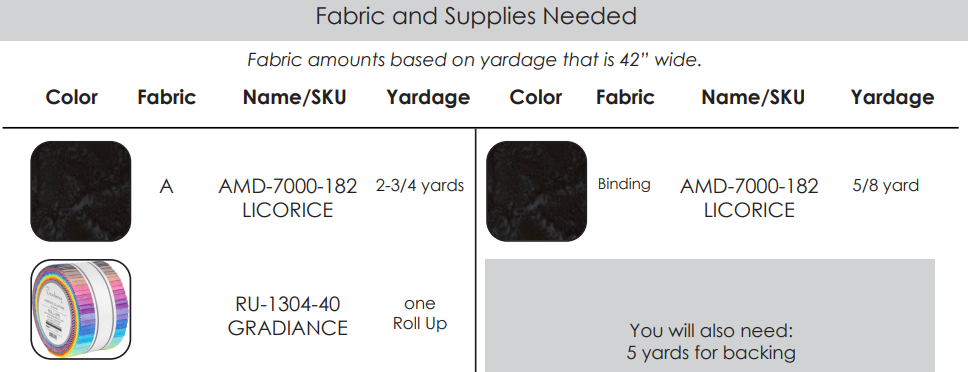
Materials in the Gradiance version
| Material | Official amount | Purpose |
|---|---|---|
| AMD-7000-182 Licorice, Fabric A | 2 3/4 yards | Row spacers, sashing, and outer borders |
| RU-1304-40 Gradiance Roll Up | One Roll Up | Select 25 colorful strips for the pieced bars |
| AMD-7000-182 Licorice, binding | 5/8 yard | Eight binding strips |
| Backing fabric | 5 yards | Pieced quilt back |
The Licorice fabric is an Artisan Batiks: Prisma Dyes tonal, not a flat black solid. A solid can be substituted, but it will produce a cleaner and less textured background than the original.
The top and binding quantities are listed separately. If you want one continuous cut of the same Licorice fabric for both, the mathematical total is 3 3/8 yards. Buying a little more is sensible if you prewash yardage, need extra squaring room, or want spare fabric for repairs and a hanging sleeve.
Batting is not listed in the supply table. Choose a piece that extends beyond the quilt top on every side and confirm required overage with your longarm quilter. The five-yard backing allowance assumes ordinary quilting-width fabric; directional designs or pattern matching may require additional yardage.
Important binding correction
The official 2024 PDF specifies eight 2 1/2-inch width-of-fabric binding strips. Some online summaries describe 2 1/4-inch strips, but that is not the width given in this edition. Follow the publisher’s file unless you intentionally recalculate the binding for your preferred method.
Understand the anatomy of one row
Every color row starts with three pieces from the same Roll Up strip:
- one short 3 1/2-inch segment;
- one medium 6 1/2-inch segment;
- one long 30 1/2-inch segment.
Those colored segments are separated by one 4 1/2-inch and one 6 1/2-inch Fabric A rectangle. After the five pieces are joined with quarter-inch seams, the incomplete row should measure approximately 49 1/2 inches long and 2 1/2 inches high. This measurement is derived from the published cut sizes and gives you a useful checkpoint before the end pieces are added.
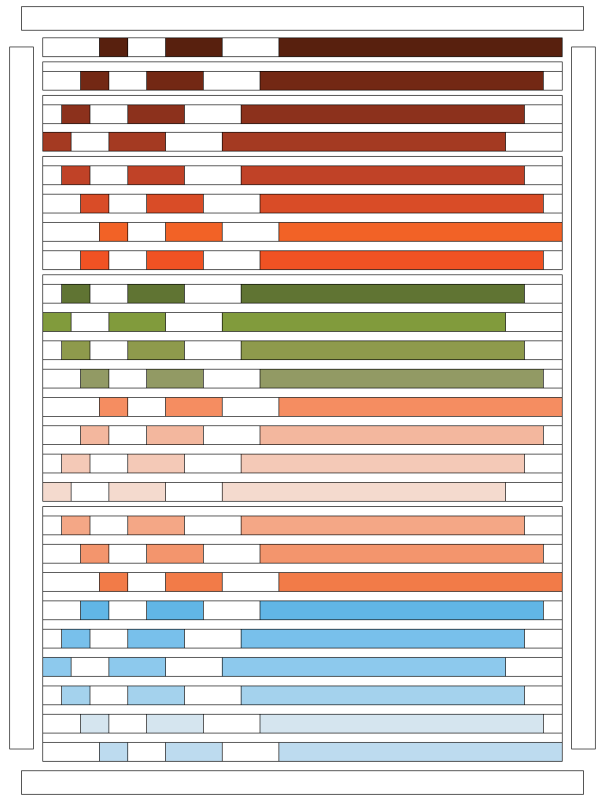
The official layout then extends each row to 55 1/2 inches. Depending on its position, a row receives either one 6 1/2-inch Fabric A rectangle at one end or a combination of one 4 1/2-inch rectangle and one 2 1/2-inch square at opposite ends. The placement shifts the colored bars sideways and creates the darting motion.
Do not attach the end pieces from memory. Page 3 identifies their size and whether they belong on the left, right, or both ends of every row. Number the rows before completing them.
Select and organize the twenty-five colors
The Gradiance version depends on a deliberate color journey. The original arrangement moves through warm reds, oranges, greens, pale peach tones, brighter coral, blues, and light blue. You do not have to copy that sequence, but your order should look intentional from the top edge to the bottom.
Unroll the bundle without separating the manufacturer’s labels until you understand its range. Place potential strips on a design wall or large table and choose twenty-five. Photograph the final order, then label them 1 through 25 with removable paper tabs.
Before cutting a selected strip, prepare three matching labels with the same row number. Attach them immediately to the 3 1/2-, 6 1/2-, and 30 1/2-inch pieces. The three segments from Row 7, for example, must stay together even after the cut pieces are stacked.
The remaining Roll Up strips are not required for the top. Save them for a scrappy binding, matching pillow, label, or future project, but do not mix them into the selected twenty-five after cutting begins.
Check strip length before cutting
The three required colored segments total 40 1/2 inches from each selected strip. That leaves little room for uneven ends on a strip whose usable length is close to 42 inches. Measure all twenty-five strips before cutting and square the ends as sparingly as possible.
Do not prewash a Roll Up. Narrow precuts can shrink, twist, and fray enough to lose the length required for the 30 1/2-inch segment. If you prefer prewashed fabric, use yardage and cut fresh 2 1/2-inch width-of-fabric strips after washing.
Cut the 30 1/2-inch piece first, then the 6 1/2- and 3 1/2-inch pieces, checking the remaining length before each cut. Use a fresh rotary blade and keep the strip relaxed on the mat; stretching a batik strip while measuring can create a short piece after it recovers.
The Fabric A cutting plan is tight
Fabric A supplies many small rectangles, sixteen squares, the long sashing, and all four borders. The pattern assumes fabric at least 42 inches wide. The 2 3/4-yard requirement also leaves limited room across the length of the yardage after the required 2 1/2- and 1 1/2-inch strips are cut.
Measure the actual usable width after removing selvages. If the fabric is narrower than 42 inches, was prewashed, or has a visibly skewed grain, consider buying additional yardage before cutting. Square only as much as necessary and keep the border strips separate from the small pieces.
The twenty-four sashing strips finish at 55 1/2 inches long and are pieced from thirty-two 1 1/2-inch width-of-fabric strips. This is an efficient, low-waste plan. Avoid diagonal joining seams, which consume more length than simple end-to-end seams. Measure the usable WOF and plan the extensions before joining all thirty-two strips into an uncontrolled chain.
A practical approach is to reserve twenty-four full-width strips as the main sashing lengths and use the remaining eight to cut extensions. Join, press open, and trim each sashing strip to the official length. If your usable width is exactly the minimum, there will be almost no spare length, so test the plan with one strip first.
Prepare an accurate sewing setup
The PDF specifies a 1/4-inch seam allowance unless otherwise noted. Test your machine with scrap strips cut to the same 2 1/2-inch width. Sew several pieces end to end, press them, and calculate whether the finished length matches the expected seam take-up.
The general instruction is to press seam allowances open. The row assembly is a stated exception: press those seams toward the darker fabric. In the original palette, the Licorice background is normally darker than the Gradiance colors, so the allowances tend to sit behind the dark bars.
If you substitute a pale background, “toward the darker fabric” may point toward the colored segment instead. Follow the value relationship in your actual fabrics. Use a dry iron or minimal steam and lift rather than drag; long horizontal units can easily stretch.
Useful tools include a long acrylic ruler, a fresh blade, numbered clips, a design wall, a seam gauge, fine pins, and a tape measure longer than the quilt width. A portable board for each row prevents the small end pieces from migrating between labels.
Assemble one test row first
Choose a middle row rather than the very first or last color. Lay out its three matching Gradiance pieces with the two Fabric A separators exactly like the Step 1 diagram. Confirm the sequence before sewing.
Join the pieces one seam at a time. Press toward the darker fabric, allow the row to cool, and measure it. The incomplete core should be straight, 2 1/2 inches high, and about 49 1/2 inches long. If it is short, inspect the seam allowance and confirm the three colored pieces were cut accurately. If it waves, reduce handling and review the pressing technique.
Only after this test passes should you chain piece the other twenty-four cores. Chain piecing is efficient, but keep the units in numerical order. A long thread chain containing several unmarked colorways is easy to reverse.
Complete the staggered row ends
Arrange all twenty-five incomplete rows in the order shown on page 3. Add the specified Fabric A piece or pieces to the ends, but do not sew immediately. First confirm that each long colored bar shifts in the intended direction and that the shorter colored bars form the smaller repeating path.
The completed rows should all measure 55 1/2 x 2 1/2 inches unfinished. Stack them in order with Row 1 on top, or hang them on a numbered design wall. Sew a small numbered scrap to the seam allowance if paper labels tend to fall off.
Photograph the complete arrangement in color and grayscale. The color image reveals an accidental row swap, while grayscale helps you see whether the long bars remain distinct from Fabric A. Correct the layout before adding sashing.
Join the rows and sashing without distortion
There are twenty-five pieced rows and twenty-four sashing strips. A sashing strip belongs between every adjacent pair, with no sashing above the first row or below the twenty-fifth row. All should be 55 1/2 inches long before assembly.
Mark the center and quarter points on both a row and its sashing. Match those marks, then pin or clip between them. The narrow sashing should not be stretched to fit. If two pieces differ, remeasure and correct the source rather than forcing the edges together.
Robert Kaufman’s useful assembly tip is to sew rows and sashing into pairs, then combine those pairs into progressively larger sections. This distributes the bulk and is easier to control than adding every new row to one increasingly heavy quilt center.
Keep the top orientation visible throughout. After every few seams, hang the section vertically and compare it with the diagram. The gradient should travel in the planned order, and the small and medium bars should remain on the correct side.
From the published strip sizes, the completed center should be approximately 55 1/2 x 74 1/2 inches unfinished. That calculated checkpoint also agrees with the side-border length. Measure through the center rather than along a potentially stretched outer edge.
Add the outer border
The border is cut from Fabric A at 2 1/2 inches wide. The official pattern uses two 74 1/2-inch side borders followed by two 59 1/2-inch top and bottom borders.
Measure the quilt center vertically in three places. If it matches the published 74 1/2-inch length, attach the precut side borders. Fold each border and side edge into quarters, match those points, and distribute the fabric evenly. Press toward the border as instructed.
After the sides are attached, the top should be approximately 59 1/2 inches wide unfinished. Add the top and bottom borders using the same measured method. The completed top should be approximately 59 1/2 x 78 1/2 inches unfinished, which becomes the stated 59 x 78 inches after the binding seam allowance is used.
Do not stretch a border to make it reach. Wavy borders are usually caused by measuring the outside edge, cutting paired borders to different lengths, or feeding one layer faster than the other.
Substituting your own gradient strips
A commercial Gradiance Roll Up is convenient but not essential. You can use twenty-five 2 1/2-inch width-of-fabric strips cut from yardage, provided each one has at least 40 1/2 inches of usable length.
Fat quarters are generally unsuitable for the colored bars because the longest piece is 30 1/2 inches. Fat eighths and ordinary scraps may work only if they contain that uninterrupted length. Do not piece the long colored segment unless you deliberately want an extra seam in every bar.
Possible palette plans include:
- one hue progressing from pale to dark and back again;
- warm colors above cool colors;
- a sunrise sequence from navy through violet, coral, gold, and cream;
- seasonal greens and reds on a charcoal background;
- low-volume neutrals on an indigo or deep brown background;
- twenty-five solids arranged as a controlled color wheel.
Contrast matters more than the exact palette. Place a sample strip on Fabric A and view it from several feet away. Very dark colors may disappear into Licorice, while pale colors appear wider and more prominent. Use this visual weight intentionally.
Backing, quilting, and binding
The pattern calls for five yards of backing. Plan the seam direction around your quilting method and any directional print. Remove selvages before joining backing panels, use a generous seam allowance, and press the backing seam open to reduce bulk.
Horizontal quilting lines can emphasize the bar structure, but avoid stitching exactly in every ditch if minor alignment differences would become more visible. Gentle waves running across the width create contrast with the straight piecing. A subtle edge-to-edge texture lets the gradient remain the focus.
Echo quilting inside the long bars can strengthen their movement. If using contrasting thread, test it on Licorice and the lightest strip because the same color behaves very differently on both. A dark neutral or soft variegated thread may blend more evenly than pure black or white.
For binding, cut the official eight 2 1/2-inch strips from the separate 5/8-yard Licorice quantity. Join them with diagonal seams, press those allowances open, and fold the binding in half lengthwise. Because the binding matches the background and border, it creates a quiet frame rather than a new color line.
Troubleshooting common problems
The three pieces from one color were mixed with another row
Return to the original strip labels and compare the batik texture, not just the hue. Similar neighboring colors may have subtle differences. Re-create the three-piece group before sewing the row.
A Roll Up strip is too short
Do not shorten the 30 1/2-inch segment. Replace that strip with another full-length strip from the bundle or cut a substitute from yardage. Confirm all remaining strips before continuing.
The incomplete row is shorter than 49 1/2 inches
Check the cut lengths and quarter-inch seam setting. Four joining seams remove a total of two inches from the five raw pieces. An overly deep seam repeated four times can create a visible shortage.
Completed rows do not measure 55 1/2 inches
Verify the end-piece combination shown for that specific row. Some use one 6 1/2-inch end rectangle; others use a 4 1/2-inch rectangle and a 2 1/2-inch square on opposite ends. Also check whether the core was assembled in the correct order.
The color sequence looks abrupt
Rearrange the twenty-five rows before adding sashing. Photograph them in grayscale and color, then move transitional hues between strong jumps. The construction does not require the manufacturer’s original sequence.
Sashing seams create bumps
Press the pieced-row seams toward the darker fabric as directed, but press the long row-to-sashing seams open under the general instruction. Use a seam roller or iron carefully where several seam ends meet the border.
The quilt center bows
Measure all rows and sashing before joining. Match centers and quarter points. Sew balanced sections rather than attaching every strip to one side of the same growing panel, and support the weight at the machine.
A practical sewing schedule
- Session 1: read the official PDF, select twenty-five colors, photograph the sequence, and label Rows 1-25.
- Session 2: measure every selected strip and cut the three matching segments from each.
- Session 3: cut Fabric A by purpose, keeping sashing, borders, row spacers, and binding separate.
- Session 4: sew one test-row core, verify 49 1/2 inches, and complete it to 55 1/2 inches.
- Session 5: chain piece the remaining row cores without changing their numerical order.
- Session 6: add the correct end pieces and inspect all twenty-five completed rows on a design wall.
- Session 7: piece and trim the twenty-four sashing strips.
- Session 8: join rows and sashing in balanced sections, then verify the center measurement.
- Session 9: add the measured border, prepare the backing, quilt, and bind.
Keep a short project note with the selected row order, machine seam setting, and actual measurements. It is much easier to resume accurately after a pause when those decisions are recorded.
Is the PDF owned by Easy Quilting Patterns?
No. The pattern and PDF belong to Robert Kaufman and are subject to the publisher’s stated usage restrictions. This article is an independent companion that links to the official source.
Final checklist before cutting
- Open the pattern from the official Robert Kaufman page.
- Confirm that you are using the 2024 four-page Gradiance edition.
- Select and number twenty-five strips before separating them.
- Measure at least 40 1/2 inches of usable length on every selected strip.
- Keep the three segments from each color together.
- Reserve Fabric A pieces by row, sashing, and border purpose.
- Test the quarter-inch seam on one row core.
- Check the incomplete core at approximately 49 1/2 inches.
- Follow page 3 for every left and right end piece.
- Check all completed rows at 55 1/2 inches.
- Join rows and sashing in balanced sections.
- Use the official 2 1/2-inch binding width.
- Credit Ariga Wilson and Robert Kaufman Fabrics when sharing the project.
Dart is simple in shape but disciplined in layout. Number the colors, protect the three-piece sets, test one row, and measure the long sashing before assembly. Those habits preserve the flowing gradient and make this Roll Up-friendly quilt far more relaxing to sew.
Pattern credits
Dart was designed by Ariga Wilson for Robert Kaufman Fabrics and this version features the Artisan Batiks: Gradiance collection. The official pattern is copyright 2024 Robert Kaufman and is provided for individual use only; it may not be reproduced without the publisher’s express permission and is not for resale. All pattern instructions, diagrams, quilt images, fabric artwork, collection names, and trademarks remain the property of their respective rights holders. Easy Quilting Patterns is not affiliated with or endorsed by Robert Kaufman Fabrics. This independently written article provides additional planning, accuracy, and troubleshooting guidance and directs readers to the official pattern.