
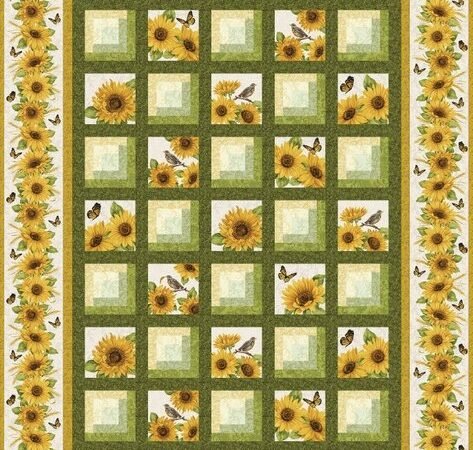
The quilt commonly described online as the Accent on Sunflowers quilt pattern is officially titled Snappy Sunflowers. Designed by Jackie Robinson of Animas Quilts to showcase the Accent on Sunflowers collection for Benartex, this lap quilt finishes at 55 x 70 inches.
The design alternates seventeen fussy-cut sunflower squares with eighteen light log cabin blocks. Deep green sashing organizes the thirty-five blocks into five vertical columns, a narrow gold border frames the center, and a directional sunflower stripe creates the wide mitered outer border.
This independently written companion explains the pattern’s correct name, block math, measurement checkpoints, vertical-row construction, and mitered-border preparation. Use it beside the credited PDF, which contains the designer’s exact cutting list and diagrams.
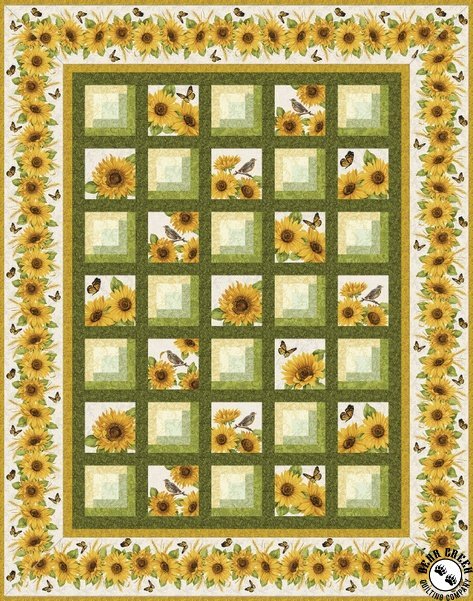
Snappy Sunflowers at a glance
| Detail | Pattern information |
|---|---|
| Official pattern name | Snappy Sunflowers |
| Featured collection | Accent on Sunflowers |
| Designer | Jackie Robinson, Animas Quilts |
| Fabric company | Benartex |
| Finished size | 55 x 70 inches |
| Pieced blocks | 18 log cabin-style blocks |
| Fussy-cut blocks | 17 sunflower panel squares |
| Block size | 6 1/2 inches unfinished |
| Layout | Five vertical columns of seven blocks |
| Sashing | 2-inch cut width; 1 1/2-inch finished width |
| Inner border | 1 1/2-inch cut width; 1-inch finished width |
| Outer border | 7 1/2-inch centered stripe with mitered corners |
| Binding | Seven 2 1/2-inch WOF strips |
Calling the project “Accent on Sunflowers” is understandable because that name appears prominently with the fabrics. However, credits and headings should identify the quilt as Snappy Sunflowers featuring Accent on Sunflowers. This distinction avoids turning the fabric collection’s name into an incorrect pattern title.
Pattern source and credited PDF
The official fabric collection page is available from Benartex: Accent on Sunflowers. The pattern PDF currently attached to this article is titled Snappy Sunflowers and credits Jackie Robinson of Animas Quilts, Benartex, and the cover-quilt maker.
The publisher’s active collection page should be checked for current information. The PDF link above should remain public only if the site can document that this copy was lawfully obtained and may be redistributed. It must never be described as a pattern created or owned by Easy Quilting Patterns.
Materials in the featured quilt
| Fabric | SKU | Amount | Use |
|---|---|---|---|
| Accent on Sunflowers Panel | 10211-55 | 3 panels | Seventeen fussy-cut squares |
| Celery Accent Scroll | 10215-04 | 1/4 yard | Log cabin centers |
| Butter Accent Scroll | 10215-03 | 1/4 yard | First round of logs |
| Light Green Napa Swirl | 1225-43 | 1/4 yard | Second round of logs |
| Light Yellow Napa Swirl | 1225-33 | 1/4 yard | Third round of logs |
| Medium Green Livingston | 10216-42 | 3/8 yard | Final round of logs |
| Forest Butterfly Fields | 10217-44 | 1 yard | Short and long sashing |
| Gold Butterfly Fields | 10217-34 | 7/8 yard | Inner border and binding |
| Accent on Sunflowers Stripe | 10212-55 | 2 1/8 yards | Wide mitered outer border |
| Backing | Quilter’s choice | 3 5/8 yards | Quilt back |
The old article lists batting at 55 x 70 inches, exactly the finished top size. That provides no extra material for basting or quilting. Use batting larger than the top on every side. A practical starting size is at least 63 x 78 inches, but confirm the required overage with your longarm quilter before cutting.
Start with the quarter-inch seam test
This project repeats small one-inch finished logs around eighteen center squares. A tiny seam error grows each time another strip is added. The pattern therefore begins with a useful calibration test.
Cut two accurate 1 1/2 x 3-inch rectangles and sew them together along their long edges. Press the seam as you plan to press the quilt blocks. The unit should measure exactly 2 1/2 inches across. If it is wider or narrower, adjust the needle position or seam guide and repeat the test.
Use a short stitch length that holds securely without making unpicking impossible. Press with an up-and-down motion and avoid pulling the narrow strips. A dry iron and a tailor’s clapper can help set seams without distorting the block.
Cut and organize the log cabin pieces
Each pieced block begins with a 2 1/2-inch Celery square. The four colored rounds are built with paired strips that become one inch wide after sewing.
For all eighteen blocks, prepare:
- eighteen 2 1/2-inch Celery squares;
- eighteen Butter strips at 1 1/2 x 2 1/2 inches and eighteen at 1 1/2 x 3 1/2 inches;
- eighteen Light Green strips at 1 1/2 x 3 1/2 inches and eighteen at 1 1/2 x 4 1/2 inches;
- eighteen Light Yellow strips at 1 1/2 x 4 1/2 inches and eighteen at 1 1/2 x 5 1/2 inches;
- eighteen Medium Green strips at 1 1/2 x 5 1/2 inches and eighteen at 1 1/2 x 6 1/2 inches.
The equal 3 1/2-inch strips in Butter and Light Green are easy to mix. Keep every color and length in a labeled tray. A simple index card reading “color – size – step” prevents an accidental round from being sewn in the wrong place.
Cut one sample set first. Continue with the remaining pieces only after its measurements are correct.
Build one log cabin block step by step
The block grows in a consistent path around the Celery center.
- Sew the 1 1/2 x 2 1/2-inch Butter strip to the left side of the Celery square. Press toward Butter. The unit should measure 3 1/2 x 2 1/2 inches.
- Add the 1 1/2 x 3 1/2-inch Butter strip across the top. Press toward the new strip. The unit should now be 3 1/2 inches square.
- Add the 1 1/2 x 3 1/2-inch Light Green strip to the right, followed by the 1 1/2 x 4 1/2-inch Light Green strip across the bottom. The block should measure 4 1/2 inches square.
- Add the 1 1/2 x 4 1/2-inch Light Yellow strip to the left, then the 1 1/2 x 5 1/2-inch Light Yellow strip across the top. The block should measure 5 1/2 inches square.
- Add the 1 1/2 x 5 1/2-inch Medium Green strip to the right and the 1 1/2 x 6 1/2-inch Medium Green strip across the bottom. The completed block should measure 6 1/2 inches square unfinished.
The block is directional because each round begins on a specific side. Rotate the sample so it matches the PDF diagram, then keep it beside the machine as a reference. Do not alternate the starting side between blocks unless deliberately redesigning the layout.
Measure after every completed round. If a 4 1/2-inch checkpoint is missed, correcting the next strip length will not repair the seam error underneath. Square the block only when enough fabric remains to preserve the intended one-inch finished log widths.
Once the sample is accurate, chain-piece all eighteen blocks by step. Complete the first Butter strip on every center, press the batch, then add the next strip. This is faster and more consistent than finishing one block at a time.
Fussy cut seventeen panel squares
The pattern calls for three Accent on Sunflowers panels and seventeen 6 1/2-inch squares. The goal is to feature sunflower and butterfly motifs attractively rather than cutting every square at the same distance from a selvage.
Press each panel from the wrong side and inspect the printed images. Use a transparent 6 1/2-inch ruler or a paper window with a 6 1/2-inch opening. Move the window across each motif until the focal flower has balanced space around it.
Consider the quarter-inch seam allowance that will disappear on all four sides. A petal or butterfly placed directly against the raw edge may be cut off after assembly. Mark promising crops first, count all seventeen, and only then begin cutting.
Printed panels are not always perfectly square to the grain. Prioritize a visually upright motif while maintaining a true 6 1/2-inch square. Do not trim panel squares smaller to correct a skewed print; they must match the pieced blocks.
Lay the seventeen squares beside the eighteen log cabin blocks. Check variety before committing them to vertical columns. Spread similar sunflower views and butterfly positions so the eye travels through the quilt instead of stopping at a cluster of repeated motifs.
Understand the 18-plus-17 block math
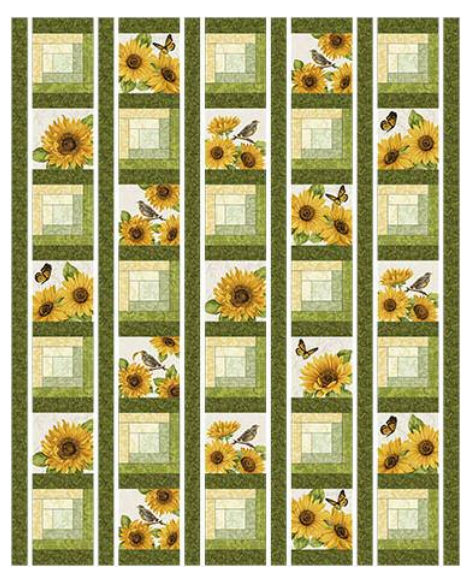
The different quantities are intentional. Five vertical columns each contain seven 6 1/2-inch blocks, for thirty-five block positions total.
Columns 1, 3, and 5 begin and end with a log cabin block. Each of those columns uses four pieced blocks and three panel squares. Columns 2 and 4 begin and end with a panel square, using three pieced blocks and four panel squares.
The totals are therefore:
- three odd-numbered columns x four log cabin blocks = twelve;
- two even-numbered columns x three log cabin blocks = six;
- twelve plus six = eighteen log cabin blocks;
- three odd-numbered columns x three panel squares = nine;
- two even-numbered columns x four panel squares = eight;
- nine plus eight = seventeen panel squares.
This alternating arrangement produces the checkerboard rhythm seen in the finished quilt. No block is missing, and an eighteenth panel square should not be added.
Prepare the Forest sashing
Forest Butterfly Fields separates the blocks and forms the deep green framework. The cutting plan ultimately supplies forty 2 x 6 1/2-inch short sashing pieces and six 2 x 54 1/2-inch long vertical sashing strips.
Each seven-block column needs eight short pieces: one at the top, one at the bottom, and one between every neighboring pair of blocks. Five columns multiplied by eight pieces equals forty.
The six long strips sit at both outer sides and in the four spaces between the five completed columns. Because 54 1/2 inches exceeds ordinary WOF, these strips must be pieced from the listed WOF cuts. Stagger joining seams when possible and press them open to reduce bulk.
Label the long strips separately from unused yardage. Accidentally subcutting them into short pieces is an expensive mistake because the one-yard Forest allowance has a specific cutting plan.
Sew accurate mitered outer borders
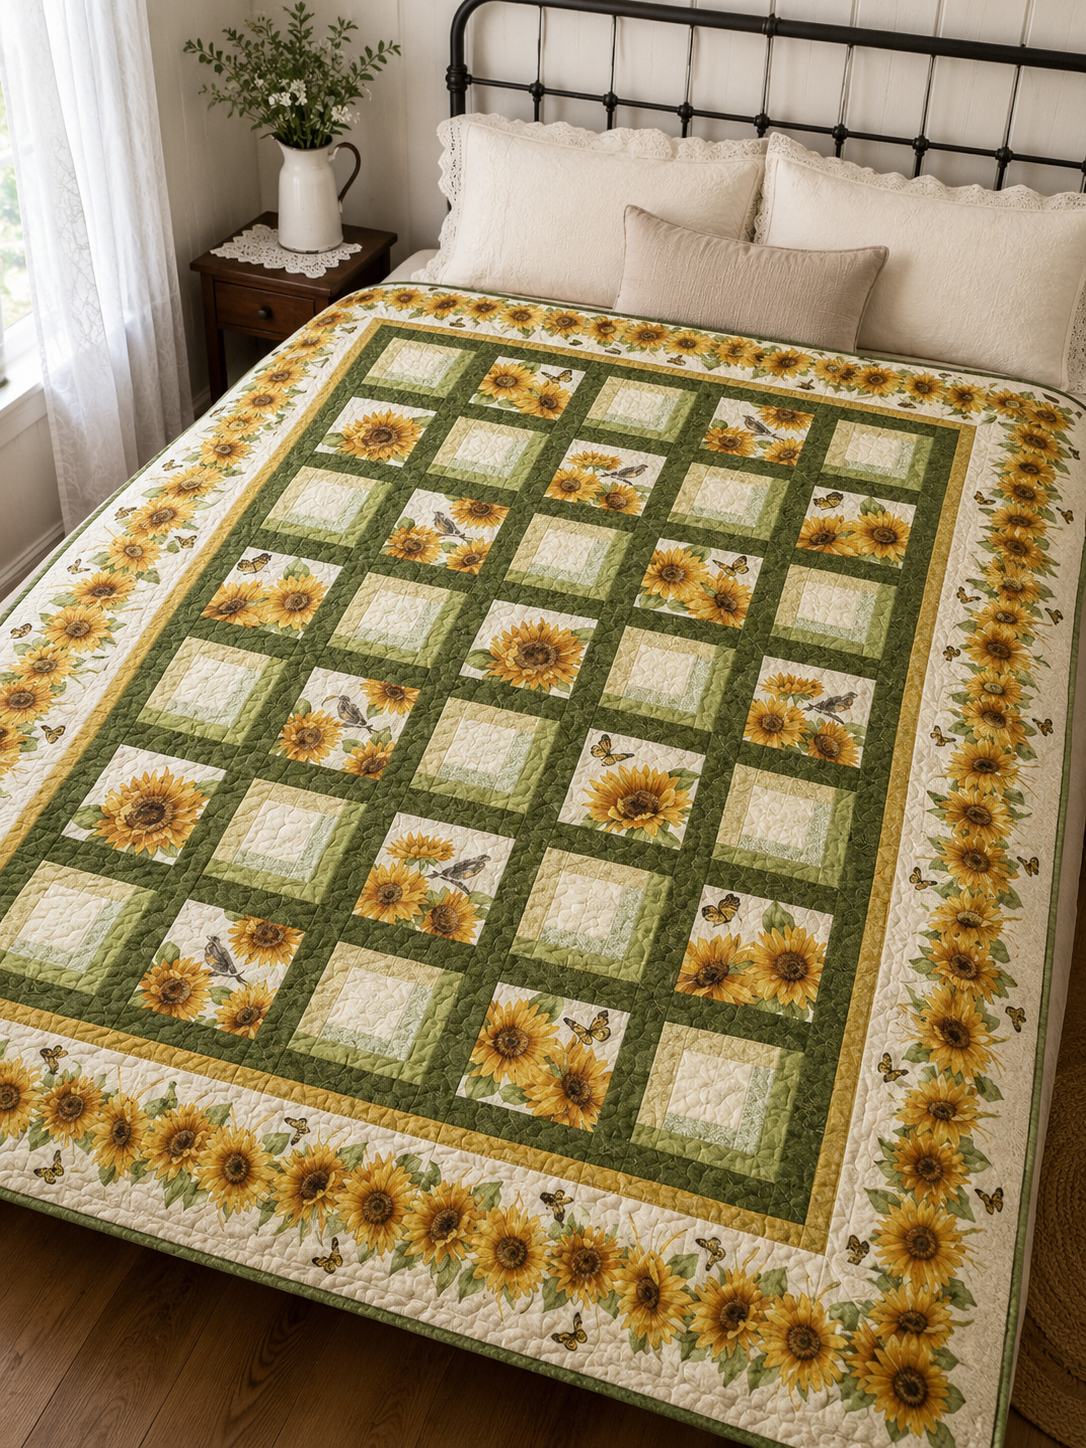
Mark the quarter-inch seam intersection at each corner of the Gold-bordered center. Attach the stripe borders while beginning and ending exactly at those marks, leaving approximately eight inches of free border beyond each end as directed in the PDF.
For one corner, place the quilt on the ironing board with the horizontal border extending to the right. Lay the neighboring vertical border over it. Fold the top border diagonally underneath until both strips align and the sunflower design turns attractively. Press the fold to mark the miter.
Pin the layers, then stitch along the pressed crease from the wrong side. Open the corner and inspect it before trimming. The corner should lie flat, the outer edges should form a 90-degree angle, and the main stripe should meet in a balanced way. Only after the result is correct should the excess be trimmed to a quarter-inch seam allowance and pressed open.
Repeat at the remaining corners one at a time. A miter can be unpicked while the full tails remain; it is much harder to correct after excess fabric has been cut away.
The 7 1/2-inch border finishes at seven inches. Added to a 41 x 56-inch finished inner section, it produces the published 55 x 70-inch quilt. Before quilting, the top should measure approximately 55 1/2 x 70 1/2 inches unfinished.
Backing, batting, quilting, and binding
The pattern lists 3 5/8 yards of backing but does not provide a detailed backing-cut diagram. Plan the seam direction around the usable width of your fabric and the overage required by your quilting method. Piecing the backing crosswise may use the listed yardage more efficiently than cutting two long panels.
Both backing and batting must extend beyond all four edges of the 55 x 70-inch top. A common minimum target is approximately 63 x 78 inches, providing four inches per side, but a longarm professional may request more. Confirm before cutting.
The pattern suggests outlining the sunflowers in the panel blocks and outer border, then stitching in the ditch around the log cabin blocks and Forest sashing. Other suitable choices include gentle leaves in the sashing, a small meander inside the light log cabins, or simple vertical lines that reinforce the column layout.
Test thread on scraps of the actual fabrics. A gold thread may disappear into the sunflowers but show strongly on light log centers. A warm neutral can move between the prints with less contrast. Follow the batting manufacturer’s maximum quilting distance.
For binding, use the seven 2 1/2-inch Gold Butterfly Fields strips. Join, press in half lengthwise, and attach with your preferred method. The finished quilt perimeter is 250 inches, so seven standard WOF strips allow practical room for joining seams, corners, and overlap.
Fabric substitutions that preserve the design
Original Accent on Sunflowers fabrics may be difficult to find. Substitute according to each fabric’s job rather than trying to match names exactly.
- Choose a panel that yields at least seventeen attractive 6 1/2-inch squares.
- Use four light-to-medium fabrics that progress clearly through the log cabin rounds.
- Select a dark sashing with strong contrast against both the panel squares and pieced blocks.
- Use a narrow accent border that separates the center from the outer stripe.
- Choose a border stripe with enough yardage and repeat width to cut four centered 7 1/2-inch lengths.
The most difficult substitution is the panel. Three nominal panels do not automatically guarantee seventeen usable squares. Count the motifs at the required size before purchasing. Bring a 6 1/2-inch paper window to the shop or ask an online seller for the full repeat dimensions.
A nondirectional floral can replace the border stripe, but the quilt will lose the continuous sunflower-garland effect. You may use straight borders instead of miters when the print does not benefit from turning at the corners. Recalculate lengths and corner treatment rather than mixing straight and mitered instructions.