
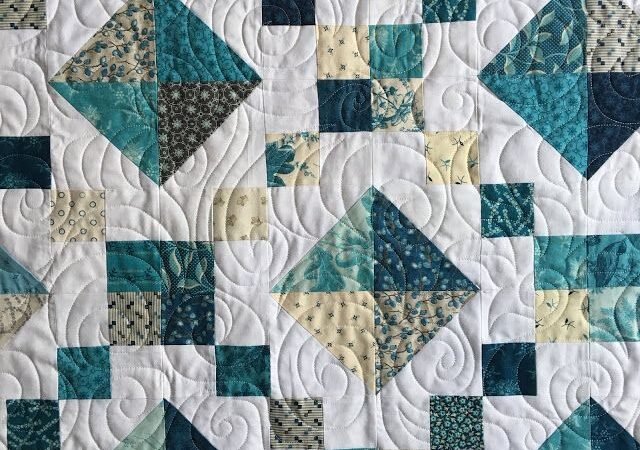
The Jewel Box quilt block turns two familiar patchwork units half-square triangles and four-patches—into a design filled with diamonds, diagonal movement, and flashes of color. It looks detailed when several blocks are joined, but every section is made with straight seams and basic rotary cutting.
This makes the block an excellent next project for a beginner who already understands a ¼-inch seam. More experienced quilters can use it as a scrap-friendly leader-and-ender project or explore dramatic color and value combinations.
This guide covers 8-, 12-, and 16-inch finished blocks. It includes an alternative two-at-a-time HST method, cutting charts, accuracy checks, quilt-size calculations, color planning, assembly guidance, and troubleshooting.
The original three-size pattern was created by Wendy Russell of Patchwork Square. Easy Quilting Patterns does not own Wendy’s pattern or PDF. A link to the creator’s official pattern page appears near the end of this article.
Jewel Box Block at a Glance
| Detail | Information |
|---|---|
| Finished block sizes | 8, 12, or 16 inches |
| Unfinished block sizes | 8½, 12½, or 16½ inches |
| Block grid | 4 × 4 |
| Units per block | 8 half-square triangles and 8 four-patches |
| Main techniques | HST piecing, four-patches, accurate row assembly |
| Seam allowance | Scant ¼ inch |
| Suggested skill level | Confident beginner |
| Best uses | Scrap quilts, samplers, wall quilts, throws, bed quilts |
Every component in a Jewel Box block must finish at one quarter of the block width:
- a 16-inch block uses 4-inch finished units;
- a 12-inch block uses 3-inch finished units;
- an 8-inch block uses 2-inch finished units.
The units are ½ inch larger before assembly because they still need seam allowances on both sides.
Understanding the Design
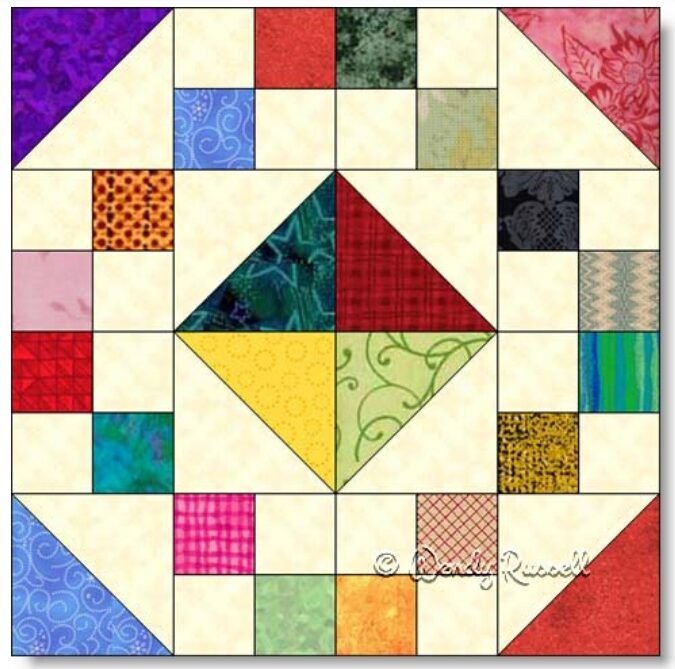
A complete block contains sixteen square units arranged in a 4 × 4 grid. Half of those units are HSTs, and half are four-patches.
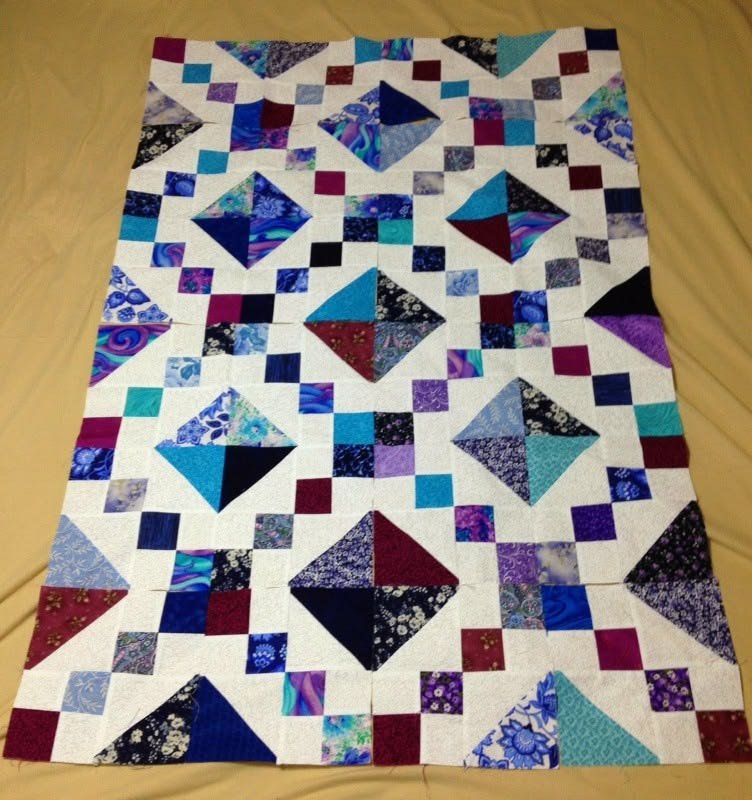
The four-patches create the sparkling checkerboard effect. The HSTs form the stronger diagonal shapes that become diamonds or star-like secondary designs when blocks meet. Fabric placement matters as much as accurate piecing: rotating a few HSTs can change the larger pattern completely.
Before sewing the final rows, step back from the layout or photograph it with a phone. The smaller image makes misplaced units easier to see.
Materials and Tools
For one block, you will need:
- background quilting cotton;
- assorted contrasting quilting cottons;
- neutral or coordinating 50-weight thread;
- sewing machine with a reliable straight stitch;
- ¼-inch presser foot, if available;
- rotary cutter and cutting mat;
- quilting ruler;
- removable fabric marker;
- iron and pressing surface;
- square ruler for trimming HSTs.
A rotating cutting mat is convenient when trimming several HST units, but it is optional. A square ruler with a clear 45-degree line is more important because it helps keep the diagonal seam centered from corner to corner.
Choosing Fabrics That Show the Pattern
The Jewel Box design depends on contrast. Prints can be very different in color yet appear almost identical in value. When that happens, the HST pathways and checkerboard sections blend together.
Choose one consistent background and a collection of fabrics that contrast clearly with it. A pale background with medium and dark scraps creates a traditional bright look. A black, navy, or charcoal background makes jewel-tone fabrics appear especially saturated.
Scrappy Jewel Box
Use many different colors for the assorted squares and HSTs, but keep the background consistent. Repeating the background allows the eye to find the structure even when every colored patch is different.
Two-Color Jewel Box
Use one background and one contrasting fabric throughout. This produces a graphic design and makes it easier to see how block rotation affects the full quilt.
Controlled Palette
Select three or four related colors, such as sapphire, teal, emerald, and violet. Distribute them throughout the block rather than grouping each color in one corner.
Low-Volume Background
Several pale prints can replace a single background fabric. Keep them similar in value and choose prints with enough open space that they still read as one quiet group.
To test the contrast, arrange the fabrics and take a grayscale photo. The background and assorted group should remain easy to distinguish without their color.
Cutting Chart for the Two-at-a-Time HST Method
The chart below is an alternative cutting method written for this companion guide. It uses slightly oversized squares for the HSTs so the units can be trimmed accurately. It is not a reproduction of the cutting chart in Wendy Russell’s PDF.
Pieces for One Block
| Finished block | Background small squares | Assorted small squares | Background HST squares | Assorted HST squares | Trim HSTs to |
|---|---|---|---|---|---|
| 16 inches | 16 at 2½ inches | 16 at 2½ inches | 4 at 5 inches | 4 at 5 inches | 4½ inches |
| 12 inches | 16 at 2 inches | 16 at 2 inches | 4 at 4 inches | 4 at 4 inches | 3½ inches |
| 8 inches | 16 at 1½ inches | 16 at 1½ inches | 4 at 3 inches | 4 at 3 inches | 2½ inches |
Each background HST square is paired with one assorted HST square. Four pairs produce eight HST units.
The thirty-two smaller squares produce eight four-patch units. Each four-patch contains two background squares and two assorted squares.
If you prefer to follow the diagonal-triangle construction and exact cutting measurements in the original pattern, use the official Patchwork Square page linked below. Do not combine cutting dimensions from one HST method with sewing instructions for another.
Approximate Fabric for One Block
The following estimates assume approximately 40 to 42 inches of usable fabric width and efficient cutting. They are intentionally rounded up slightly.
| Finished block | Background | Assorted fabrics combined |
|---|---|---|
| 16 inches | About ⅓ yard | About ⅓ yard |
| 12 inches | About ¼ yard | About ¼ yard |
| 8 inches | About ⅙ yard | About ⅙ yard |
These amounts do not include fabric for borders, backing, or binding. Add extra for directional prints, fussy cutting, shrinkage, mistakes, and squaring. When working from scraps, the cutting chart is more useful than the yardage estimate.
Check the Seam Allowance First
Small errors are multiplied across a 4 × 4 grid. Sew a test seam before piecing the block:
- Cut three accurately measured fabric strips or squares.
- Sew them together using the intended ¼-inch foot or seam guide.
- Press the seams as you will press the block.
- Measure the center piece from seam to seam.
If the unit is too small, move the needle slightly toward the raw edge or use a scant ¼-inch seam. If it is too large, make the seam marginally wider. Thread and pressing consume a small amount of fabric, which is why a scant seam often produces more accurate patchwork.
Make Eight Half-Square Triangle Units
The two-at-a-time method keeps the bias edges protected until after sewing and gives you room to trim each unit precisely.
1. Mark the Background Squares
On the wrong side of each large background square, draw a diagonal line from one corner to the opposite corner. Use a fine removable marker that does not distort the fabric.
2. Pair the Fabrics
Place one marked background square right sides together with one assorted square of the same size. Align all four edges. Pin if the fabrics shift easily.
3. Sew on Both Sides
Sew a scant ¼ inch from one side of the drawn diagonal. Rotate the pair and sew a second seam a scant ¼ inch from the other side.
Repeat with all four pairs.
4. Cut and Press
Cut each pair apart directly on the drawn line. Each pair makes two HST units, for a total of eight.
Press the seam allowance toward the darker fabric when practical. Set the seam briefly with the iron before opening it, then press without stretching the diagonal edge.
5. Trim Accurately
Place the ruler’s 45-degree line on the diagonal seam. Trim two adjacent edges, rotate the unit, and trim the remaining edges to the measurement in the chart:
- 4½ inches for a 16-inch block;
- 3½ inches for a 12-inch block;
- 2½ inches for an 8-inch block.
The diagonal seam should end exactly at two opposite corners after trimming. If it does not, the point may disappear when units are joined.
Make Eight Four-Patch Units
Each four-patch uses two background squares and two assorted squares.
1. Sew Two-Patch Pairs
Place one background square and one assorted square right sides together. Sew with a scant ¼-inch seam. Make sixteen two-patch pairs.
Press the seam allowances toward the assorted fabric. Consistent pressing will allow the seams to nest when two pairs are joined.
2. Form the Four-Patches
Rotate one two-patch pair so the background and assorted squares alternate. Place it right sides together with a second pair. Nest the center seams and pin or hold the intersection securely.
Sew across the pair. Press the four-patch open. For a flatter center, gently open the final seam allowance at the intersection and fan the four tiny allowances around the center. This optional technique reduces bulk.
Repeat to make eight four-patches.
3. Measure the Units
Each four-patch should match the unfinished HST size:
| Finished block | Four-patch and HST unfinished size |
|---|---|
| 16 inches | 4½ inches |
| 12 inches | 3½ inches |
| 8 inches | 2½ inches |
If the four-patches are too large, check before trimming them. Trimming only the outer edges can make the center seams appear off-center. Correct the seam allowance for future units whenever possible.
Arrange the Jewel Box Block
Place the eight HSTs and eight four-patches in a 4 × 4 grid. The four-patches and HSTs alternate to form four matching quarter sections. Rotate the HST units until the contrasting triangles create the intended central jewel and continuous diagonal pathways.
Because a rotated HST can produce a different valid secondary design, use the fabric-placement diagram on the official Patchwork Square pattern page as the final orientation reference. This is especially important if you want your block to match Wendy Russell’s original layout.
Before sewing:
- confirm that every row contains two HSTs and two four-patches;
- check that the four-patch colors alternate correctly;
- trace the diagonal design across the entire block with your finger;
- take a reference photograph.
If you are making a scrappy block, move repeated prints away from one another unless deliberate clusters are part of the design.
Assemble the Block
1. Sew the Units into Rows
Join the four units in each row with a scant ¼-inch seam. Keep the HST diagonal points from shifting by pinning near the intersections.
Measure each completed row. It should match the unfinished block width:
- 16½ inches for a 16-inch finished block;
- 12½ inches for a 12-inch finished block;
- 8½ inches for an 8-inch finished block.
2. Press Alternate Rows in Opposite Directions
Press the seams in the first and third rows toward the right. Press the seams in the second and fourth rows toward the left. When the rows are joined, the seam allowances will nest.
If bulky HST intersections prevent a flat result, press selected seams open instead. Consistency and a flat block are more important than following a single pressing rule everywhere.
3. Join the Rows
Place the first two rows right sides together. Match and pin every unit intersection, then sew the seam. Repeat with the remaining rows and join the two halves.
Press the final row seams in the direction that creates the least bulk, or press them open.
4. Check the Finished Measurement
The unfinished block should measure ½ inch larger than the named finished size. Do not trim away a full ¼-inch seam allowance merely to make a slightly undersized block look square.
If necessary, trim only fine threads or very small uneven edges. Preserve the points located ¼ inch from the raw edge so they are not cut off when the block is sewn into a quilt.
Faster Four-Patches with Strip Piecing
For multiple blocks, strip piecing can be faster than sewing individual squares.
- Cut one background strip and one assorted strip at the same width as the small squares in the cutting chart.
- Sew the strips together lengthwise.
- Press toward the assorted strip.
- Cut the strip set into segments equal to the strip width.
- Join two segments in opposite orientation to form each four-patch.
For a very scrappy quilt, make several short strip sets from different fabrics rather than one long repeated combination. Mix the cut segments before pairing them.
Square the end of every strip set before subcutting. A slightly angled starting edge can cause every segment to be inaccurate.
Planning a Full Quilt
The chart below shows finished quilt-top measurements before borders. It assumes the blocks are joined directly without sashing.
| Layout | Blocks | With 8-inch blocks | With 12-inch blocks | With 16-inch blocks |
|---|---|---|---|---|
| 3 × 4 | 12 | 24 × 32 inches | 36 × 48 inches | 48 × 64 inches |
| 4 × 5 | 20 | 32 × 40 inches | 48 × 60 inches | 64 × 80 inches |
| 5 × 6 | 30 | 40 × 48 inches | 60 × 72 inches | 80 × 96 inches |
| 6 × 7 | 42 | 48 × 56 inches | 72 × 84 inches | 96 × 112 inches |
Measure the intended bed, wall, or recipient rather than relying only on standard quilt-size names. Add borders or sashing if you need a size between the measurements shown.
Layout Ideas
Blocks Joined Directly
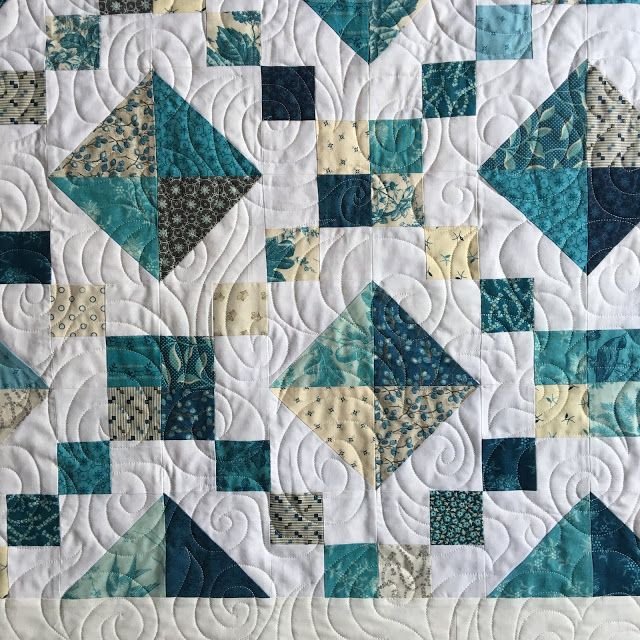
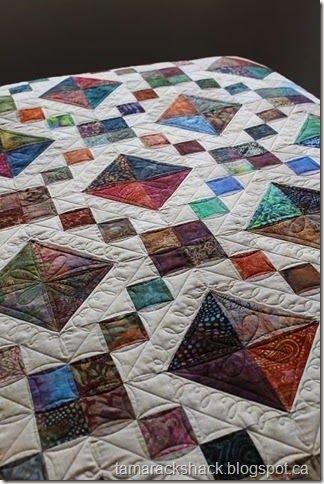
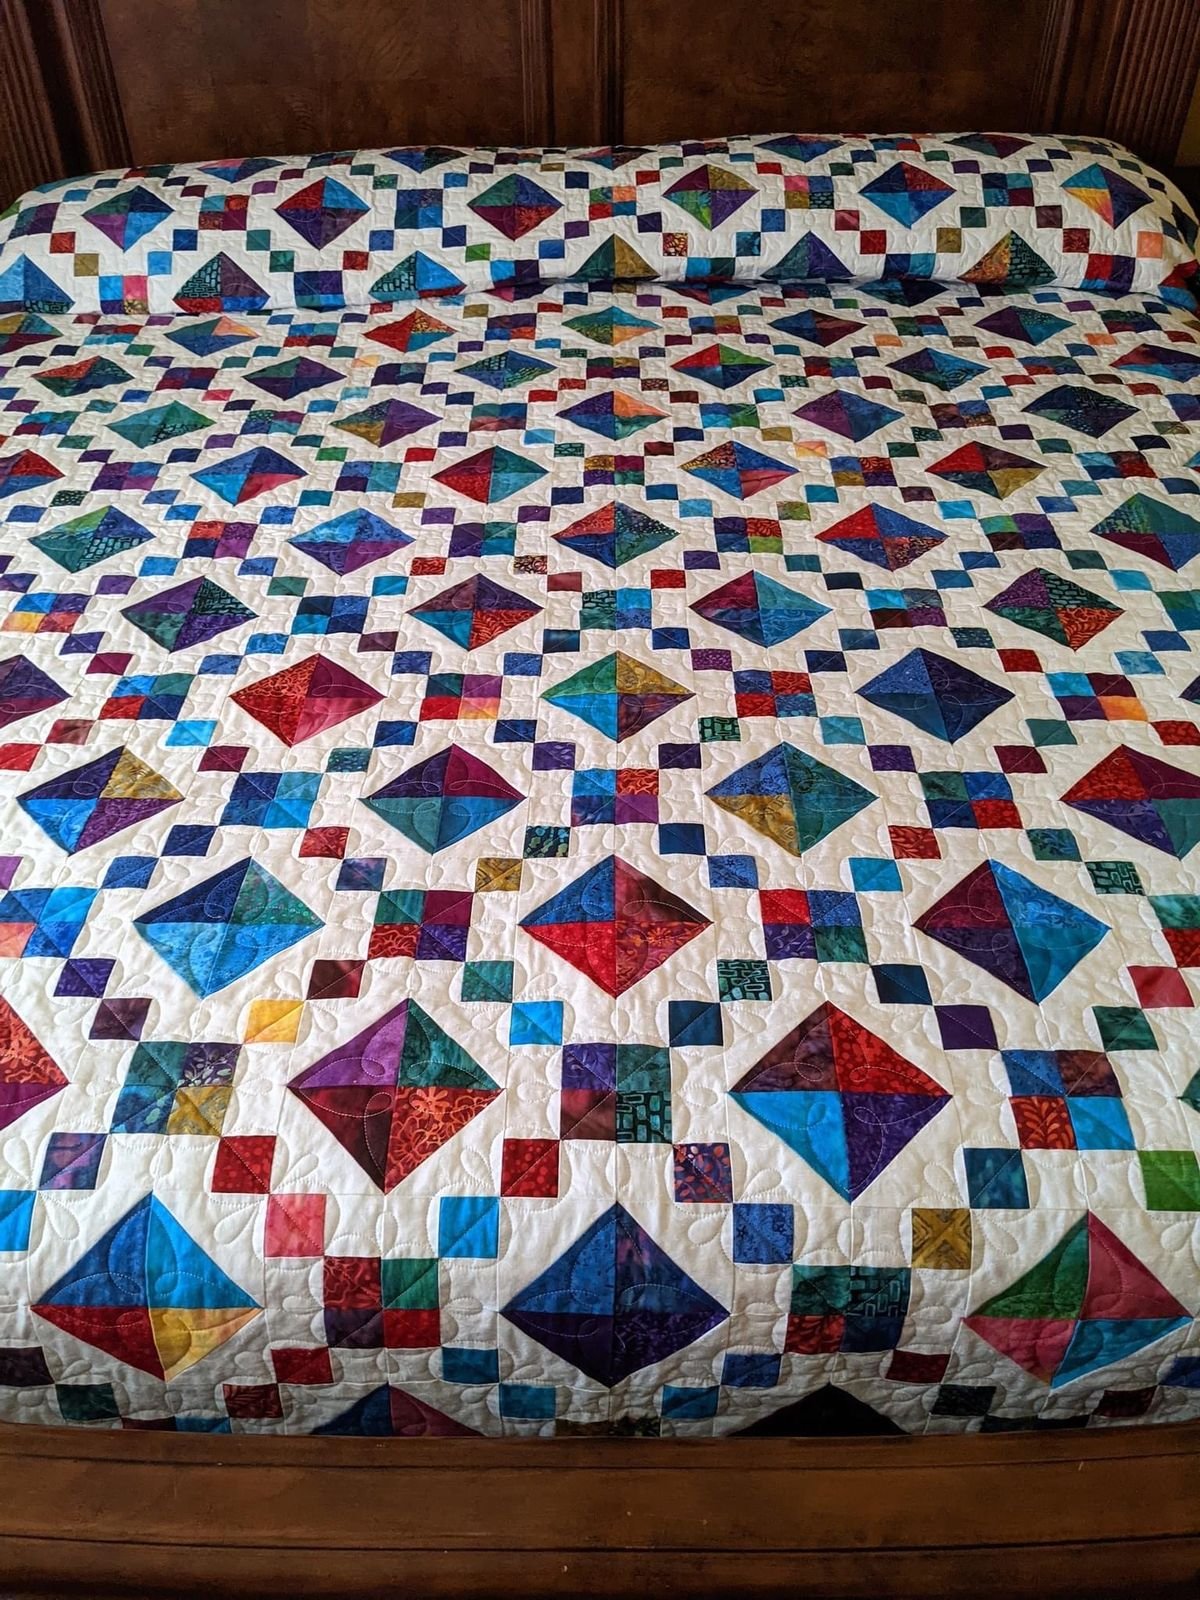
Joining blocks without sashing allows the HST pathways to continue across block boundaries. This produces the strongest secondary diamonds and gives the quilt a lively all-over pattern.
Narrow Background Sashing
Sashing separates the blocks and makes each individual Jewel Box easier to see. Use the background fabric for a quiet frame or a contrasting fabric for a grid effect.
Alternating Negative-Space Blocks
Alternate Jewel Box blocks with plain background squares. The open areas provide room for visible quilting and reduce the number of pieced blocks needed.
On-Point Setting
Turning the blocks 45 degrees changes the direction of the checkerboard movement. An on-point setting requires side and corner setting triangles, so plan those measurements before cutting the quilt fabric.
Reversed Background
Use light backgrounds in some blocks and dark backgrounds in others. Test the entire layout before sewing because the secondary shapes will be more complex.
Quilting Ideas for a Jewel Box Quilt
The piecing already creates strong geometry, so the quilting can either follow the design or soften it.
- Diagonal straight lines: echo the HST seams and emphasize the diamonds.
- Crosshatch quilting: creates an even texture that suits traditional fabrics.
- Stitching near the ditch: outlines the major units without competing with the scraps.
- Continuous curves: adds softness inside the four-patches.
- Background meandering: allows the colored jewel shapes to stand forward visually.
Choose a quilting distance compatible with the batting manufacturer’s instructions. When using contrasting thread, test it across both the lightest and darkest fabrics before quilting the full project.
Troubleshooting
My HST Points Disappear
The diagonal seam may not have reached the corners during trimming, or the final seam was wider than ¼ inch. Trim with the ruler’s 45-degree line directly over the diagonal and keep a visible ¼-inch allowance beyond every point.
The Four-Patch Centers Do Not Match
Press both two-patch pairs toward the assorted fabric, rotate one pair, and nest the seam allowances. Pin immediately beside the intersection so the layers cannot slide.
The Rows Are Different Lengths
Measure all HSTs and four-patches before assembly. Mixed unit sizes cannot be corrected reliably at the row stage. Also confirm the seam allowance with a test unit.
The Block Is Wavy
Avoid stretching HST seams while pressing. Use an up-and-down pressing motion instead of pushing the iron. Check that bulky intersections are fully opened and flat.
The Block Is Too Small
Common causes include an overly wide seam, units trimmed below the target size, or aggressive pressing. Do not add a narrow strip around one block unless it is an intentional design decision applied consistently.
The Design Looks Different from the Example
One or more HSTs may be rotated. This does not necessarily make the block unusable, but it changes the secondary pattern. Compare the layout with the official placement diagram before sewing the rows.
My Scrappy Version Looks Chaotic
Use one consistent background and sort the assorted fabrics by value. Remove a few prints that are too close to the background or repeat several colors across the block to create visual rhythm.
Frequently Asked Questions
Is the Jewel Box block suitable for beginners?
Yes, for a beginner who can sew a consistent ¼-inch seam. The individual units are simple, but matching sixteen units requires careful trimming and pinning. The 16-inch version is the most forgiving because its pieces are larger.
Which block size should I make first?
Start with the 16-inch block if you are learning HSTs or four-patches. Choose the 12-inch size for samplers and common quilt layouts. The 8-inch version is useful for scraps but requires the greatest precision.
Can I use charm squares?
Five-inch charm squares work well for the oversized HST pieces in the 16-inch version. The 2½-inch four-patch squares can also be cut from charms, although each charm must be subdivided accurately.
Can I use a layer cake?
Yes. Ten-inch squares provide several HST or four-patch pieces, depending on the block size. Plan the cuts on paper first to avoid waste, especially with directional prints.
Must all the assorted fabrics be dark?
No. They only need enough contrast from the background to preserve the pattern. Medium and dark fabrics can be mixed, or the value plan can be reversed with light colors on a dark background.
Can the four-patches be strip pieced?
Yes. Strip piecing is efficient for multiple blocks. Use shorter varied strip sets when you want the quilt to remain scrappy.
Why does the original PDF cut extra assorted triangles?
The original chart explains that only half of the assorted triangles produced are used in one block, with the remaining pieces retained for another block. The alternative chart in this article uses paired squares to make exactly eight HSTs for one block.
Should seams be pressed open or to one side?
Pressing to one side helps adjacent seams nest. Pressing open reduces bulk at crowded intersections. A combination of both is acceptable as long as the units stay flat and the seam allowance remains accurate.
Can I enlarge the block to another size?
Yes, when the desired finished size divides evenly by four. Divide the finished block size by four to find the finished component size. Add ½ inch for the unfinished HST and four-patch unit size. Draft and sew a test block before cutting an entire quilt.
View the Free Original Pattern
Wendy Russell provides the Jewel Box pattern through the Patchwork Square website. Her original resource includes 8-, 12-, and 16-inch block options and the official fabric-placement diagrams.
View the free original Jewel Box pattern at Patchwork Square
The pattern remains on the creator’s website, where Wendy controls its availability and terms of use.
Pattern Credit
The original Jewel Box Free Quilt Block Pattern, including its PDF, cutting charts, diagrams, and fabric-placement graphics, was created by Wendy Russell of Patchwork Square. The PDF is marked “all rights reserved,” and Patchwork Square’s terms prohibit copying or redistribution without express written permission.
Easy Quilting Patterns does not claim authorship or ownership of Wendy Russell’s pattern, PDF, illustrations, or photographs. This article is an independently written companion guide. It provides an alternative two-at-a-time HST method, original explanations, quilt-size calculations, color-planning suggestions, accuracy checks, and troubleshooting while sending readers to the official source.
Final Thoughts
The Jewel Box block rewards careful preparation. Trim every HST to the same size, make the four-patches match those measurements, and inspect the full 4 × 4 arrangement before joining the rows. Accuracy at the component stage prevents most problems later.
Begin with one sample block in the largest size. Once the seam allowance and pressing method are producing reliable units, organize scraps by value and work in batches. A pile of simple HSTs and four-patches can quickly become a quilt that looks far more intricate than its construction.